
Setup/Configurations for Mac
Connecting
*You will need to be at our office or on the VPN to do this
- Download VNC Viewer
- Make sure the Mac you're wanting to connect to is actually plugged in (check the ethernet cable) and turned on
- The two QA ones are by all the other QA testing machines (as of 10/25/2022)
- The Dev one is by McKay's space - in the Ops corner (as of 10/25/2022)
- Once it's open, add a new connection see credentials
- The dev mac currently is the only machine that has all the signing certificates for the Mac Desktop Client
- The dev mac is often turned off
- The QA mac 1 is much faster than any of the others, but doesn't have the signing certificates for the Desktop Client
- When setting up the QA mac within VNC, turn Encryption > Prefer Off
- Make sure no one from QA is using it
- The dev mac currently is the only machine that has all the signing certificates for the Mac Desktop Client
Credentials
DEV MAC
IP Address: 10.10.0.60
Username: dev
Password: BrianRocks!
QA MAC 1
IP Address: 10.10.0.68
Username: qa
Password: qaRocks!
QA MAC 2 (not recommended)
IP Address: 10.10.0.67
Username: qa
Password: QARocks!
Before you get started
You will need the following installed on your machine (Dev mac and QA mac 1 have these already):
- XCode
- Visual Studio for mac with:
- .NET
- .NET WebAssembly Build Tools
- macOS (Cocoa) - all versions listed
- Android
- iOS
- Our codebase
Version Control
IMPORTANT - the master branch for the Mac Desktop Client is different from windows. You're looking for origin/mac-master. Branch off of that unless instructed otherwise
Sometimes git through Visual Studio for mac is really dumb, especially with changing branches. The good news is that you can use git through terminal where needed.
Useful Git Commands
- Force change branches => git switch -f <branch-name>
- It tries rebasing on branch swap sometimes => git rebase --quit
NugetNuGet
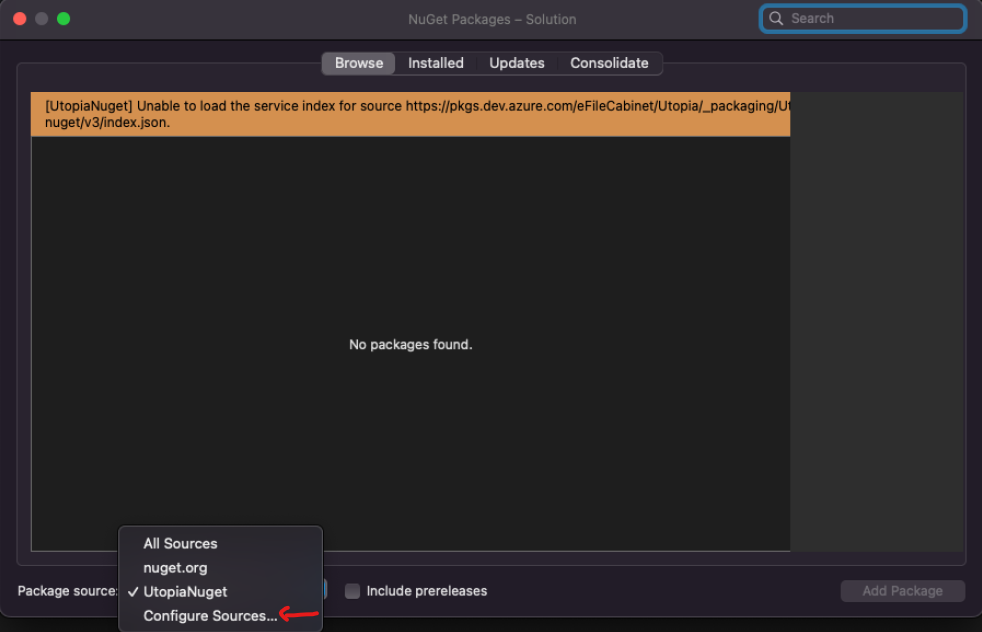
You will probably need to add our UtopiaNuget at some point to a project on mac. The process is slightly different than what is described in our other wiki page.
- Go to the NuGet packages in the solution and select Configure Sources
-
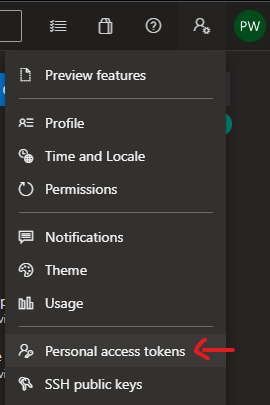
- Go in to ADO and select Personal Access Tokens
-
- Select + New Token
- Give it a name
- Change the expiration to be far in the future
- Give full access scope
- Click Create
- Save the token you are given and don't lose it
- You will not be given it again and will need to regenerate another one if you lose it, potentially breaking other connections
-
- Add a new package source
- Name it UtopiaNuget
- The location is https://dev.azure.com/eFileCabinet/Utopia/_packaging?_a=feed&feed=UtopiaNuget
- The username is your ADO username
- The password is the token you generated in step 2
- Click Add Source
- Click OK
- At this point, if you select UtopiaNuget as the package source and are on the browse page, you should be able to see all of our packages we offer.
Troubleshooting
- If you finish all the steps successfully, and can see all the packages we offer, but restoring the packages still gives you a problem, then Visual Studio for mac messed up on adding a nuget reference to the global nuget file.
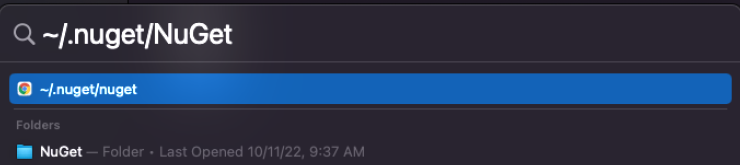
- The fix is to search for the hidden file NuGet.Config and add the reference to the new package source manually
-
-
 (ignore the double reference)
-
- The fix is to search for the hidden file NuGet.Config and add the reference to the new package source manually
Mac Desktop Client
IMPORTANT - the master branch for mac is different from windows. You're looking for origin/mac-master. Branch off of that unless instructed otherwise
Building in Debug Mode
To be able to build, you need to first have built two other projects on the machine:
- UtopiaAPIClient
- SharedLogic
It is very likely that you will need to update their references to UtopiaSharedClasses in NuGet. I recommend going into the UtopiaWindowsDesktopClient to update the packages and build them.