
How to run and Release Mobile
Debugging the iOS app:
- Set efcMobileApp.iOS as the startup project
- Pair the Mac by clicking this icon:

- Make sure you are in Debug mode, not Release mode
- Click the down arrow on the start options, and pick the device you want to simulate - Remote Device will not work
- Happy testing!
Releasing the iOS app:
- In the efcMobileApp.iOS/Info.plist file, scroll down to Bundle version and bundle versions string (short) then add 1 to each value.
- Set efcMobileApp.iOS as the startup project
- Pair the Mac (see step 2 of Debugging the iOS app)
- Make sure you are in Release mode, not Debug mode
- Right click on efcMobileApp.iOS and click Archive...
- Wait for the Archive to finish - if there's a signing error:
a. Right click on efcMobileApp.iOS and click Properties.
b. Once there, click the iOS Bundle Signing tab and make sure the Signing Identity is: iPhone Distribution: eFileCabinet, Inc. and the Provisioning Profile is: eFileCabinet Online AppStore and try the Archive again.
c. If there's still an issue, the signing certificate may be out of date. Please get with dev management to get a new signing certificate. - Once the Archive has finished, use VNC Viewer to connect to the Mac Mini (if you need credentials, ask dev management)
- Open XCode
- On the top toolbar, click Windows and then click Organizers
- You should see Archives as a tab on the left, and in there you should see the archive you just created in Visual Studio
- Select the archive and click distribute app
- Follow the wizard, leaving all the defaults except the one asking about sending reports to Apple and XCode - uncheck that box
- Please step through next steps with a member of the Dev management.
- Login into https://developer.apple.com/ using login from Last pass: Mobile Dev Apple Account. (may need to be logged into the dev mac to get the authentication code on login)
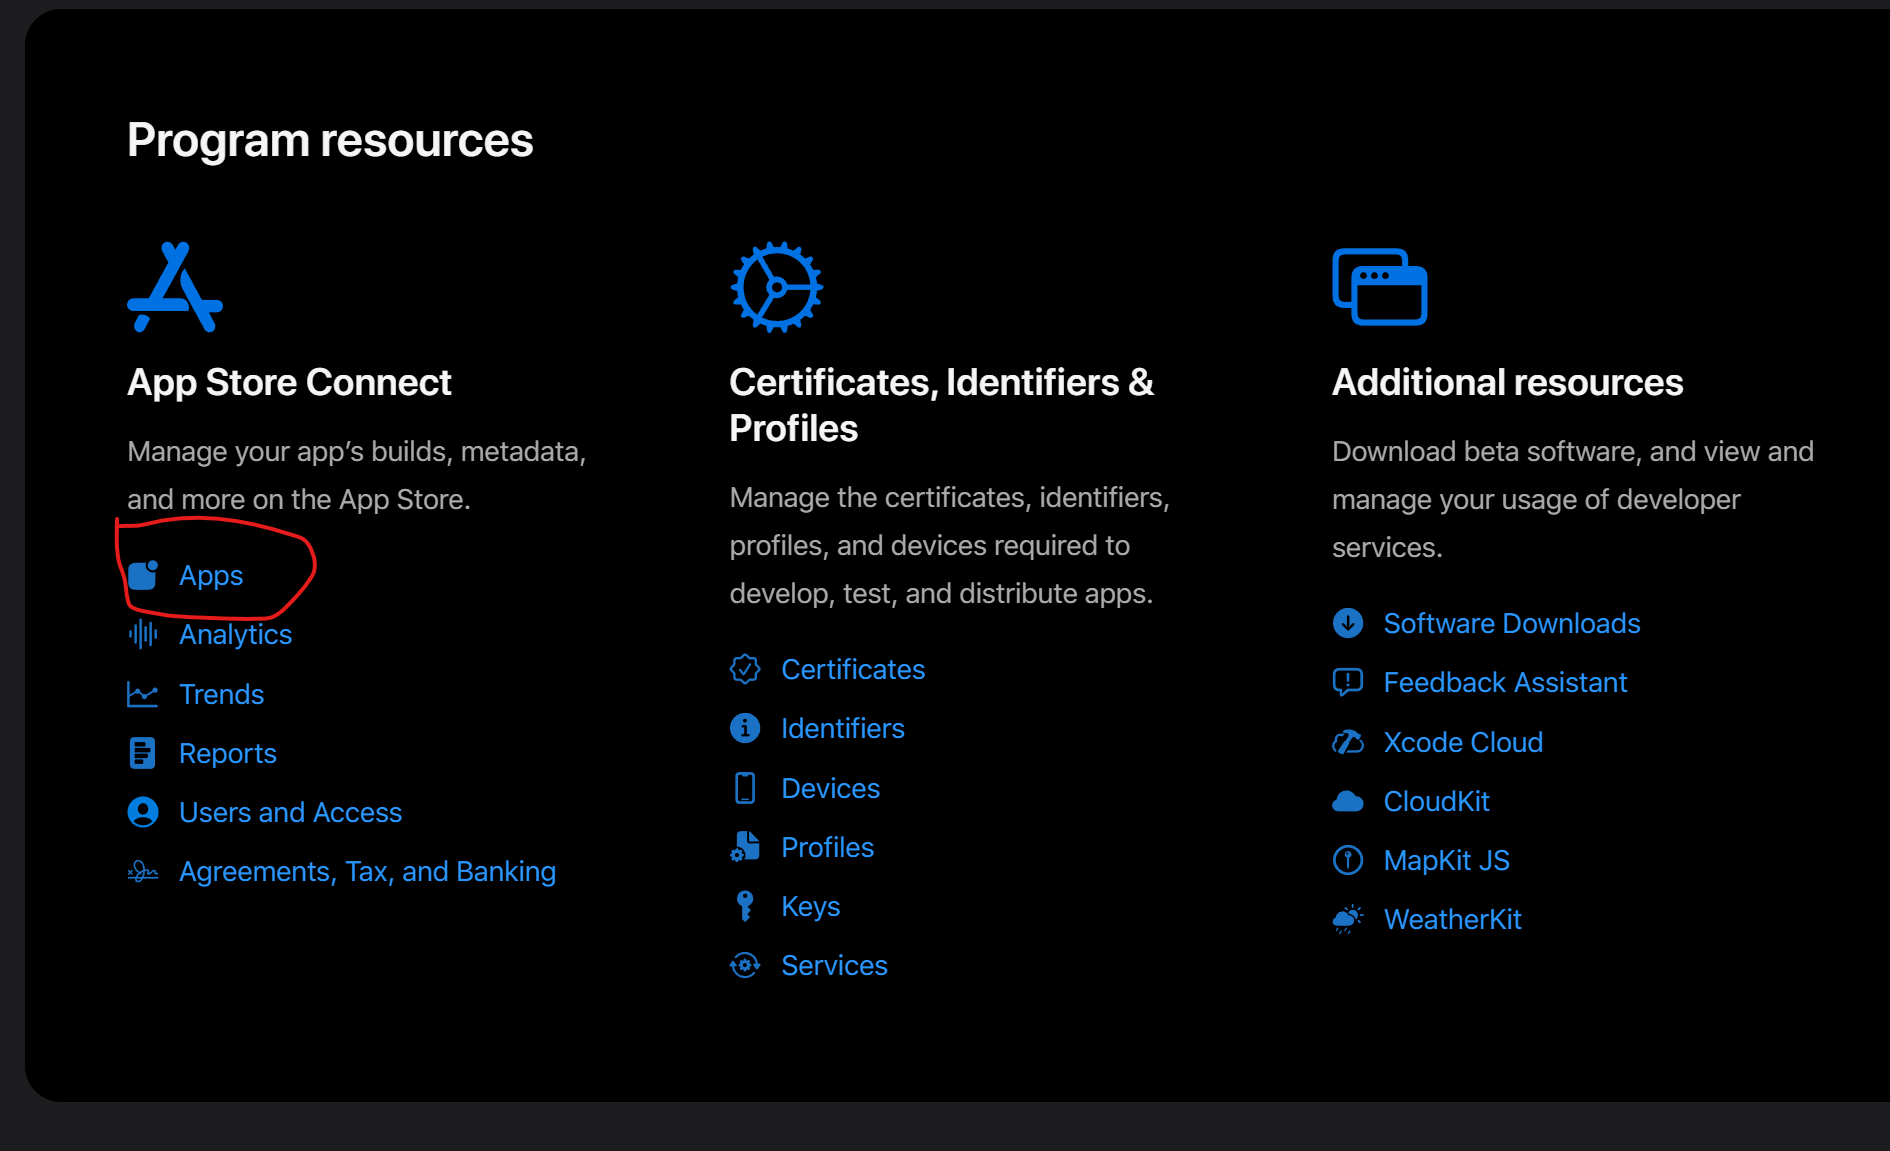
- Go to the App Store Connect section and choose Apps:

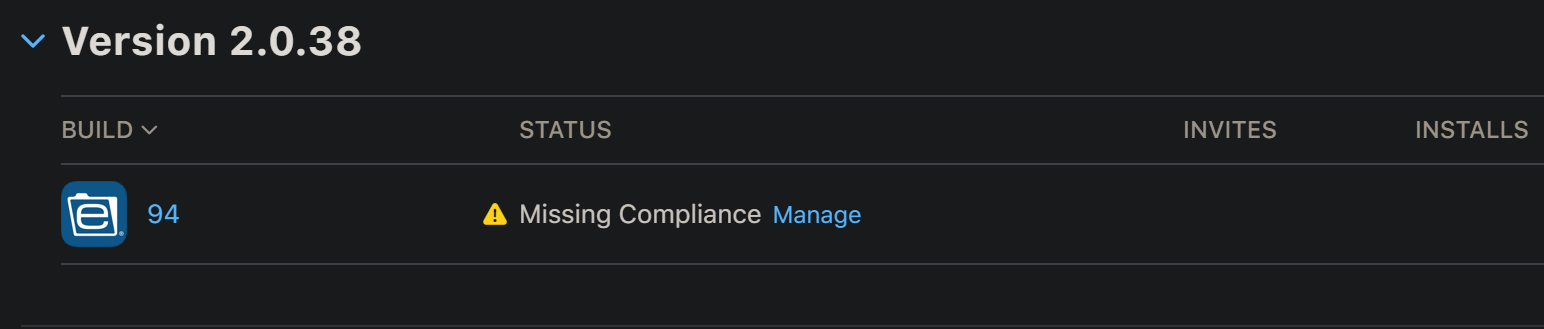
- Then go to the TestFlight tab at the top. You will now see the most recent version displayed. It will take a while to process.
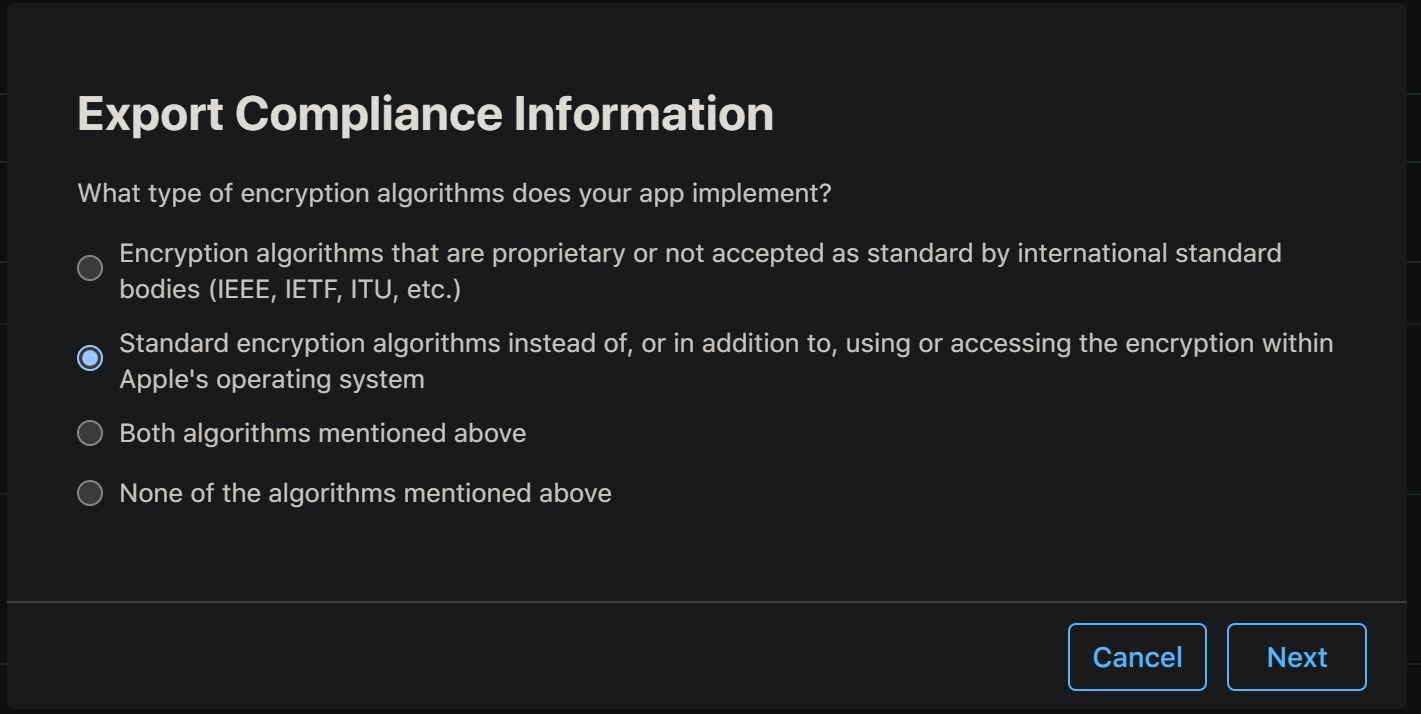
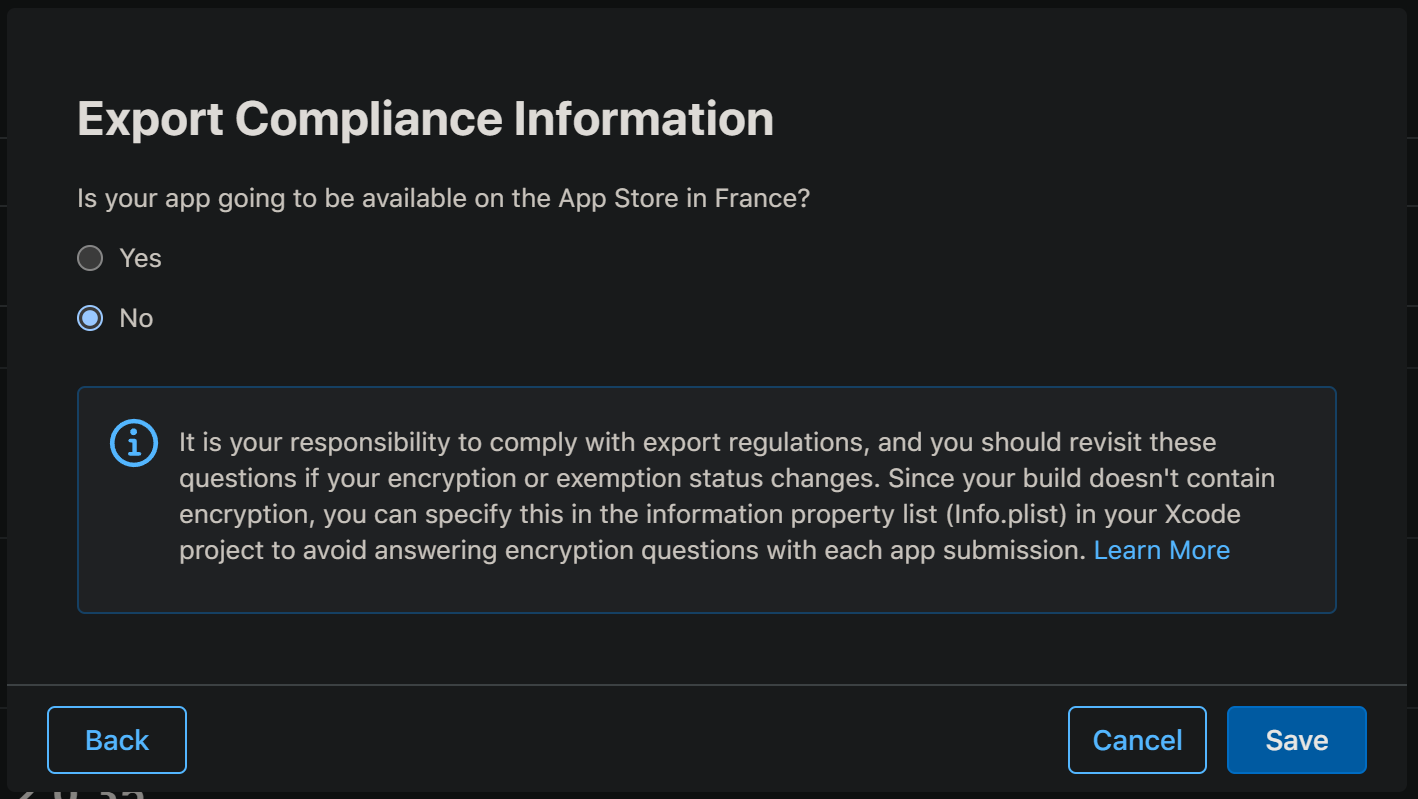
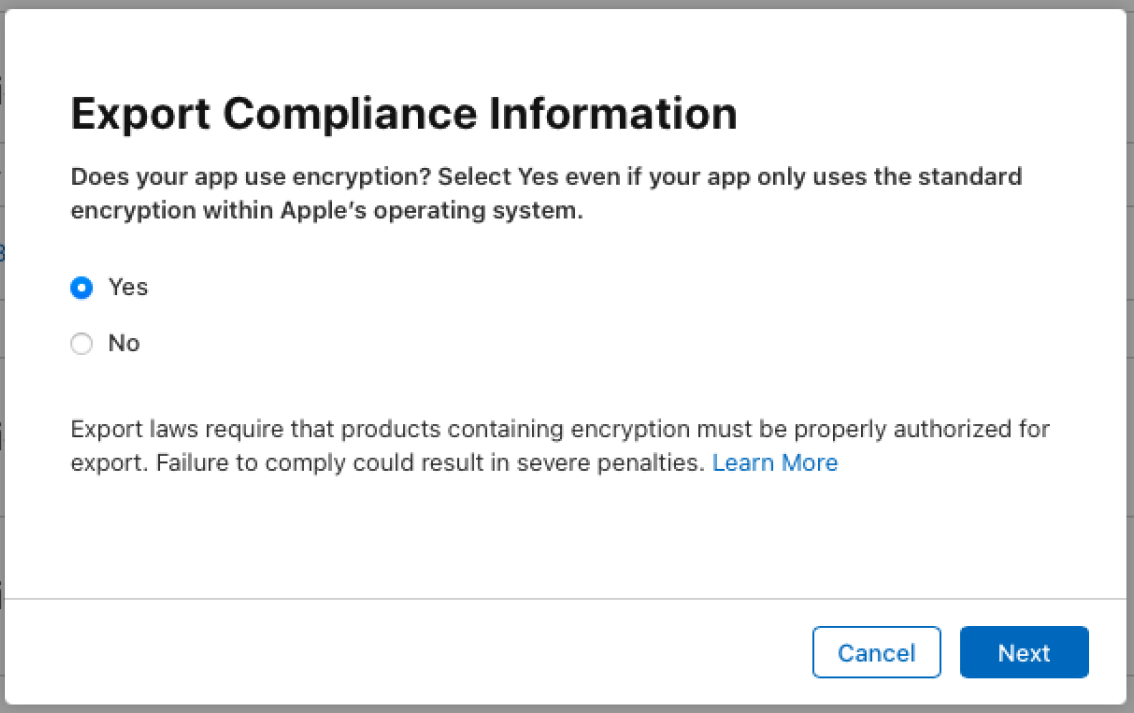
- Once done processing it will ask to complete some compliance information. Click on manage and then answer the questions as shown below (I had two different sets of questions I had to ask so both are listed below):


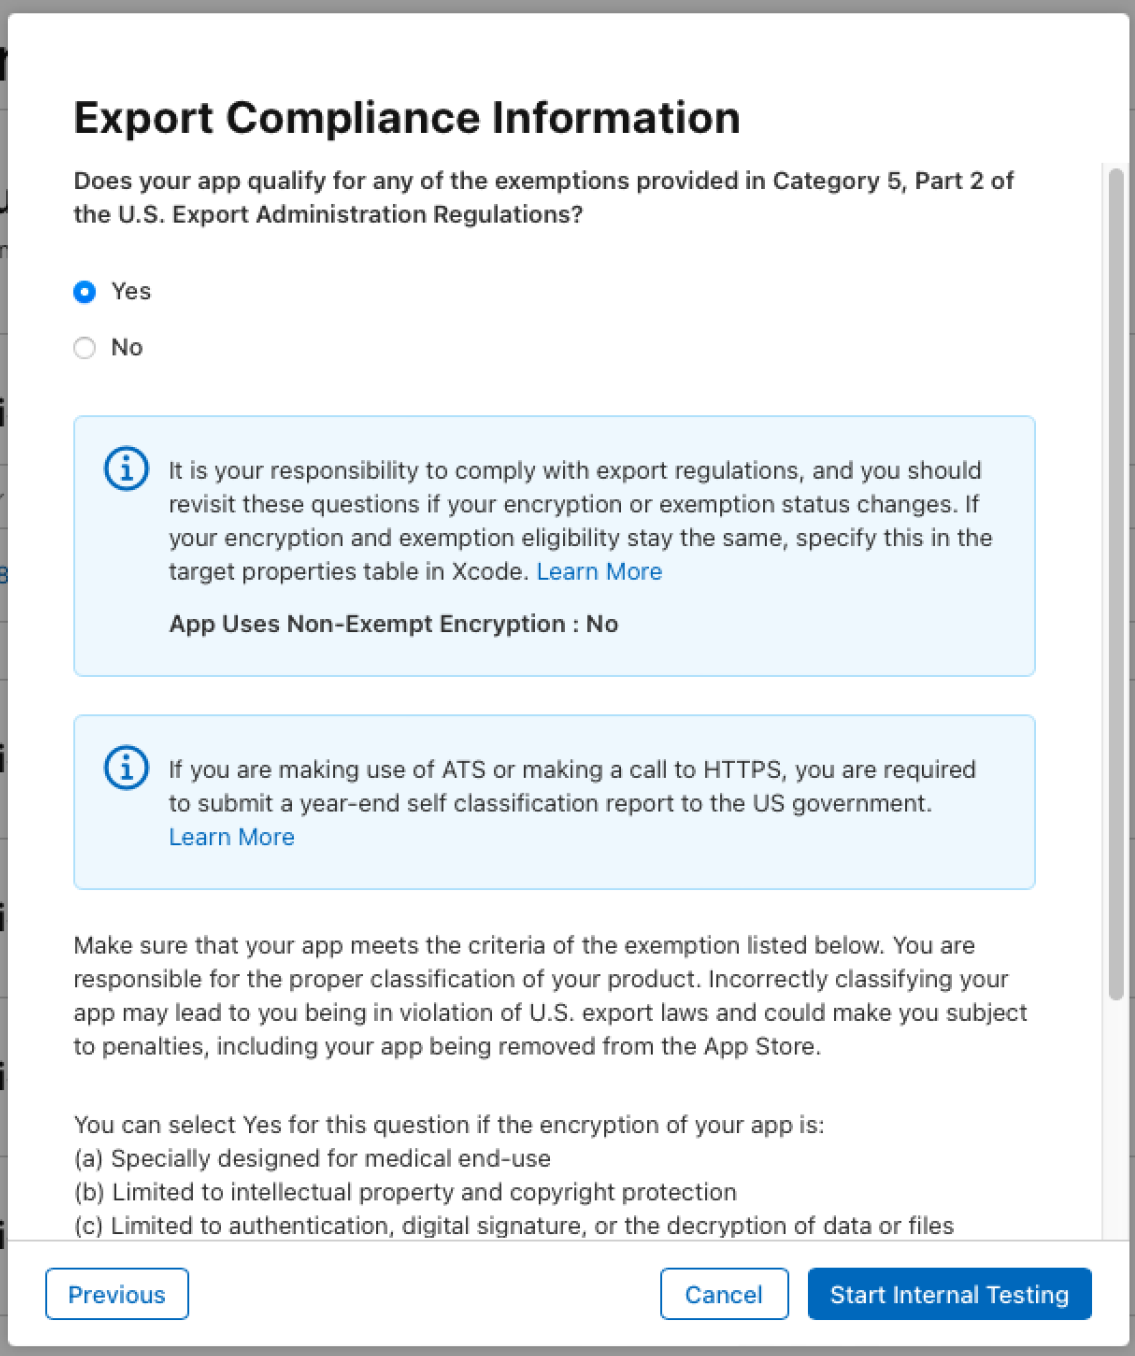
18. Once you hit start internal testing make sure your apple ID is added to the internal testings users list and download the testflight app on your apple device. Once app is up and running log in and accept the invite to the app.
19. You are not good to test the app.
Debugging the Android app:
- Set efcMobileApp.Droid as the startup project
- Make sure you are in Debug mode, not Release mode
- Run the emulator you have (you may need to install a new device)
- Wait for a long time - the Android emulator is very slow on startup
- Alternative: If you have an Android phone, plug it in and on step 3 select your phone on the run dropdown. That way debugging should be a lot faster.
Releasing the Android app:
- Set efcMobileApp.Droid as the startup project
- Make sure you are in Release mode, not Debug mode
- Right click on efcMobileApp.Droid and click Archive...
- Once the Archive has completed, click Open Distribution
- If at any point you are asked for signing credentials, they are found in the Android Signature Key Info file in the root of the source code.
- If at any point you are asked for a keystore file, import the keystore file found in the root of the source code.
- Give the resulting apk file to dev management to upload to the play store.