How To Create an Account Record
If you try to manually create an Account, you will receive an error stating that Accounts cannot be manually created. This is intentional, as there is critical data we miss when an Account does not start out as a Lead.
If you need to create a new Account, it must start out as a Lead. Here is what to do:
------------------------------
1. Create a new Lead by clicking "New"

2. Select "Default" Record Type; Next
3. Set required fields as well as any other fields you need to see on the Account or Contact later
- Required Fields:
- First Name
- Last Name
- Phone
- No. of Employees
- Lead Source (be intentional about this; you will usually select 'Self Generated')
- Other Fields you may want to populate:
- Website
- Address
- Title
4. Click the "Convert Fields" tab and review the "Fields Required for Convert" section; select "Converted" as the new Lead Status and click "Select Converted Status"
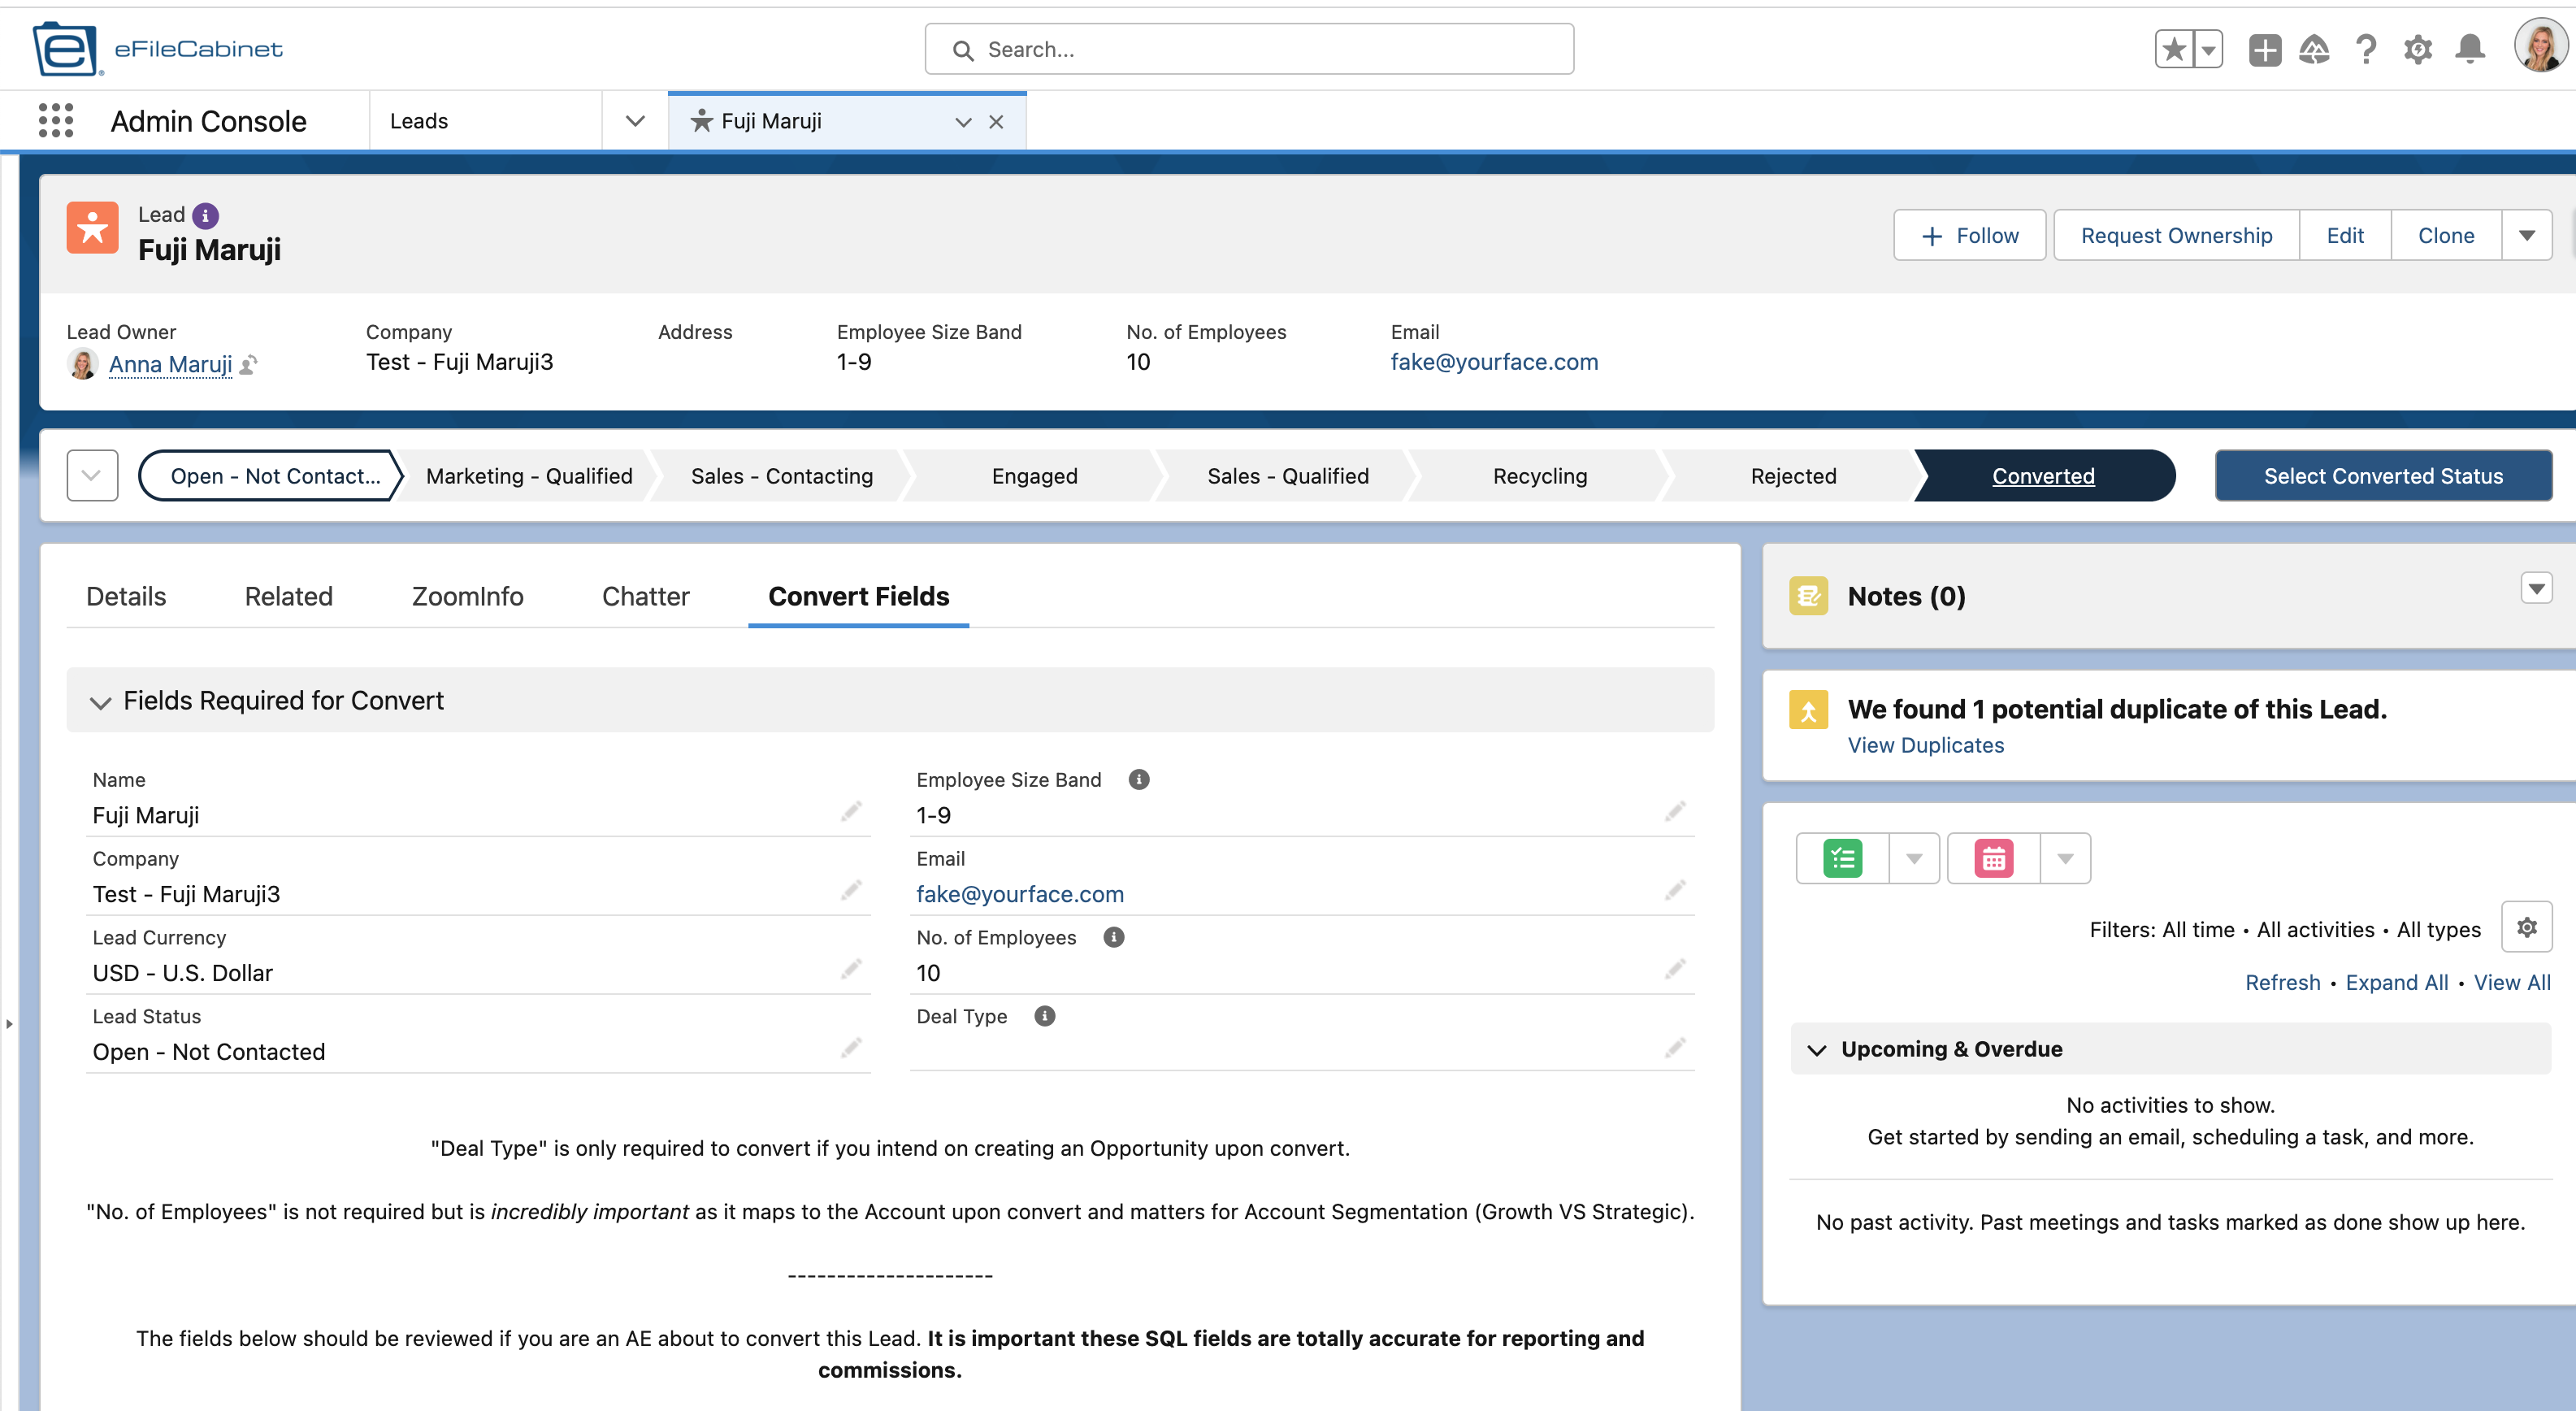
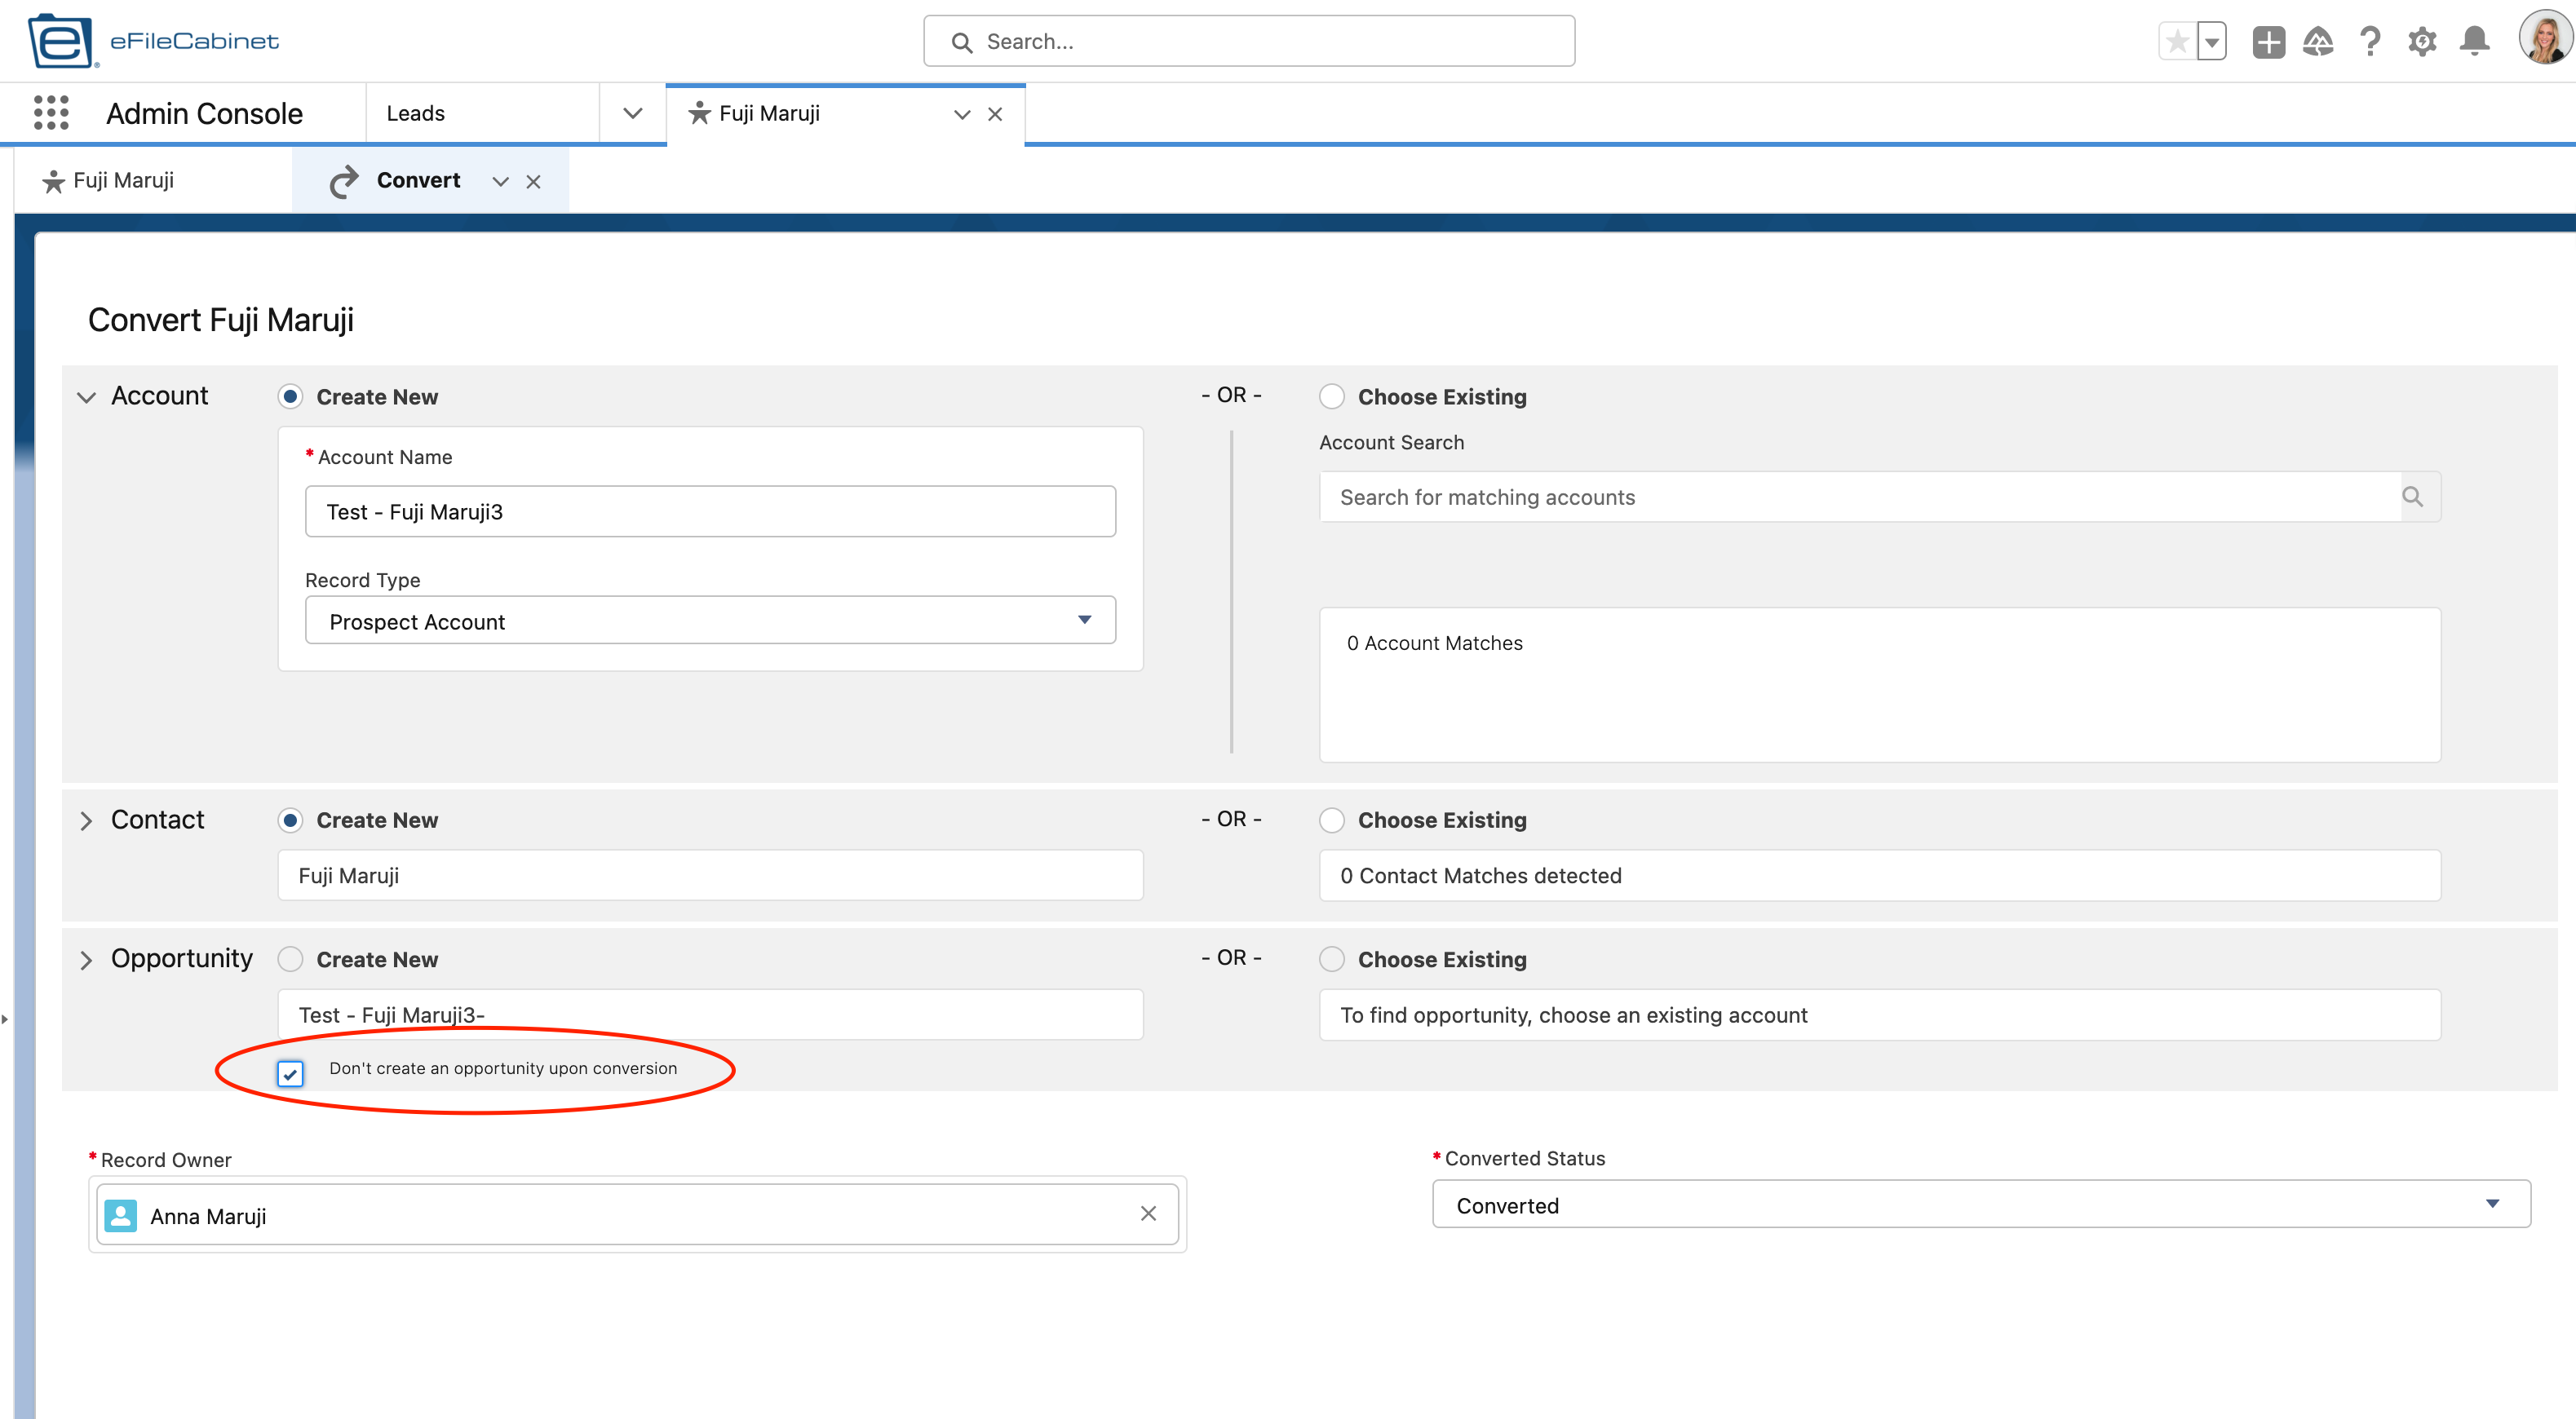
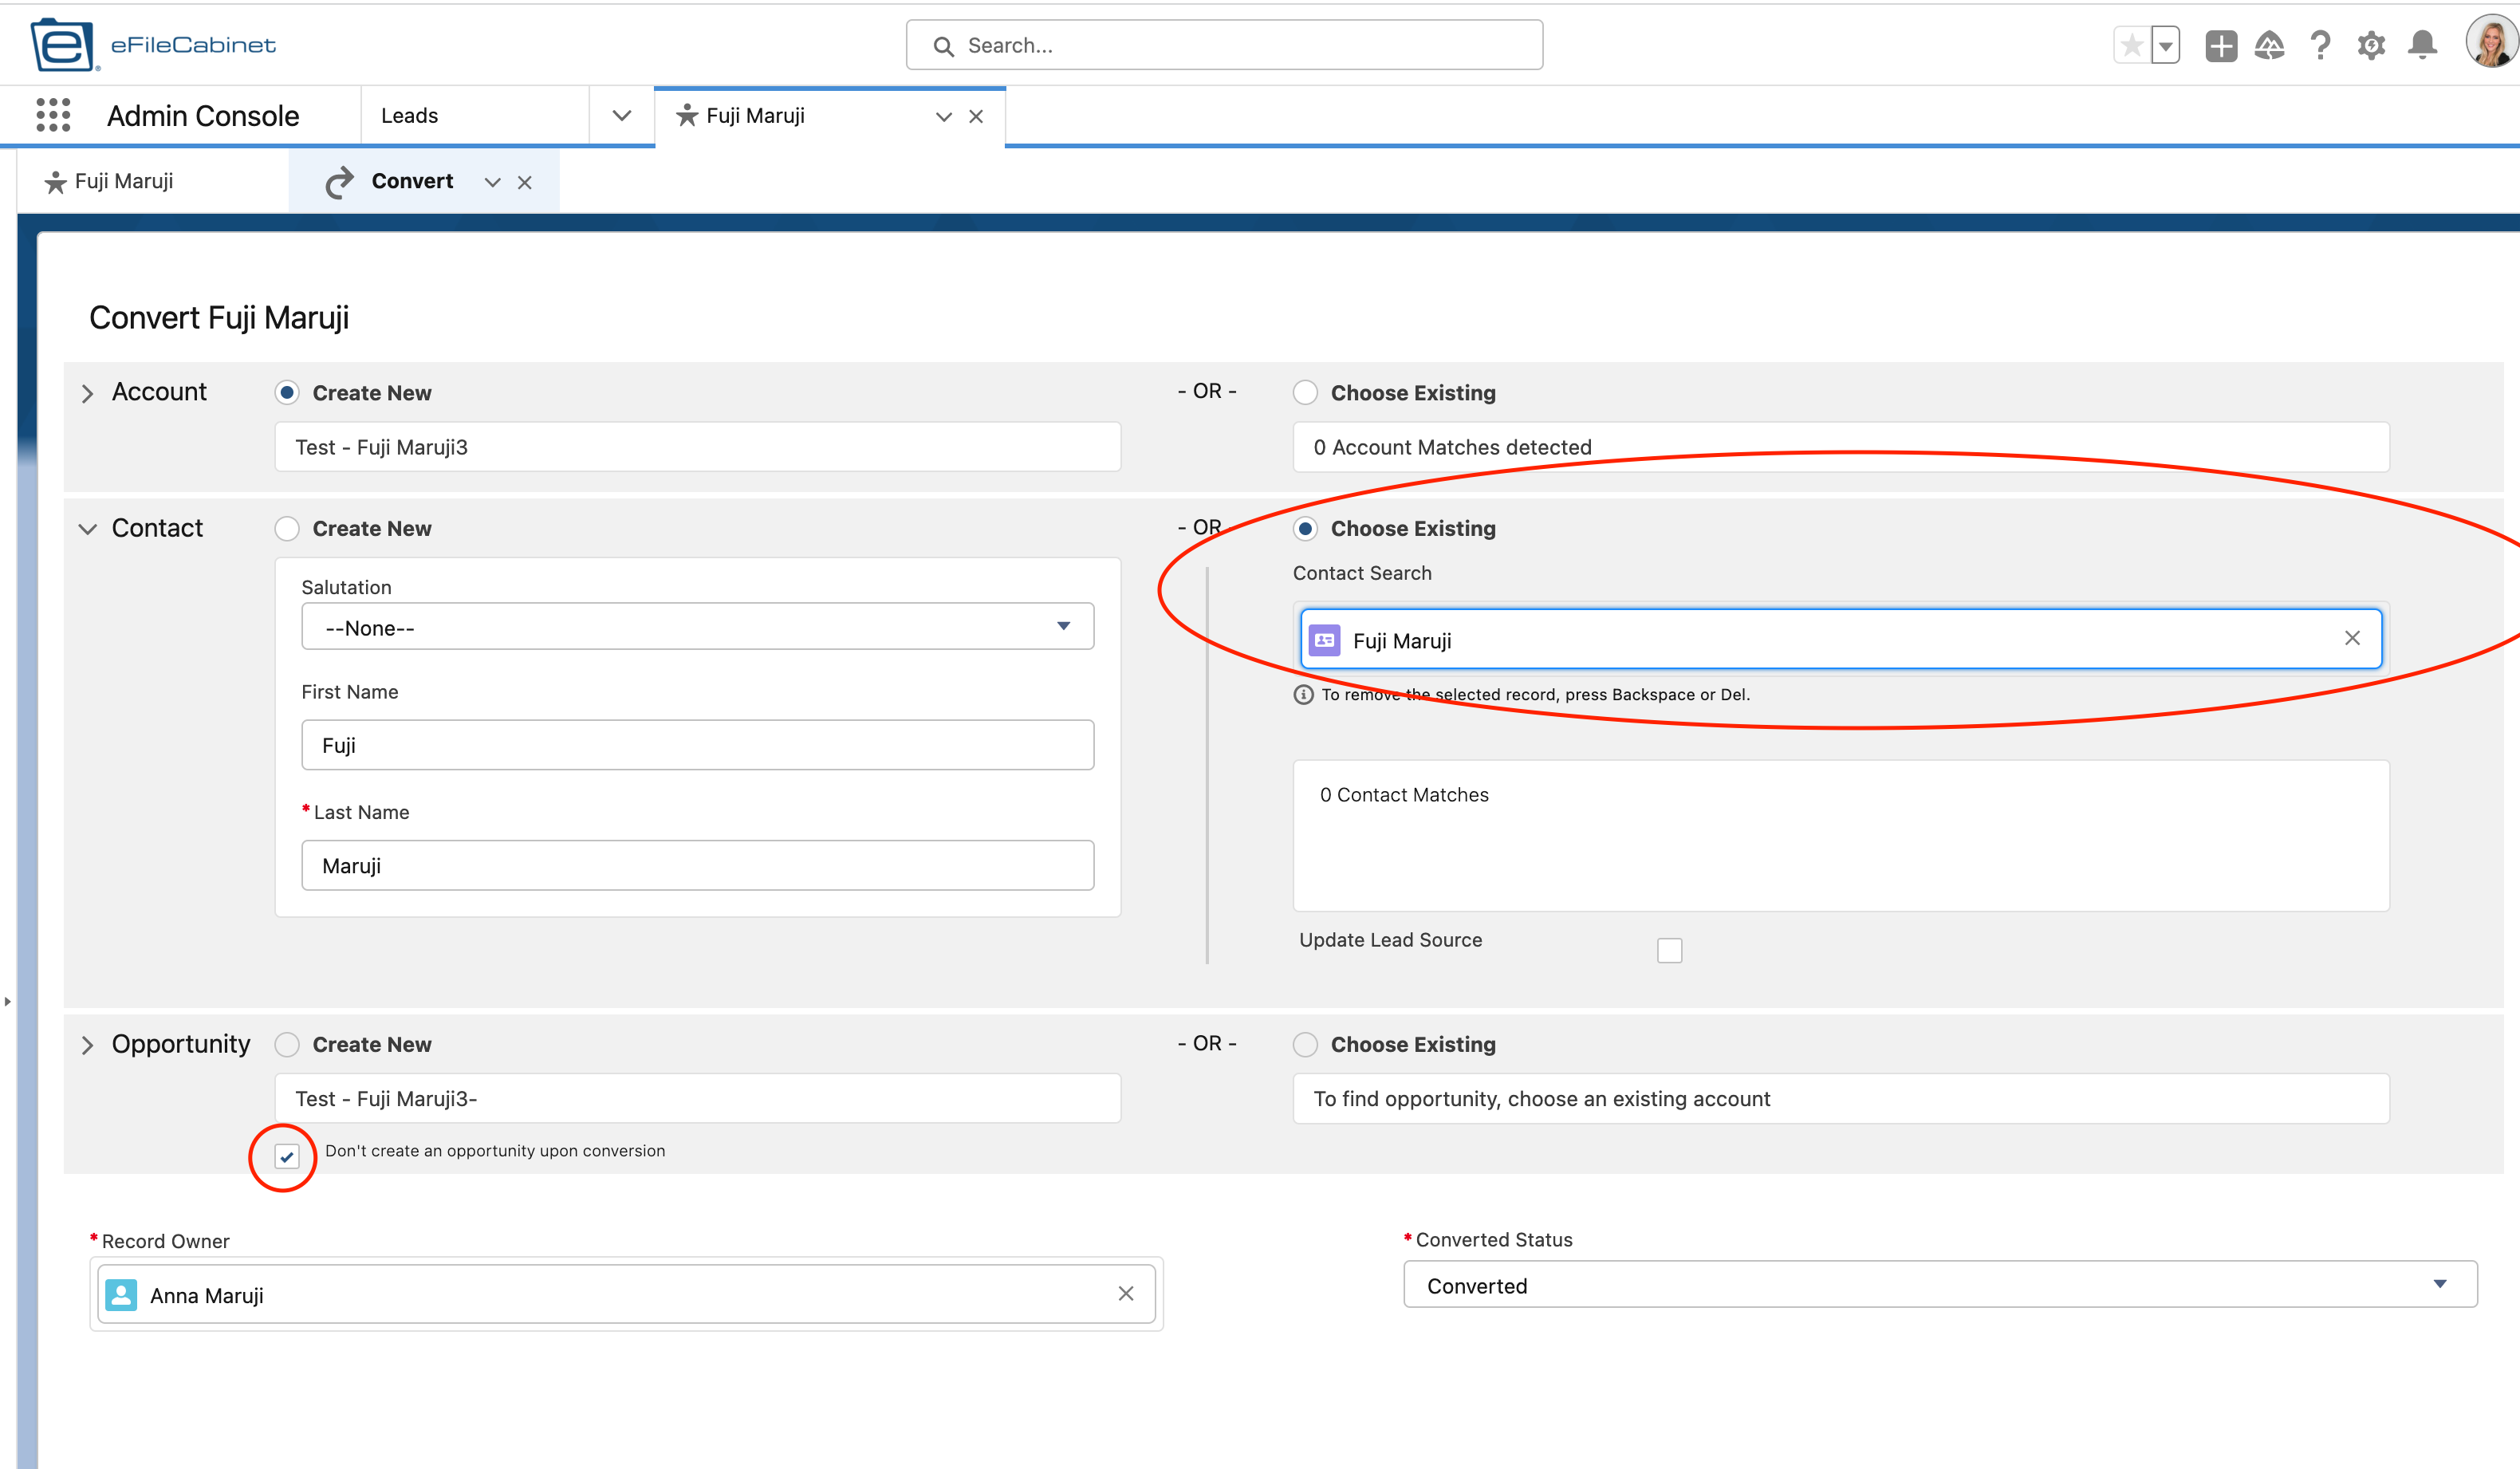
5. The Convert window will open. Select whether to choose an existing Account and/or Contact, and select "Don't create an opportunity upon conversion" unless you intend on creating a New Logo opportunity.
In this example, I am not choosing an existing Account nor Contact.
6. If you do want to select an existing record, search for the one you want to merge it with.
In this example, I am going to create a new Account, but I don't want to create a new Contact, so I will merge it with an existing one. An example of when you would do this would be for Partner situations. Joseph Merritt is a perfect example because that Account will have multiple children Accounts, but we only want one Contact that is related to all the children Accounts.
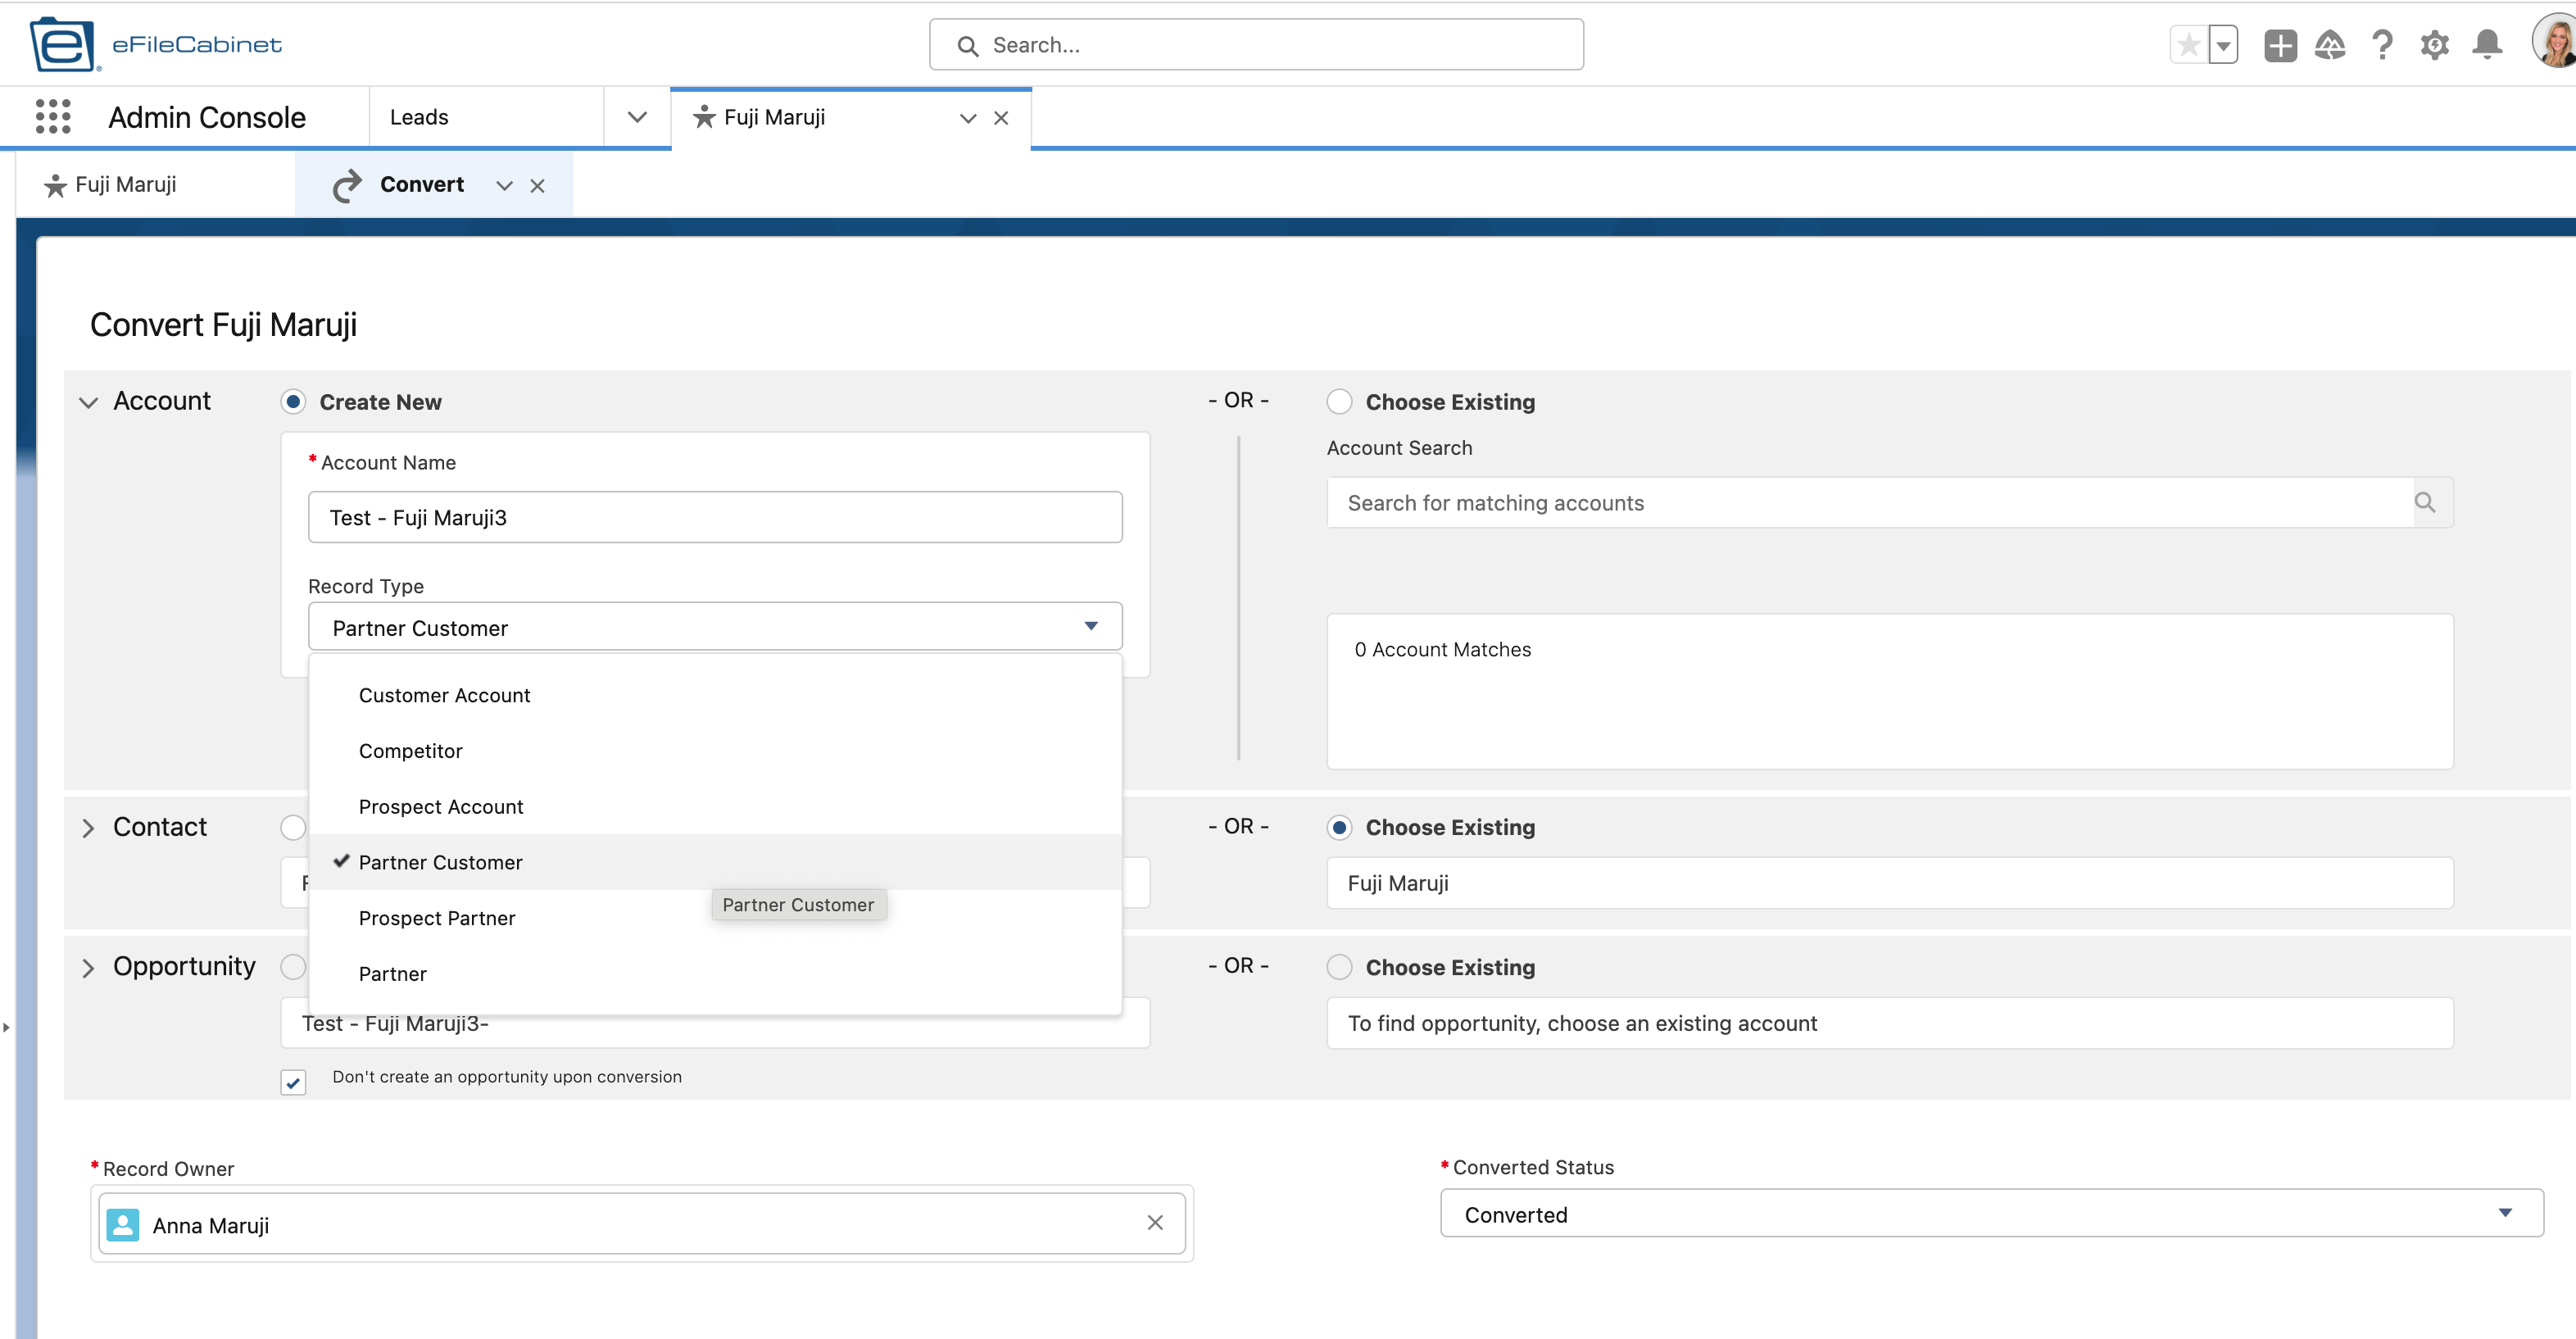
If it's a partner situation, be sure to select the appropriate Record Type, such as Partner Customer for the Joseph Merritt example.
7. Convert - all done! (continue reading for further explanations for choosing existing records)

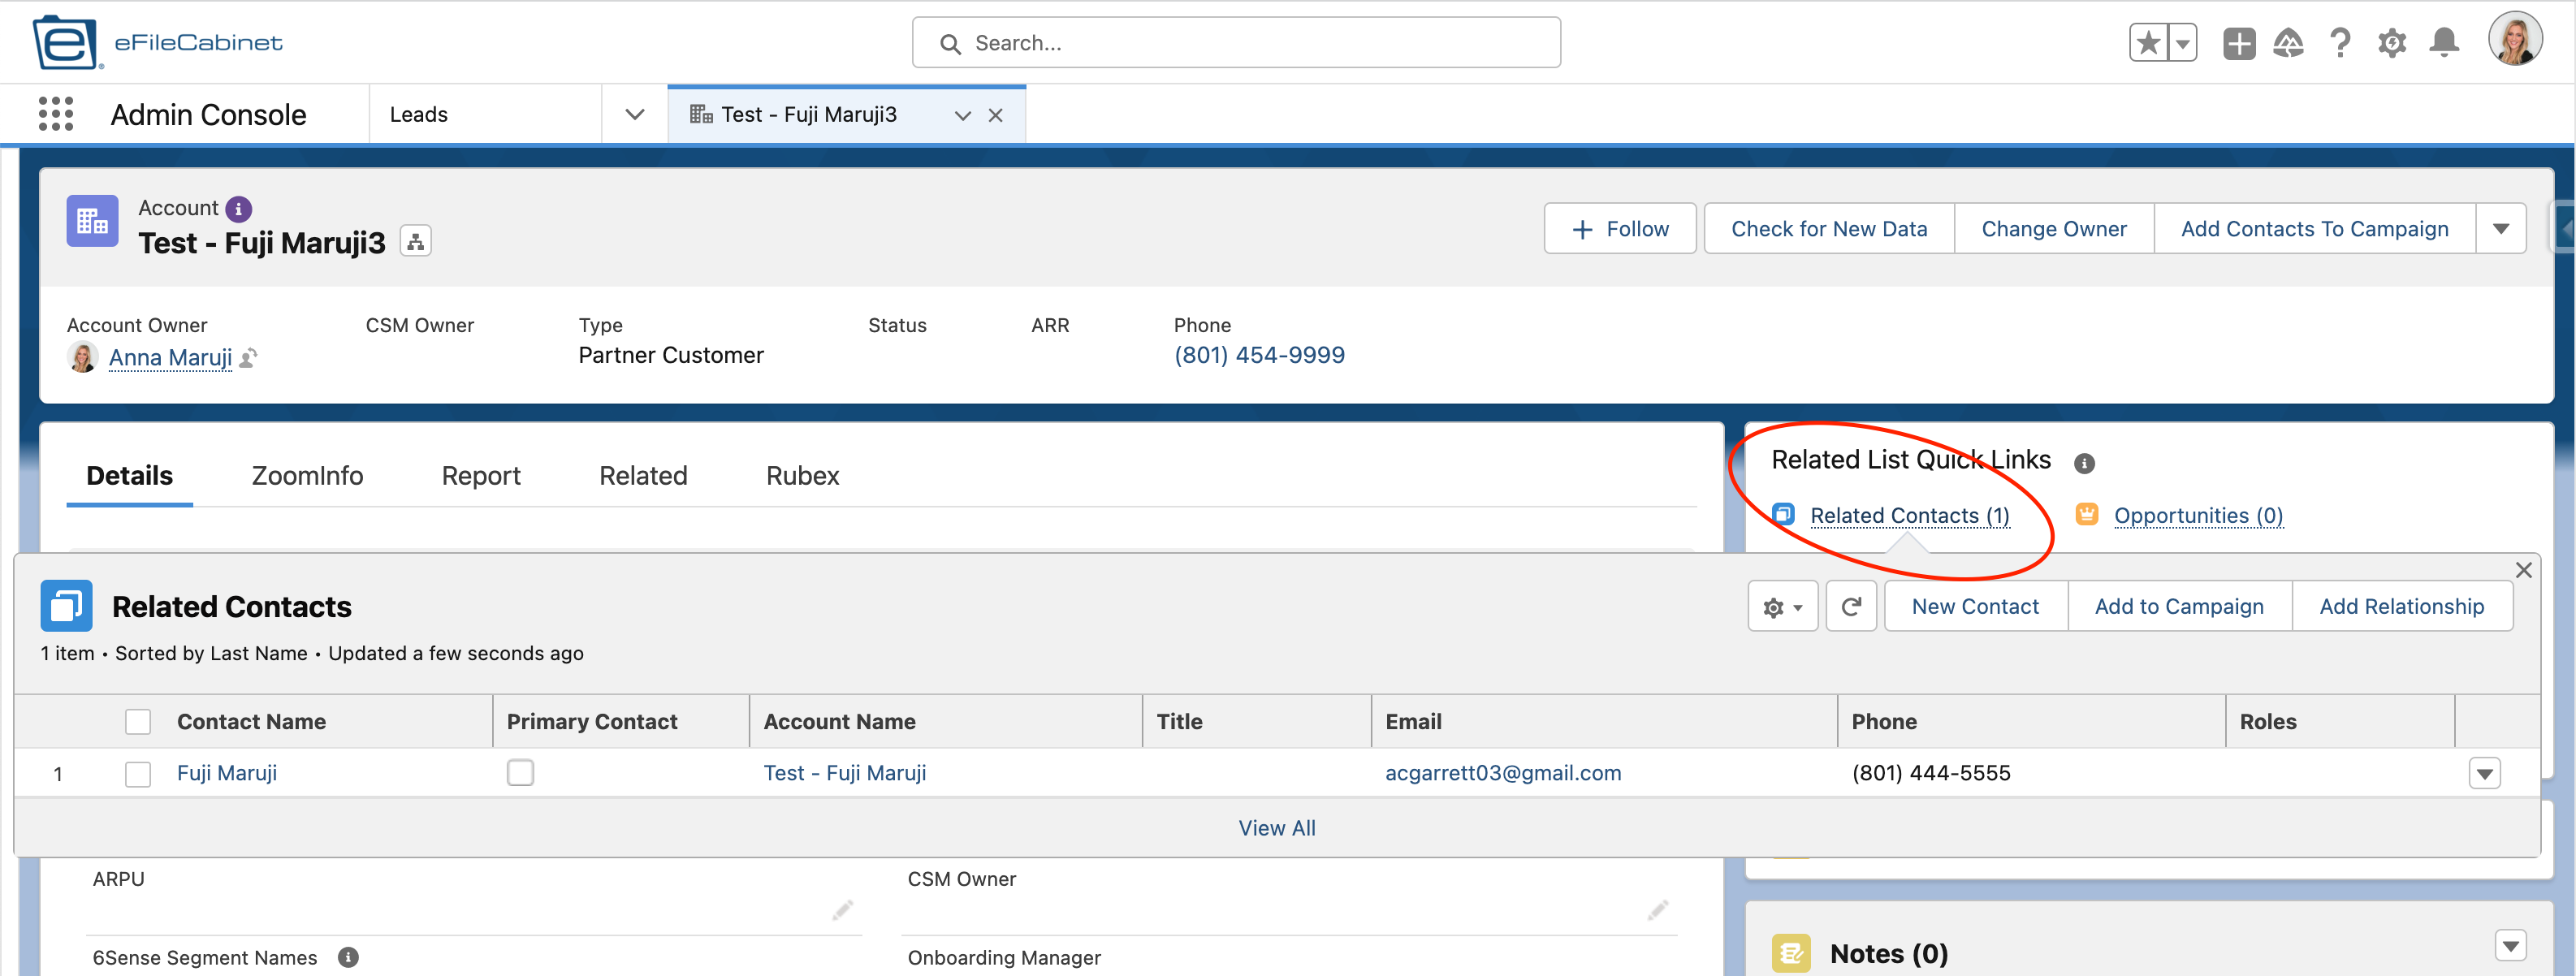
8. Open the new Account
Note how in this example, I can see one related Contact.
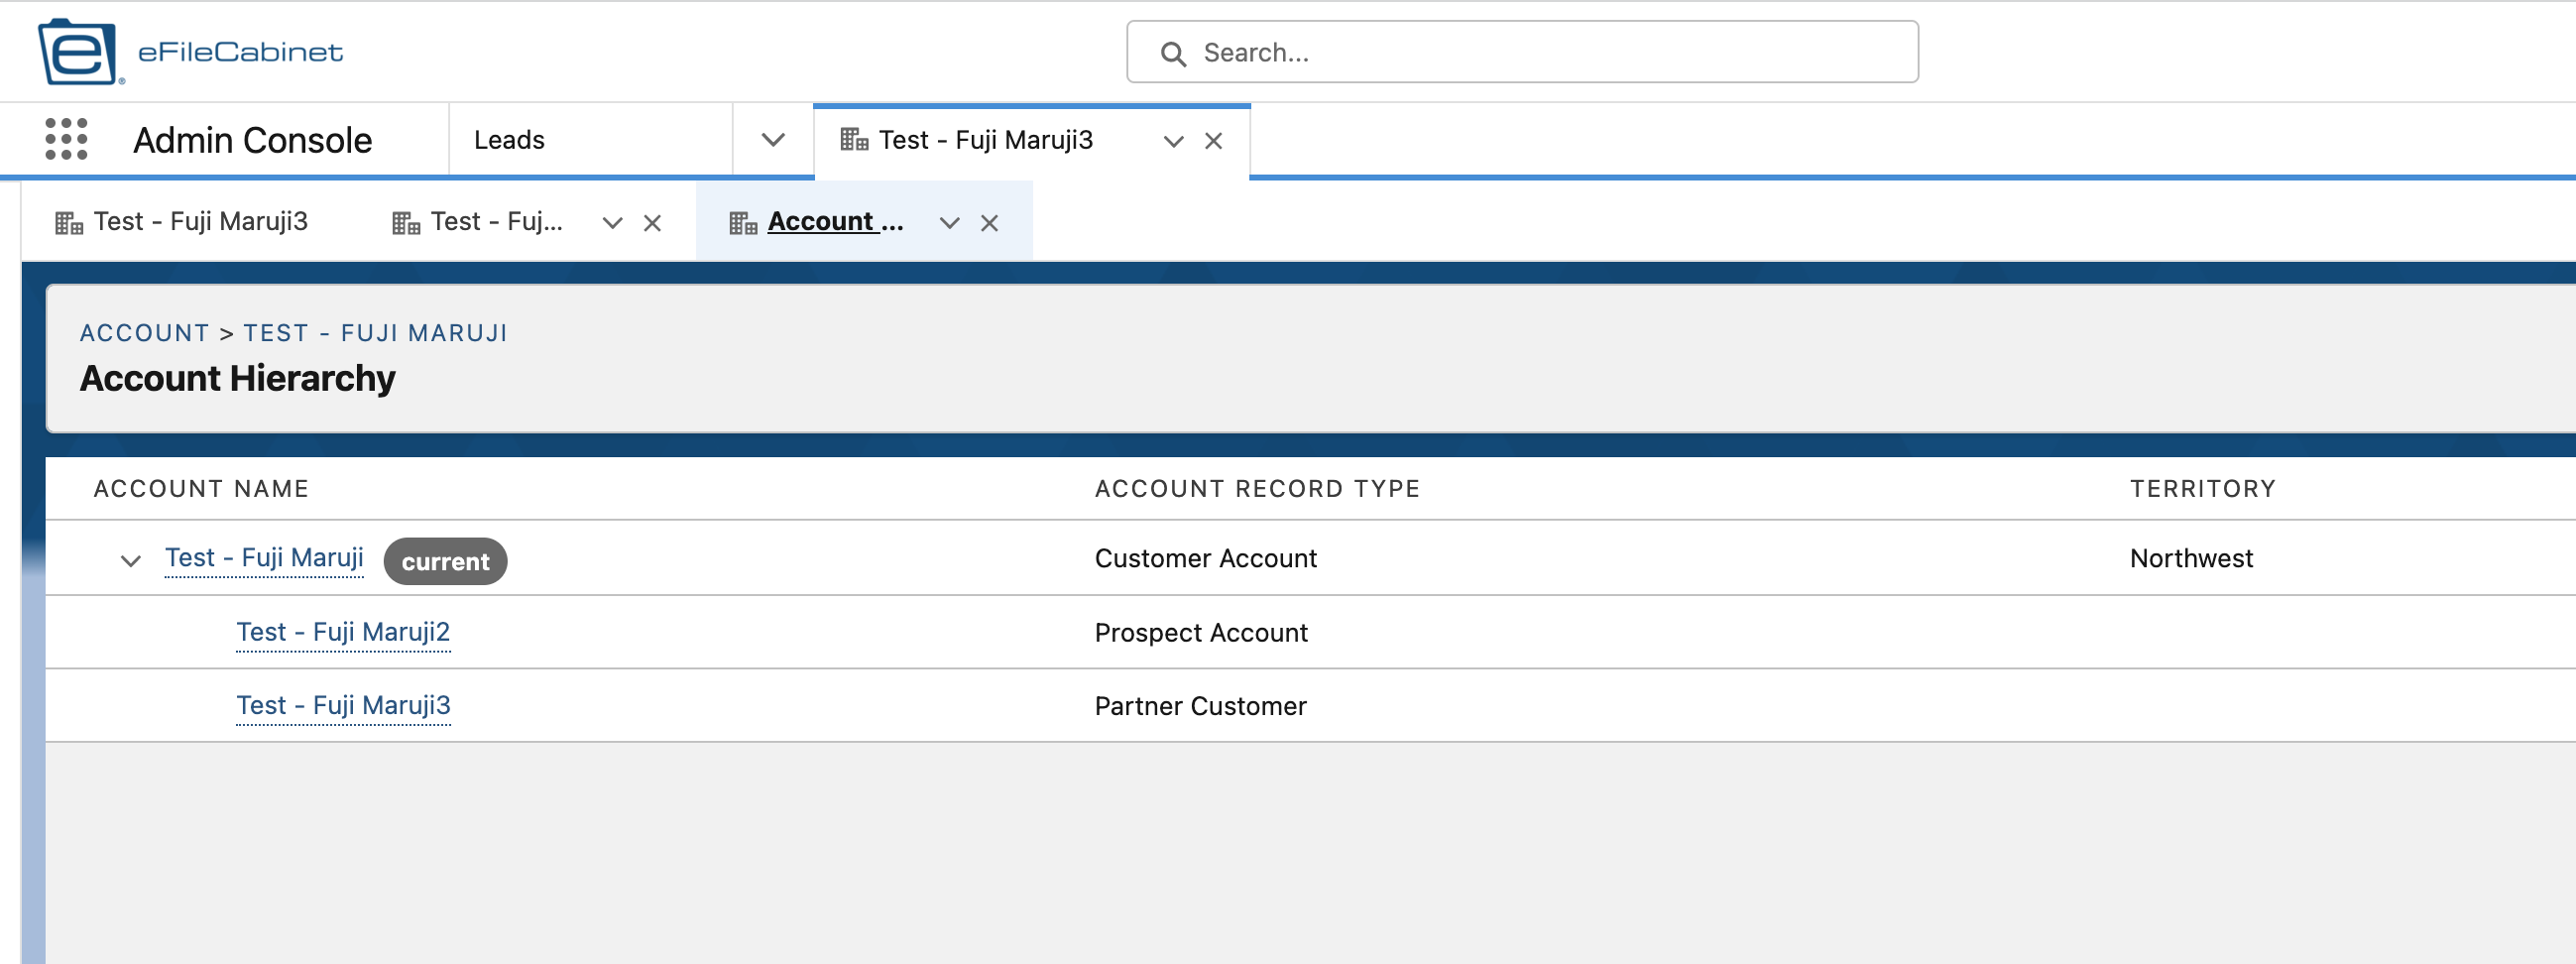
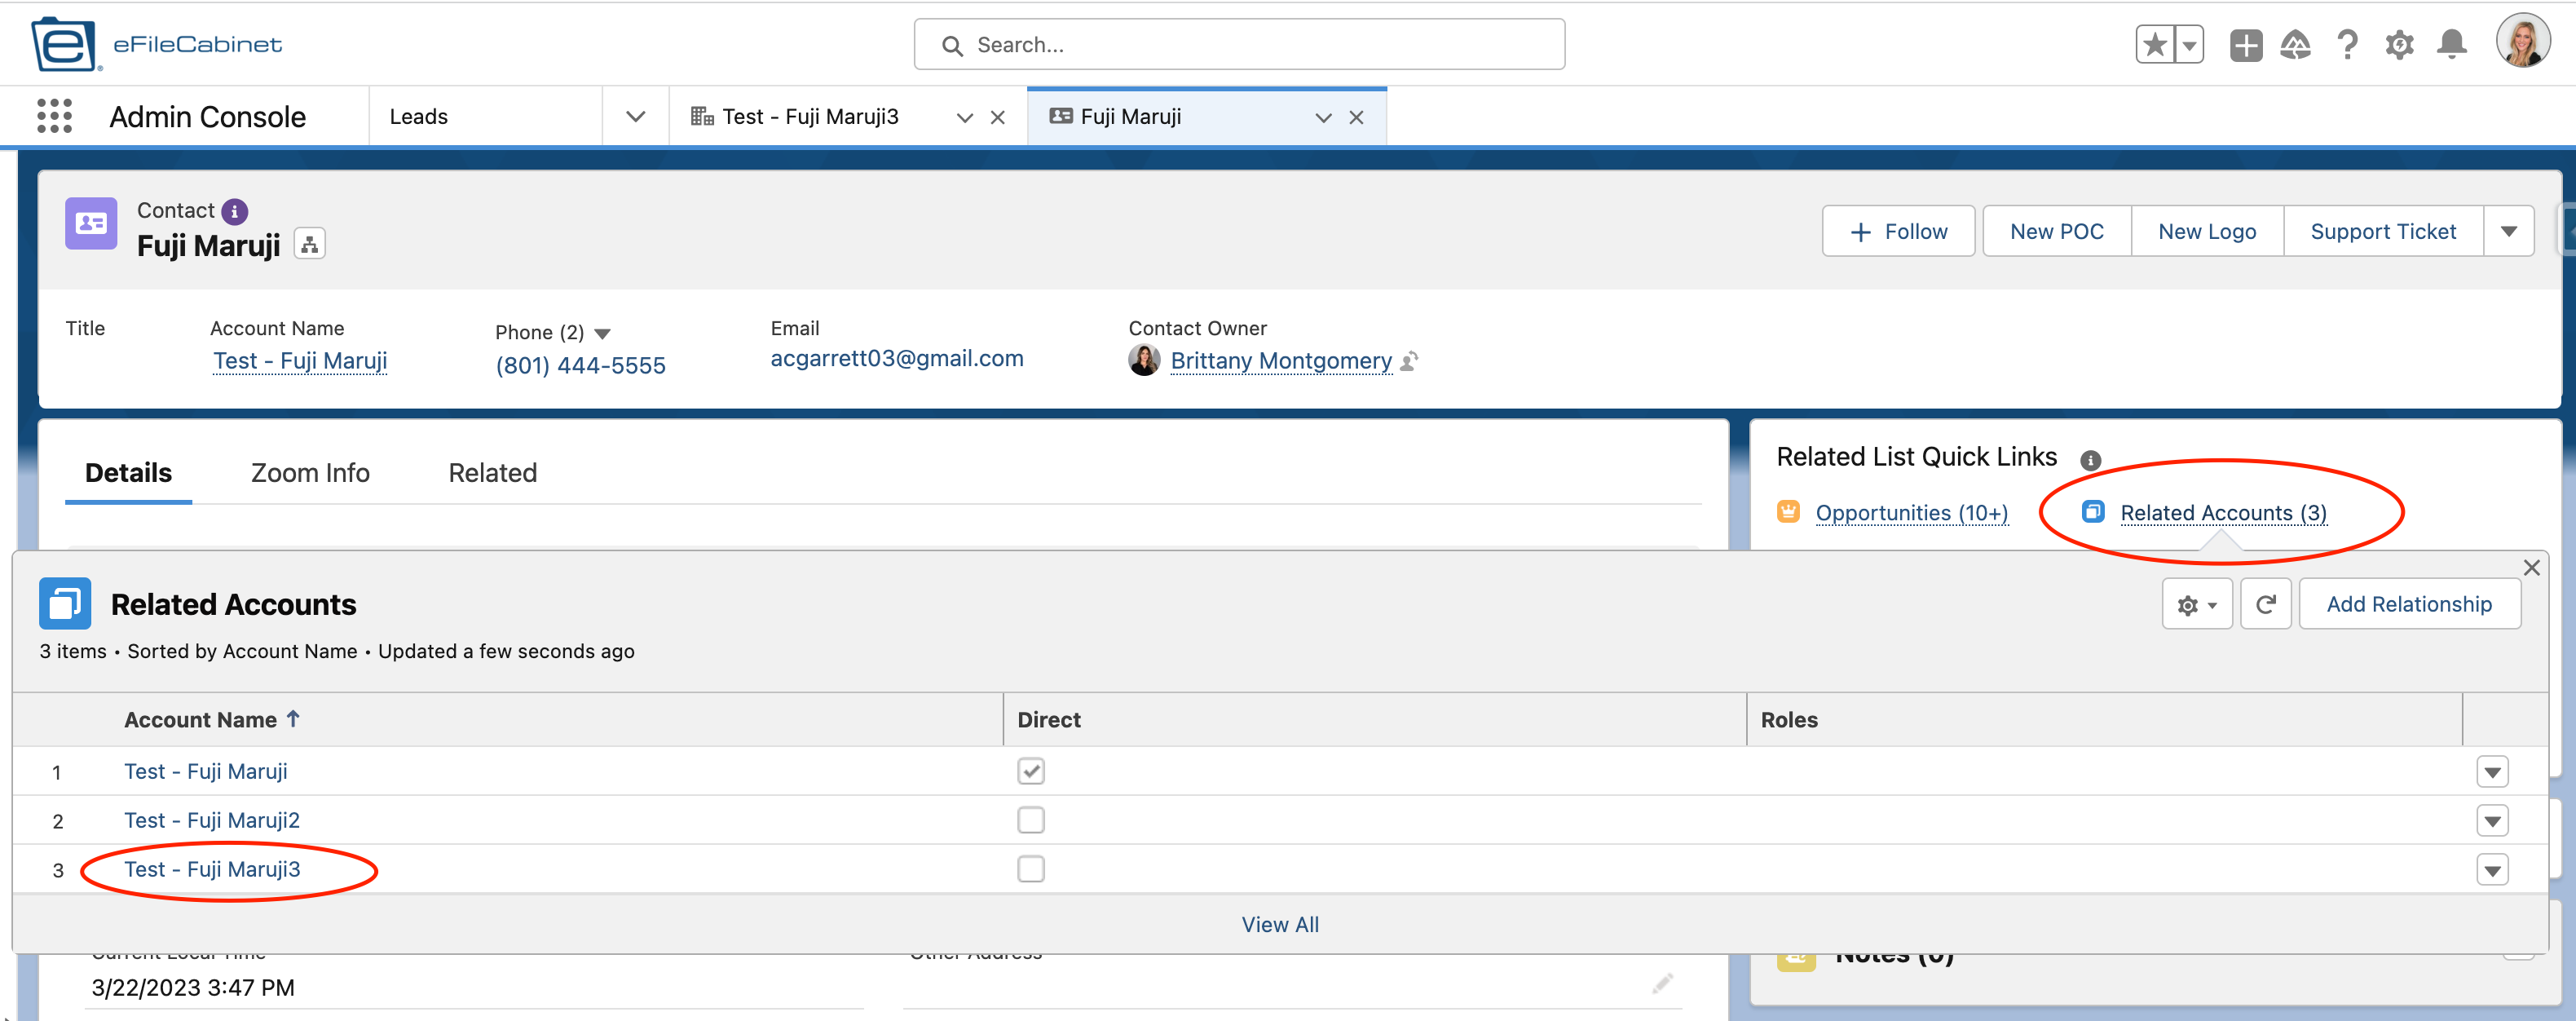
See how it has three Related Accounts? This is because we chose an existing Contact when converting the Lead, but chose to create a new Account. This is how you ensure there is only one Contract record, but allow it to be related to multiple Accounts.
10. Update record data as needed
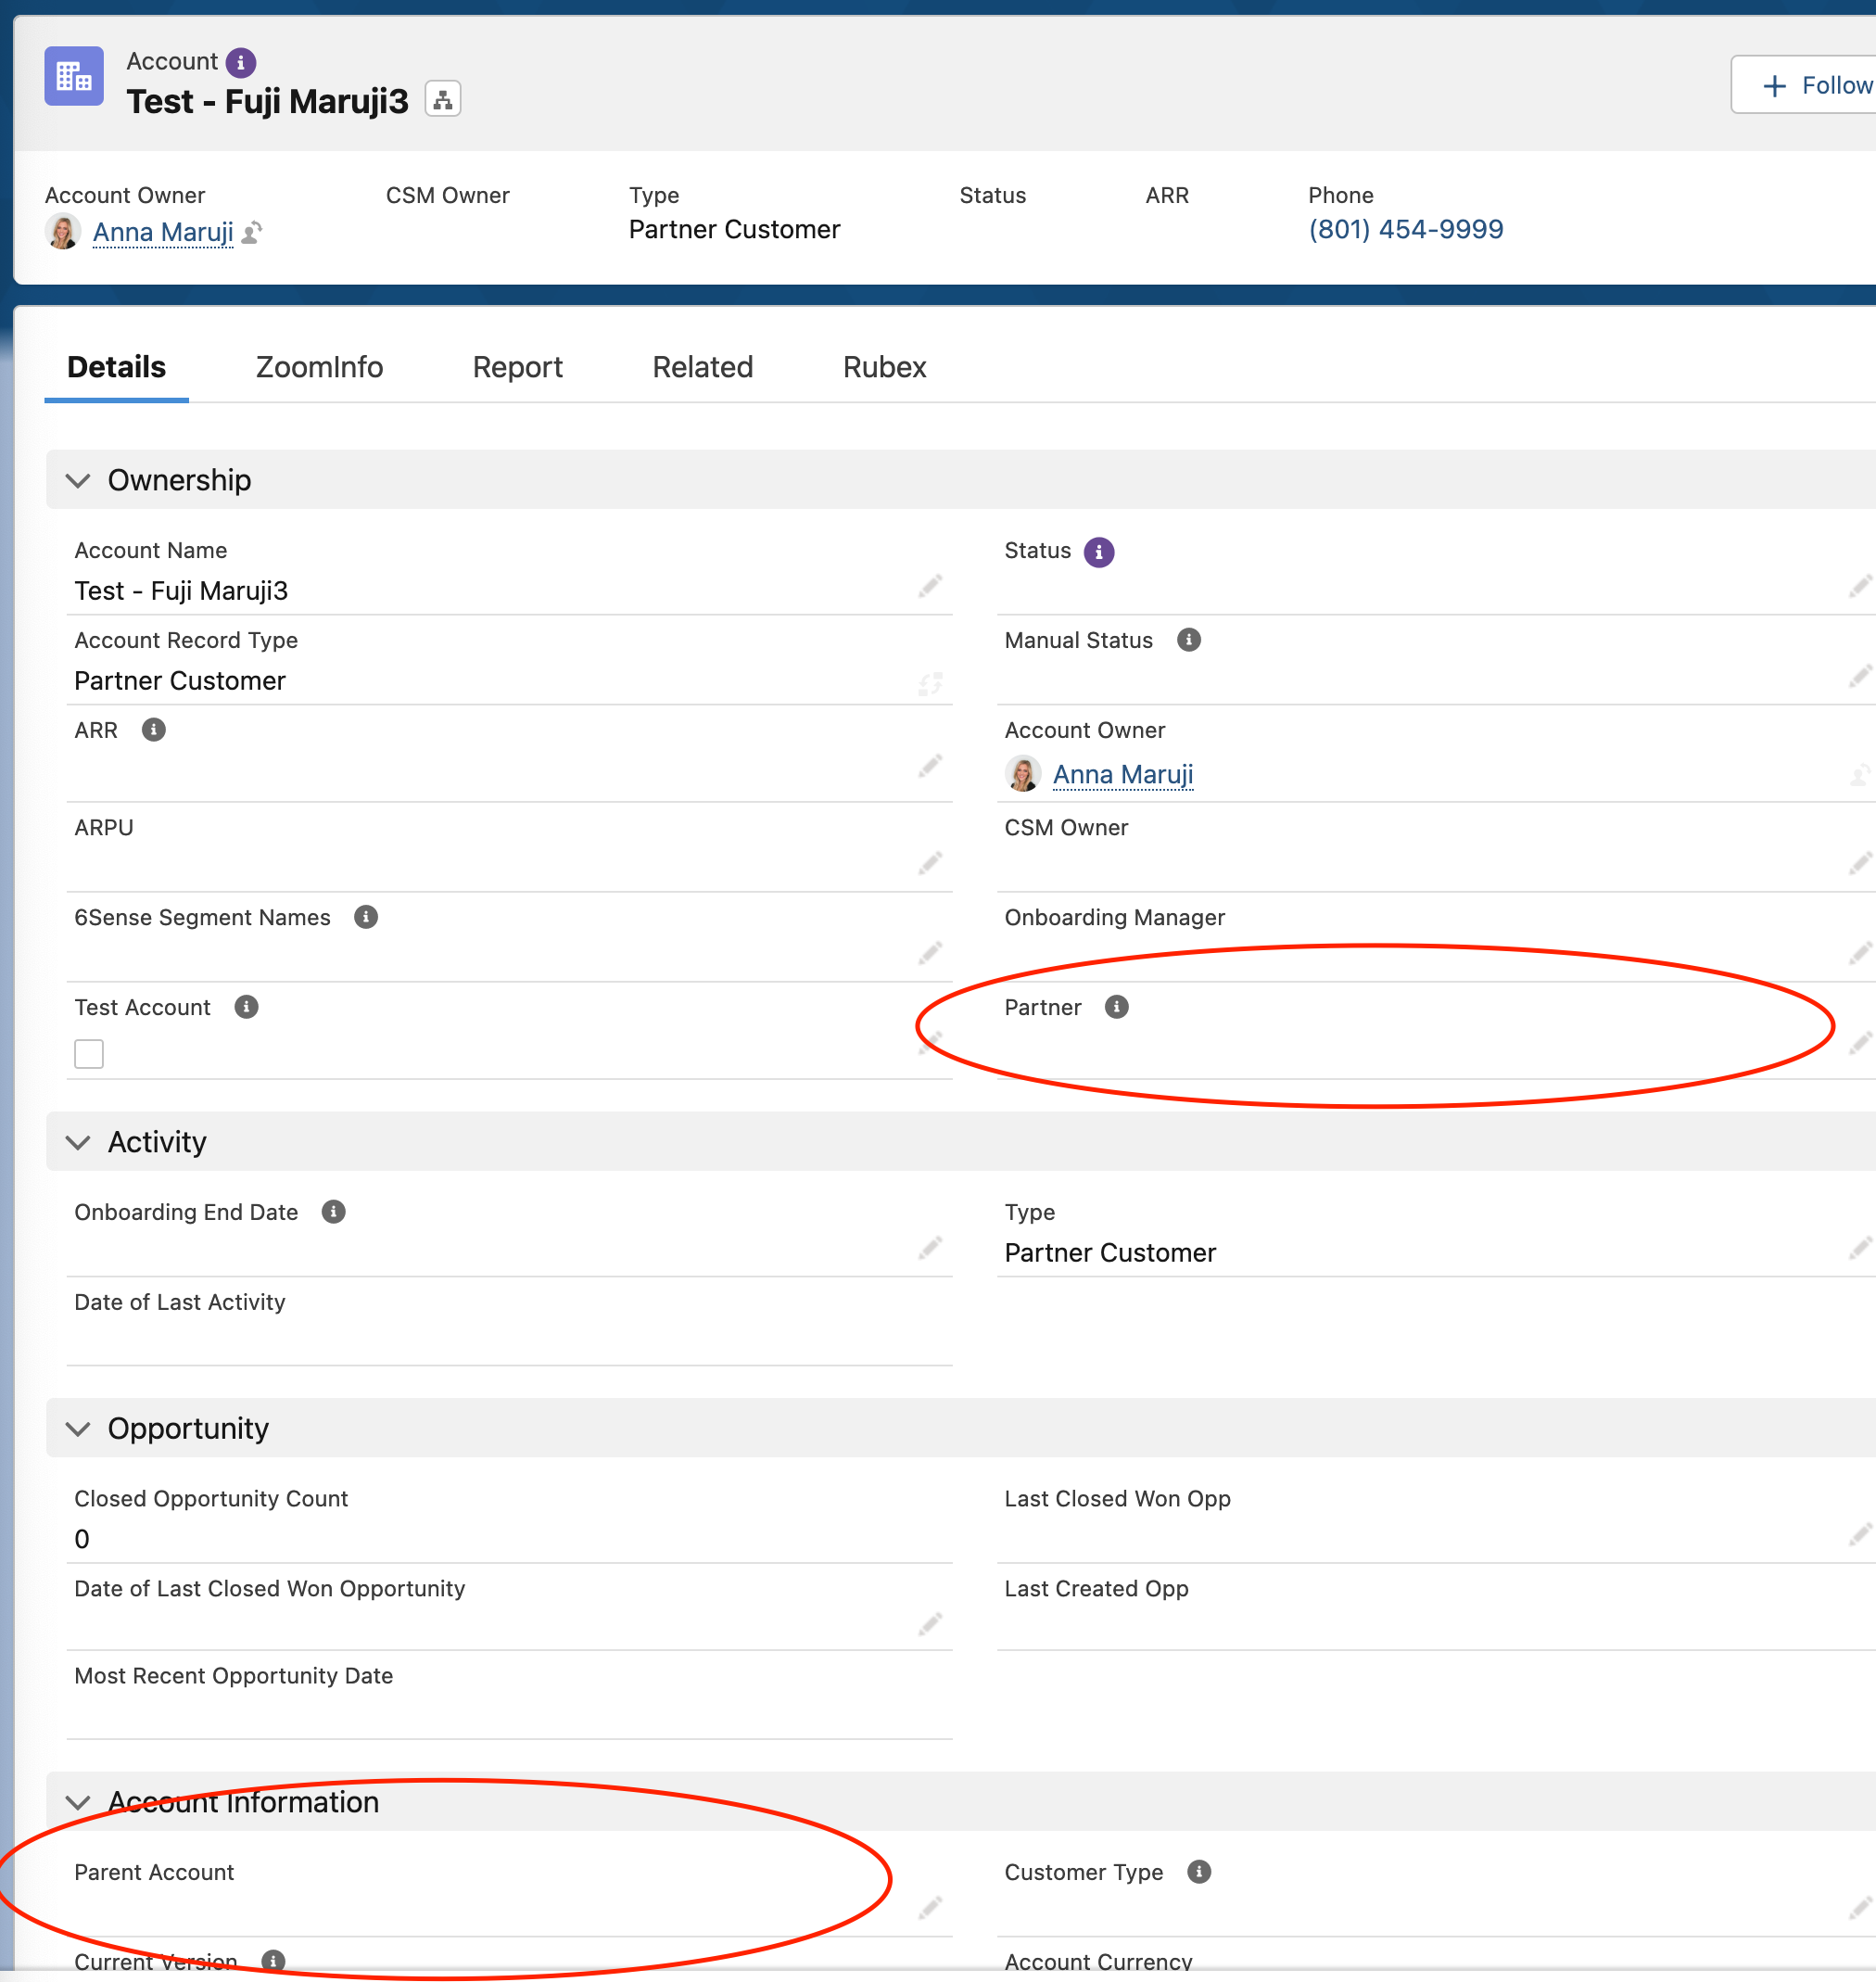
In the Joseph Merritt example, we will want to make sure this new Account is a child Account and note that it has a partner relationship.
We do that by populating two fields:
Parent Account
Partner
Both of these fields should be populated with the parent Account. In this example, it will be "Test - Fuji Maruji".
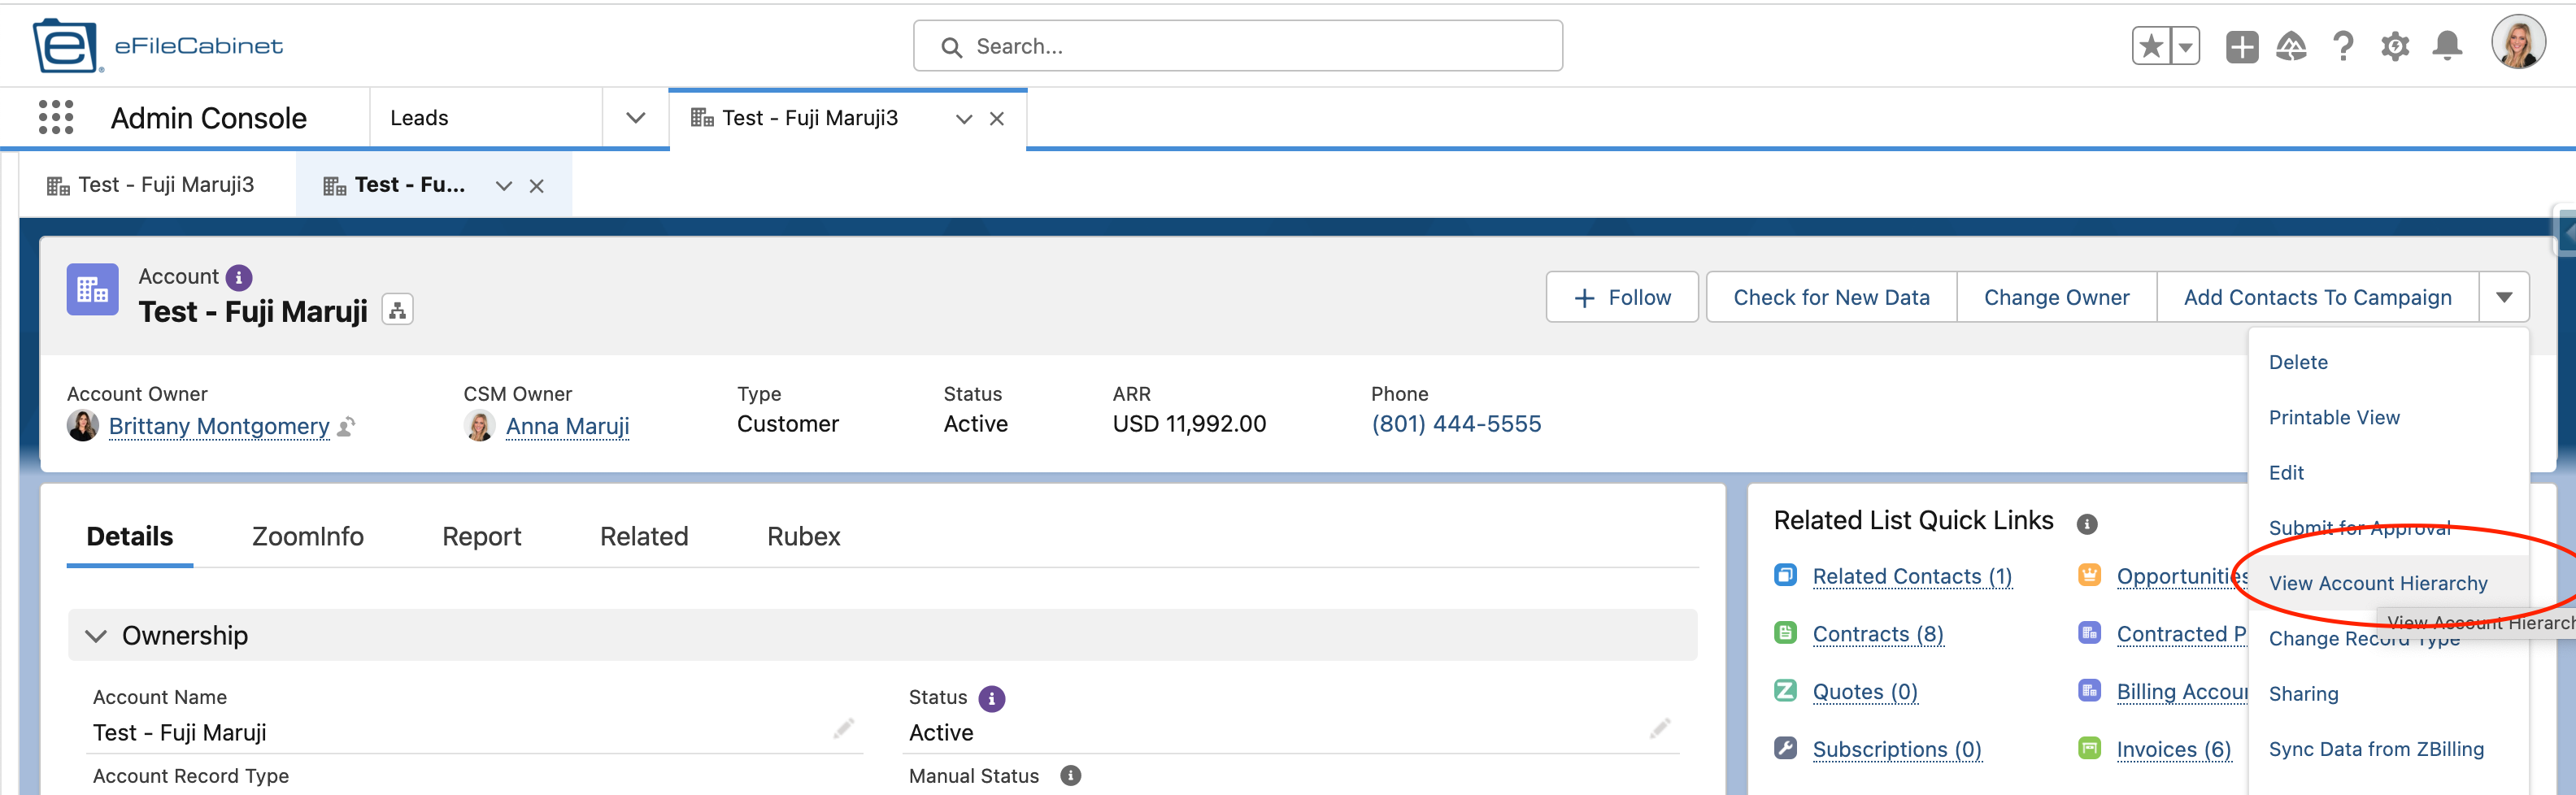
You can verify the parent/child relationship by clicking the dropdown and selecting "View Account Hierarchy"