Okta SAML SSO Configuration
Setting up Okta
- Go to the Admin Dashboard and create an app integration.
- Select SAML 2.0
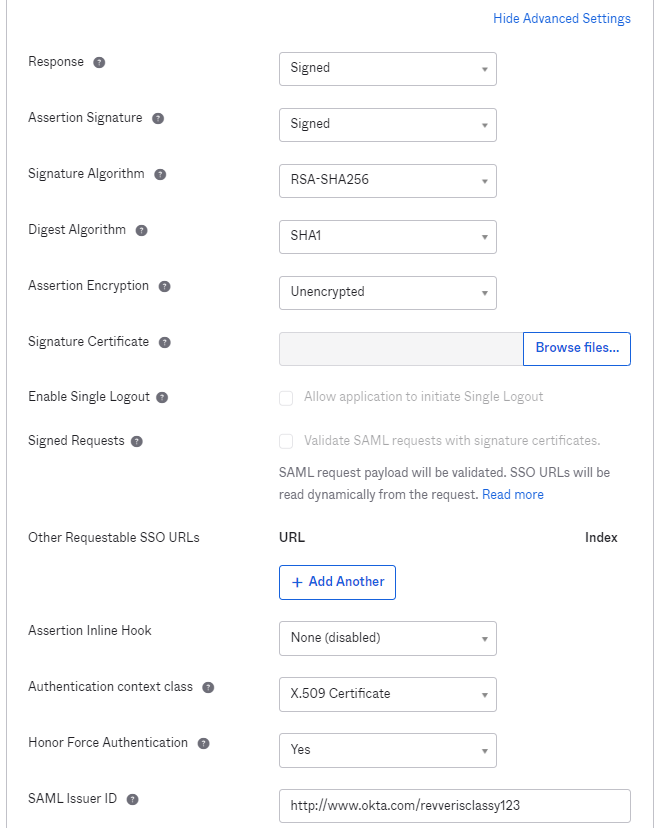
- Have the fields match as to what is shown in the below screenshots for the Configure SAML section
- Keep in mind that the Single-sign on URL will be dependent on the environment you're setting this up for, and the ID at the end will be dependent on your Revver SAML Config (once the config is created in Revver, edit it and the URL will contain the ID)
- The SAML Issuer Id needs to begin with http://www.okta.com/ but anything after that is up to you. It does need something and it needs to be unique, but it is something that you can make up if you'd like

- Once it's been configured and the app is up and running, you'll need to get the SAML signing certificate
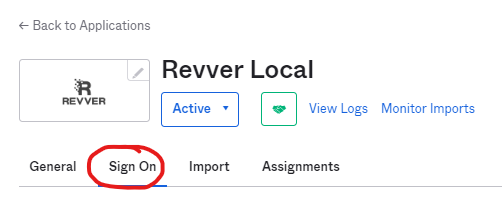
- Inside the app, go to the Sign On tab
- Find and download the SHA-1 Certificate (note you may need to activate it first. In which case ignore the warning and continue)
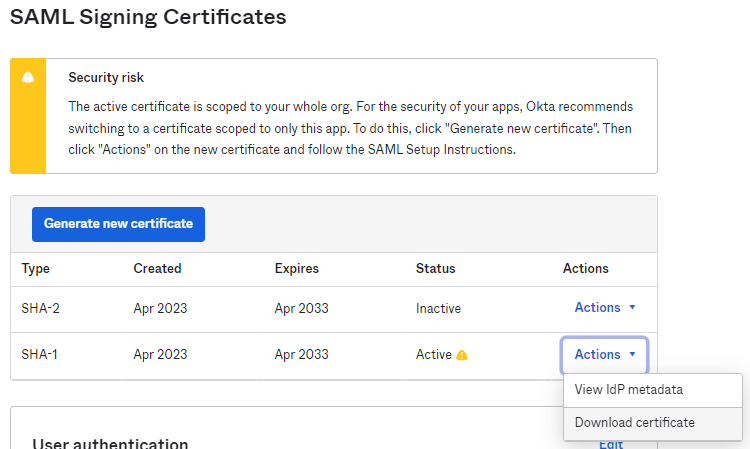
- You will receive a .cert file. Change the extension type to .cer
- Inside the app, go to the Sign On tab


Configuring SAML in Revver
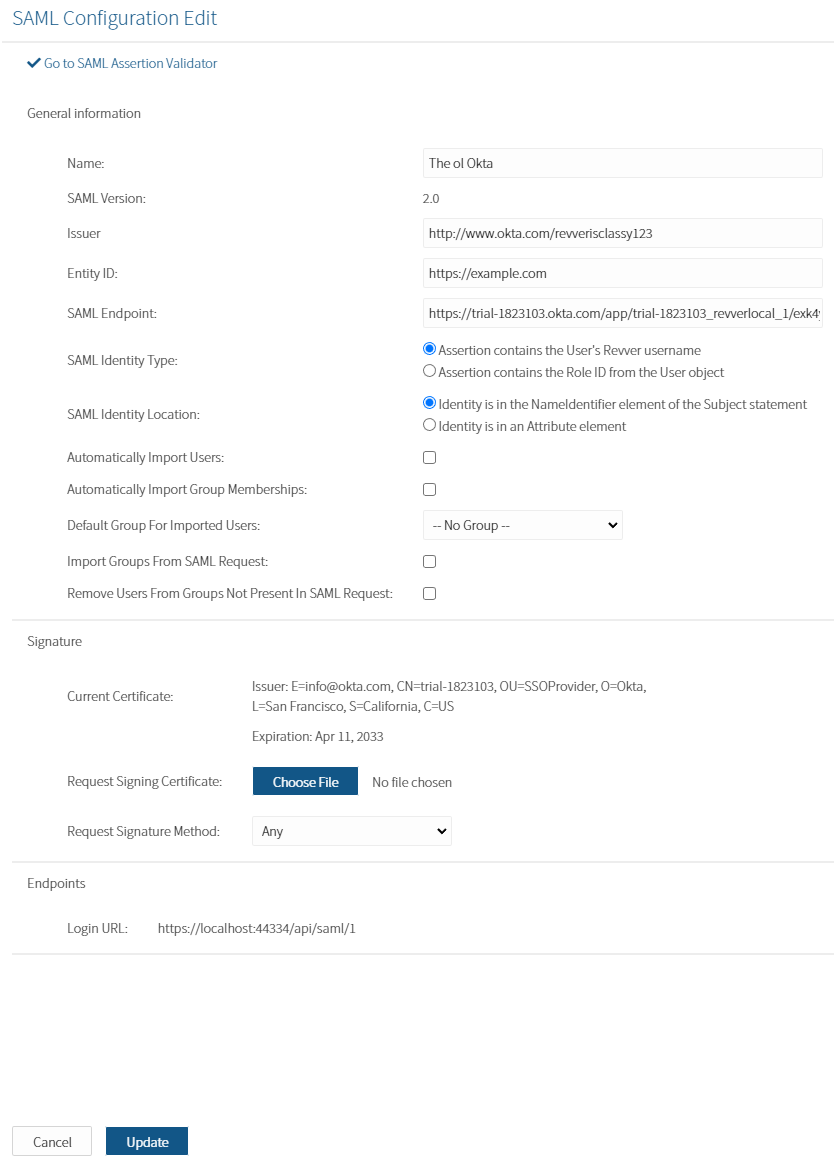
- Configure the name
- The Issuer is the Issuer Id configured above
- You can find this in Okta by going to going to the Sign On tab => Scroll to the Settings section => Click More Details => Issuer
- The Entity ID will match the Audience Restriction area in Okta's app by going to General => SAML Settings => Audience Restriction
- Be careful when using the SAML Endpoint as Okta has some misleading areas to find this
- This can be found in Sign On => Settings => More Details => Sign on URL
- Leave the rest blank (or configure as needed)
- For the Signature, Choose File => Select the .cer file (formerly a .cert file) that was downloaded (see the above Setting Up Okta section)
- Click save
Here's an example Config: