Hardware
- PBX Phone System (Jive)
- Printers
- Computers
- How to setup a new macOS computer
- How to setup a new Windows computer
- Surplus Sale
- How to join the Azure AD domain and delete the local user
- How to setup a new Windows computer ("Autopilot Reset")
- Shared Dev Mac for Remote Access
- Phone System
- AV (Audio / Video)
- Zoom Rooms
PBX Phone System (Jive)
Voicemail System
General Info
We use Jive for our phone system. Here are a few of the more common tasks you will need to know how to do:
Check Voicemail
1. Dial *99 (Watch Video) from your phone or press the Messages key. Depending on the phone model, this button may have an envelope icon on it.
2. If there are multiple lines assigned to the device, select the desired line before completing these steps.
3. Dial your password (default is 0000).
1. Log in to the mobile app.
2. Tap the phone icon from the bottom of the screen and then tap Voicemails.
3. Tap the play icon to listen to a voicemail. Tap a voicemail entry for additional options.
Manage Voicemail
1. Select Voicemail in the left sidebar.
2. Hover over a voicemail and then click the trash icon.
Mobile App
1. Tap the phone icon on the bottom.
2. Tap Voicemails.
3. Swipe left on a voicemail and then tap the trash icon.
Desk Phone
1. Dial *99 from your phone or press the Messages key.
Note: Depending on the phone model, this button may have an envelope icon on it.
2. If there are multiple lines assigned to the device, select the desired line before completing these steps.
3. Dial your password (default 0000).
4. Press 1 for new messages or 2 to open a different folder.
5. Once you have found the message you want to delete, press 7.
Printers
Adding a Printer to your computer
Shared Printers Info:
Color Printer - HP LaserJet Pro 400 color Printer M451dw - IP Address: 10.10.0.19
This printer can print in black and white and color. This is the normal sized printer in the north hallway.
Office Printers Info:
Color Printer - HP LaserJet Pro CP1525nw Color Printer - IP Address: 10.10.0.17
This printer can print in black and white and color. It is located in Dave Smith's office.
Windows Setup Instructions
Printers should be added to your computer automatically. If they are not, or if for any reason you need to add them manually, please follow the instructions found in the link below.
Add a printer to a Windows computer using the IP address
Mac Setup Instructions
Printers will NOT be setup on your computer automatically. You will need to use the IP address of the printer to add it to your computer. Please use the link below for instructions for how to do that.
Add a printer to a Mac using the IP address
Computers
How to setup a new macOS computer
Macbooks are logged into with your email address and Microsoft password. After the first initial login, the computer setup will be done automatically but may take several minutes.
IMPORTANT: You must connect to the Internet BEFORE creating user account. If you do not do this we will have to wipe your computer and start over again. Also, it has been observed that occasionally during the setup process, you may encounter an error saying the website cannot be reached or it may hang during the setup process. If this happens, just go back a step and try again.
Note: Because of our rebrand from eFileCabinet to Revver, you may see some wording or screenshots that still say eFileCabinet; we are still in the process of changing some names and links.
Instructions - Concise text version (skip this section if you want more detailed instructions):
- Setup your Mac with the options of your choosing.
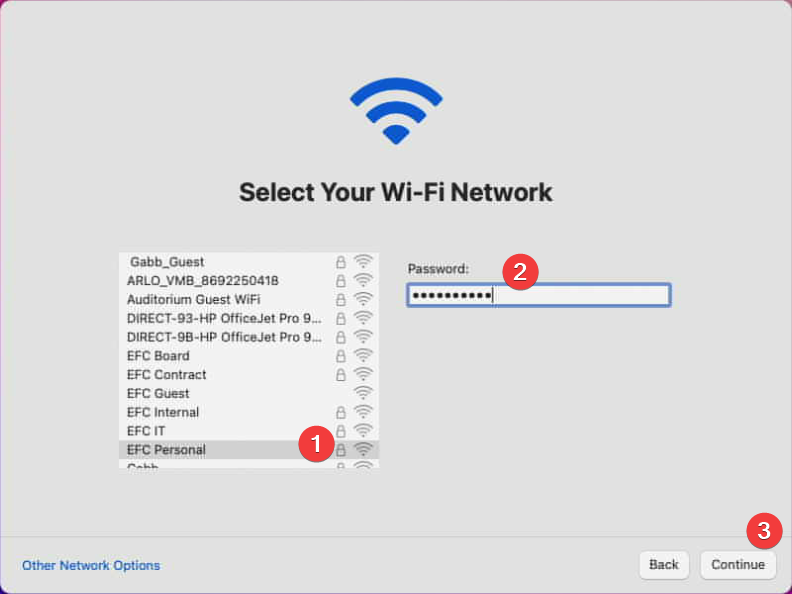
- Connect to the Internet. If in the office, log into "Revver Personal" Wifi with the password "revverbyod"
- Login with your email address and Microsoft password. You will need to do this several times during the setup process.
- Login to iCloud using your assigned email address and Microsoft password.
- Set a secure computer password.
- Configure your preferred settings.
- You must enable Filevault when you are prompted (this often happens the first time you restart your computer).
- Chrome, Slack, Zoom, and Company portal will be installed automatically. This usually takes 5-10 minutes but can be longer on slower Internet connections. If these programs do not install automatically or you wish to speed up the process you are welcome to install them manually.
- Please navigate to training.revverdocs.com to start the “New Hire Onboarding - IT Information” training course. Login using your Microsoft credentials
- Click on “Start course” to start the course
- This course is required and will help you setup software on your computer.
Instructions - Detailed version with screenshots:
- Boot the computer
- Select the language and region you wish to use.
- Set up Accessibility option if you need them or select "Not now"
- Connect to the Internet. If in the office, select the "Revver personal" Wifi SSID and enter the password "revverbyod" to connect. Accept any agreement window that may popup.
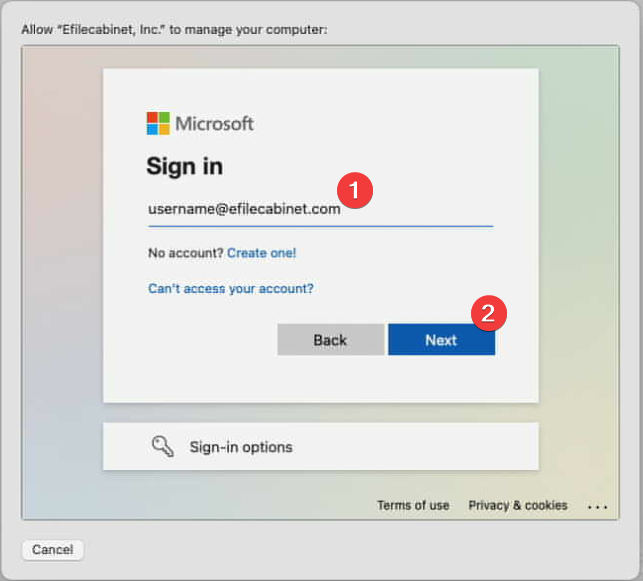
- You should now see a "Remote Management" window that states that eFileCabinet is able to configure the computer.
- You will be taken to a Microsoft login screen. Use your email address and Microsoft password to login. If you are a new hire or are using a temporary password, you will be asked to create a new password.
- Press "Continue" to move beyond the "Data & Privacy" page.
- Press "Not Now" to skip the Migration Assistant window.

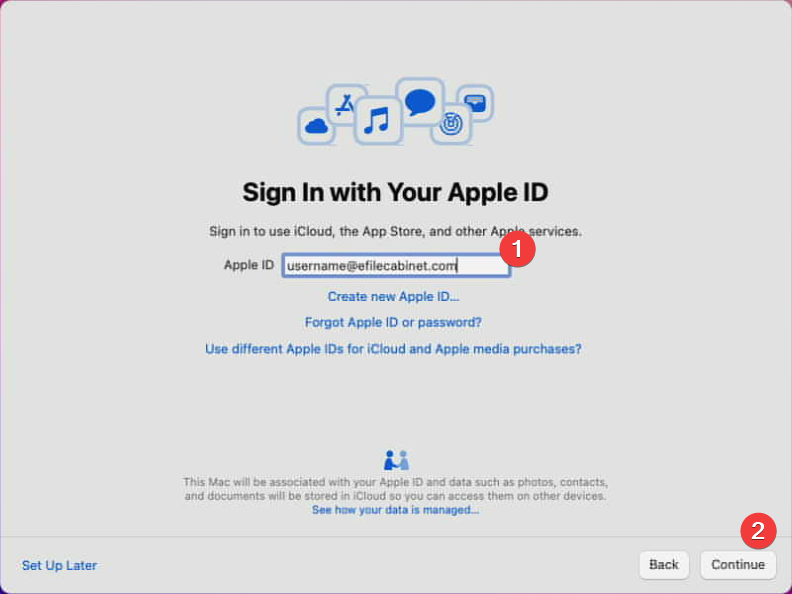
- You will then be asked to "Sign In with Your Apple ID". Use your Revver email address for your ID then press "Continue". Continue again to go to the Microsoft login window.
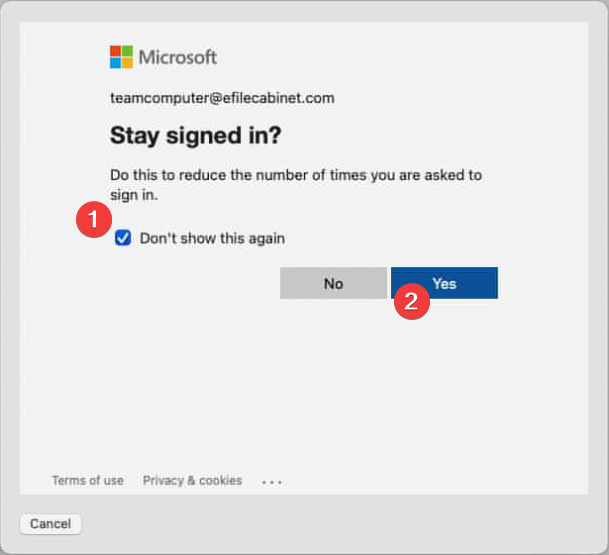
- Check the settings to stay signed in. You will need to enter your email and password a handful of times during the setup of your new computer.
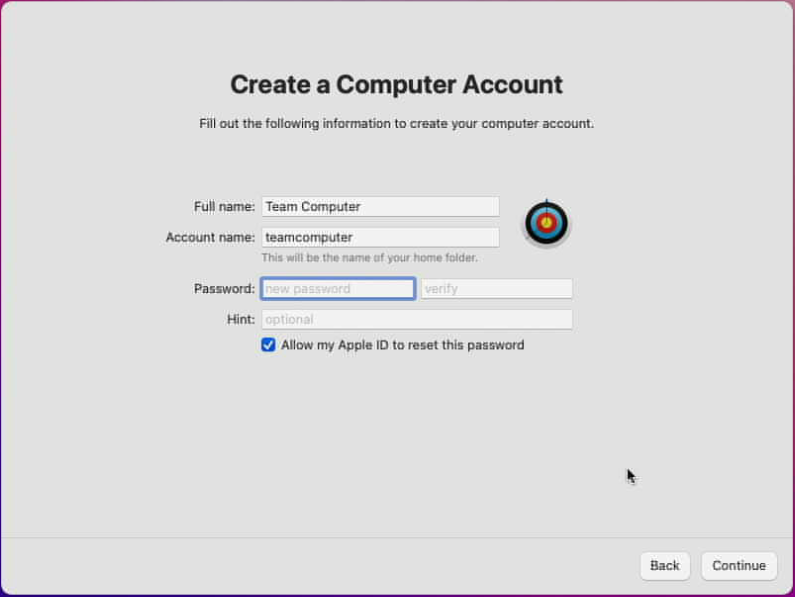
- When you are taken to the "Create a Computer Account" window, your Full name and Account name will be filled out. Keep those names as they are and enter a password that you will use to login to the computer. The password requirements are that the password must be 10 characters and contain a least one capital and one lowercase letter as well as a number or symbol. Your password can be the same as your Microsoft password.
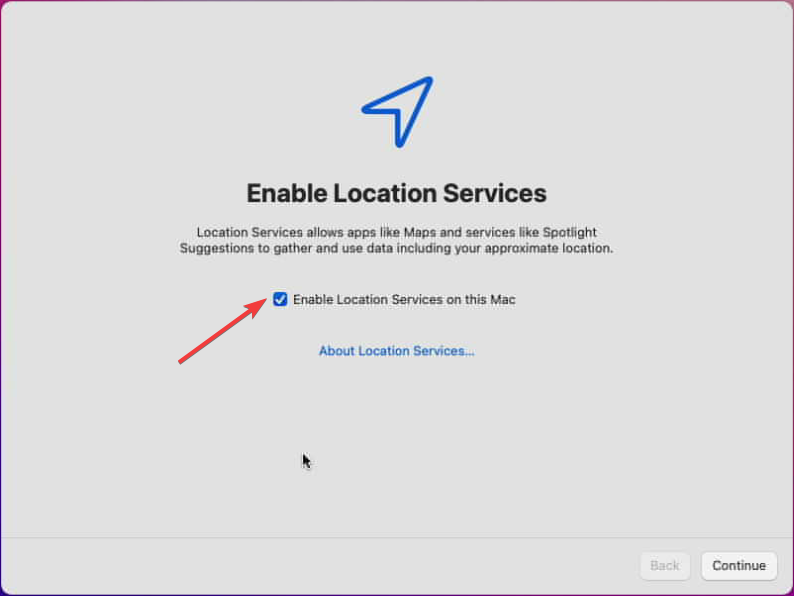
- Check the box to enable location services.
- Configure your screen time or set it up later.
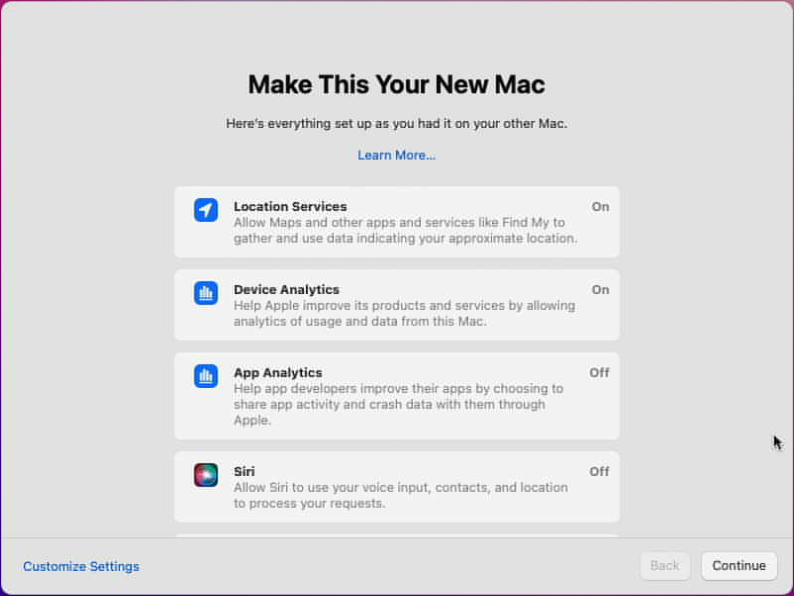
- You can customize the other Mac setting how you prefer or leave the defaults.
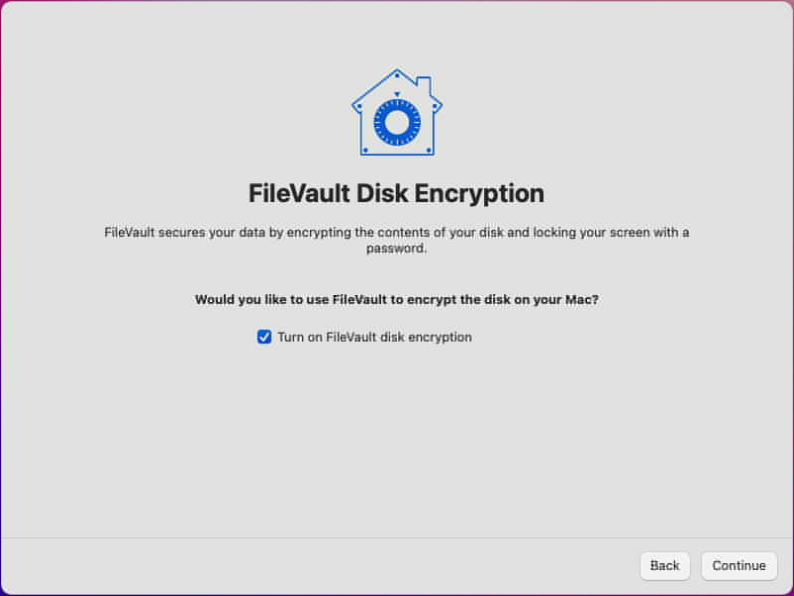
- Check the box to turn on FileVault disk encryption.
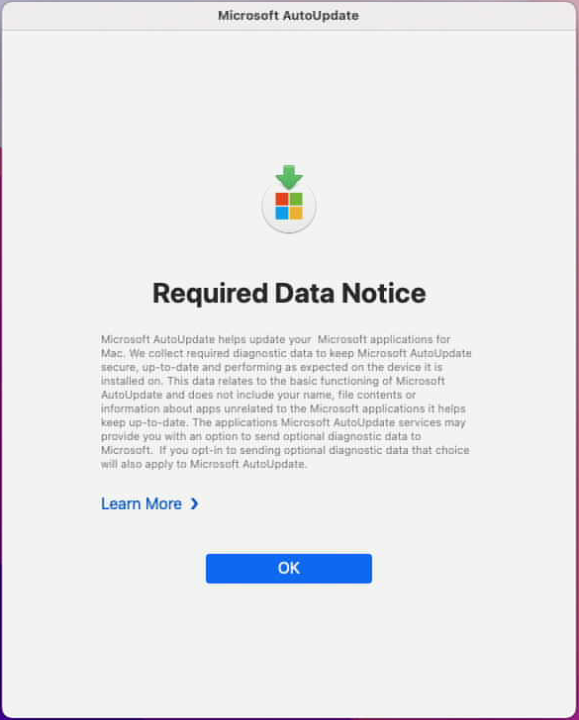
- Once you are logged into your Mac a "Microsoft AutoUpdate" window will pop up. You can close that manually or wait for it to close on its own.
- A window may ask you to write down your encryption key. The key is saved on our end and can be obtained by making a request to IT. There is no need for you to write down the key.
- Your Mac will start installing software in the background such as Chrome, Slack, Zoom, and Company Portal. This process usually takes 5-10 minutes.
- Once Chrome is installed you can login to Chrome using your email address and Google password (generally the same as your Microsoft password unless you set something different).
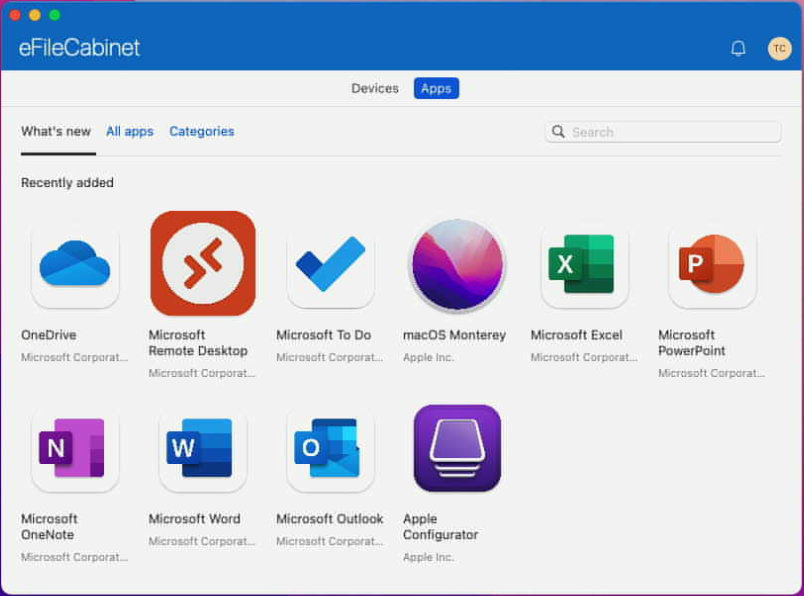
- Once Company Portal is installed you can login and install additional software if needed.
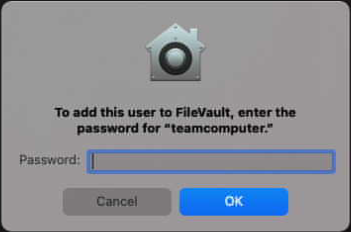
- Please note that turning on FileVault is an enforced security practice and if you did not previously turn it on, your Mac will ask you for your password to turn it on the next time you reboot your computer.
- Please navigate to training.revverdocs.com to start the “New Hire Onboarding - IT Information” training course. Login using your Microsoft credentials
- Click on “Start course” to start the course
- This course is required and will help you setup software on your computer.
- If you have any questions or concerns, you can submit a ticket to IT by going to ithelp.revverdocs.com or sending an email to ithelp@revverdocs.com
How to setup a new Windows computer
All Windows computers need to be logged into with your email address and Microsoft password. Most computer setup will be done automatically after you have logged in for the first time.
Important note: You must be connected to the Internet for the computer to register properly to your account. Do not attempt to setup a user without being connected to the internet.
Note: Because of our rebrand from eFileCabinet to Revver, you may see some wording or screenshots that still say eFileCabinet; we are still in the process of changing some names and links.
Instructions - Concise text version (skip this section if you want more detailed instructions):
- Setup your computer with your preferred settings.
- Connect to the Internet. If in the office, log into "Revver Personal" Wifi with the password "revverbyod"
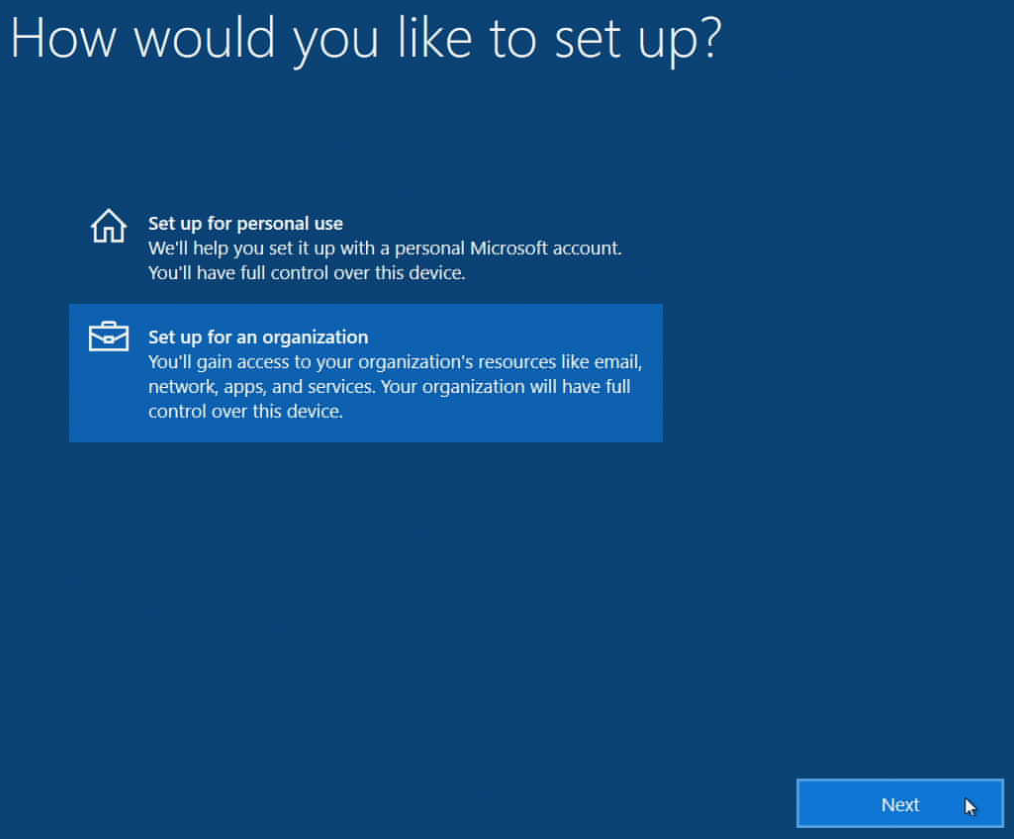
- Setup the computer for use in an "organization".
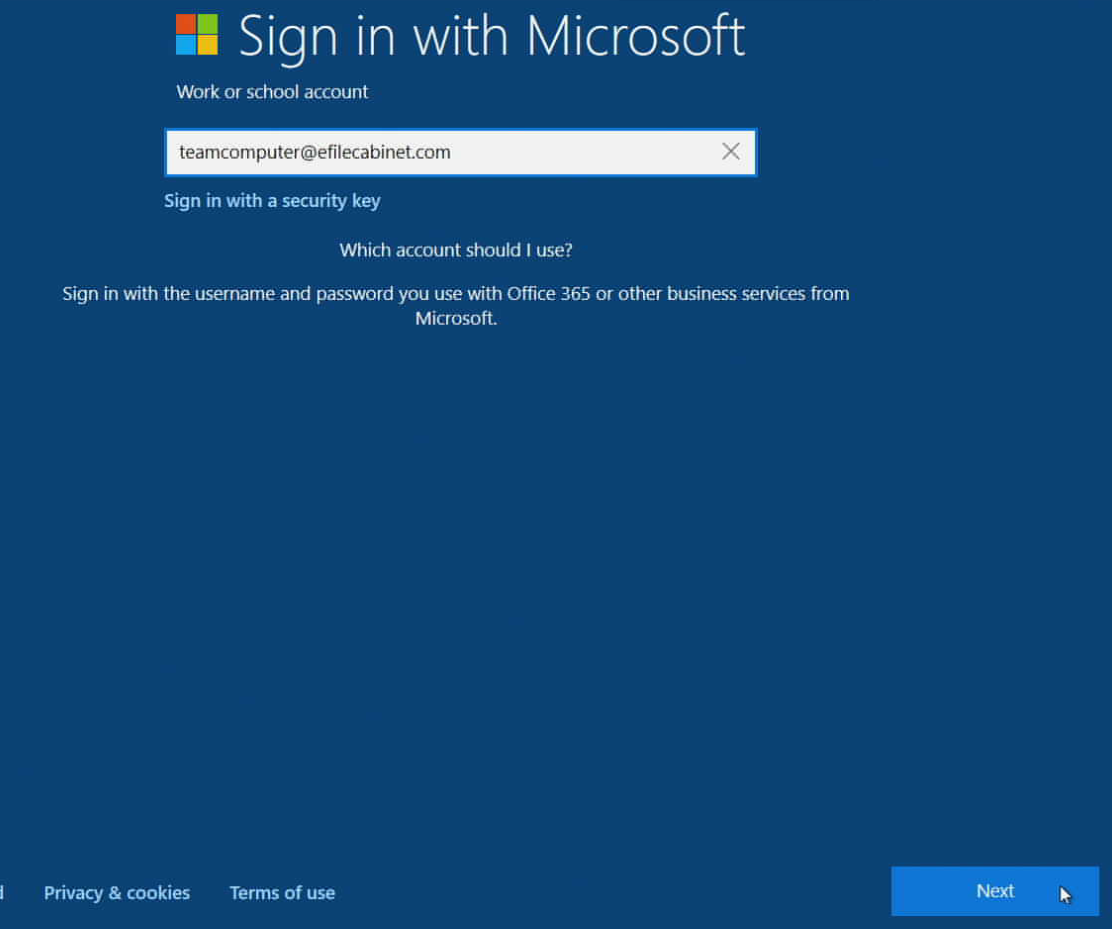
- Login with your email address and Microsoft password.
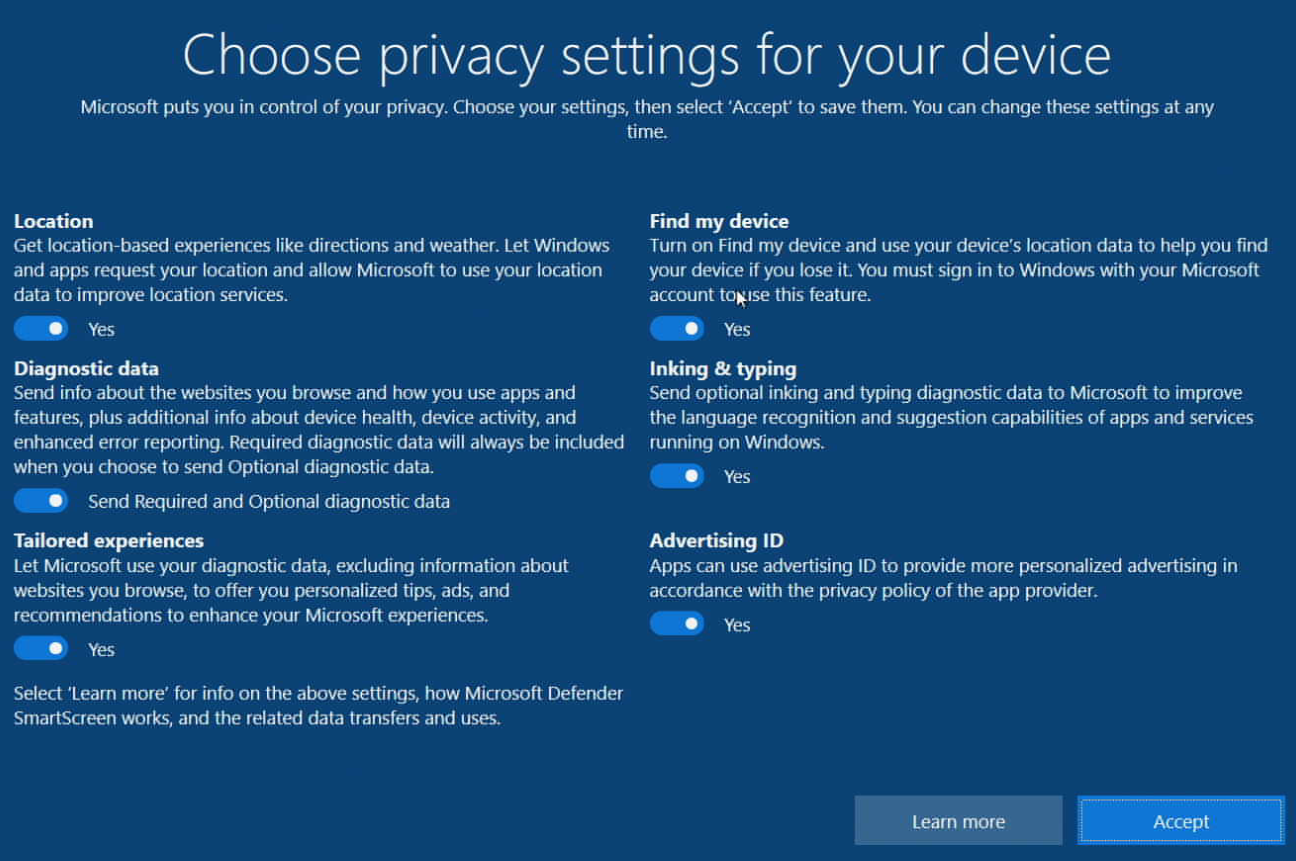
- Configure your preferred privacy settings or leave the defaults.
- Chrome, Slack, Zoom, and Company portal will be installed automatically. This usually takes 5-10 minutes but can be longer on slower Internet connections.
- Please navigate to training.revverdocs.com to start the “New Hire Onboarding - IT Information” training course. Login using your Microsoft credentials
- Click on “Start course” to start the course
- This course is required and will help you setup software on your computer.
Instructions - Detailed version with screenshots:
- Boot the computer
- Select the region, language, and keyboard you wish to use. You can skip the second keyboard layout.
- If you are in the office, connect to the "Revver Personal" Wifi connection with the password "revverbyod". If you are at home, connect to your preferred Wifi connection.
- Agree to the Windows License agreement
- When it asks you to setup for personal use or for an organization make sure you select "organization".
- Sign in with your email address and Microsoft password. If this is the first time using your password, it will have you create a new password. Make sure you set a password with 10 characters, an uppercase letter, a lowercase letter, and at least one number or symbol.
- When it asks you to choose your privacy settings you can customize the settings or keep the defaults.
- Setup your fingerprint if it gives you the option and create your Windows Hello PIN.
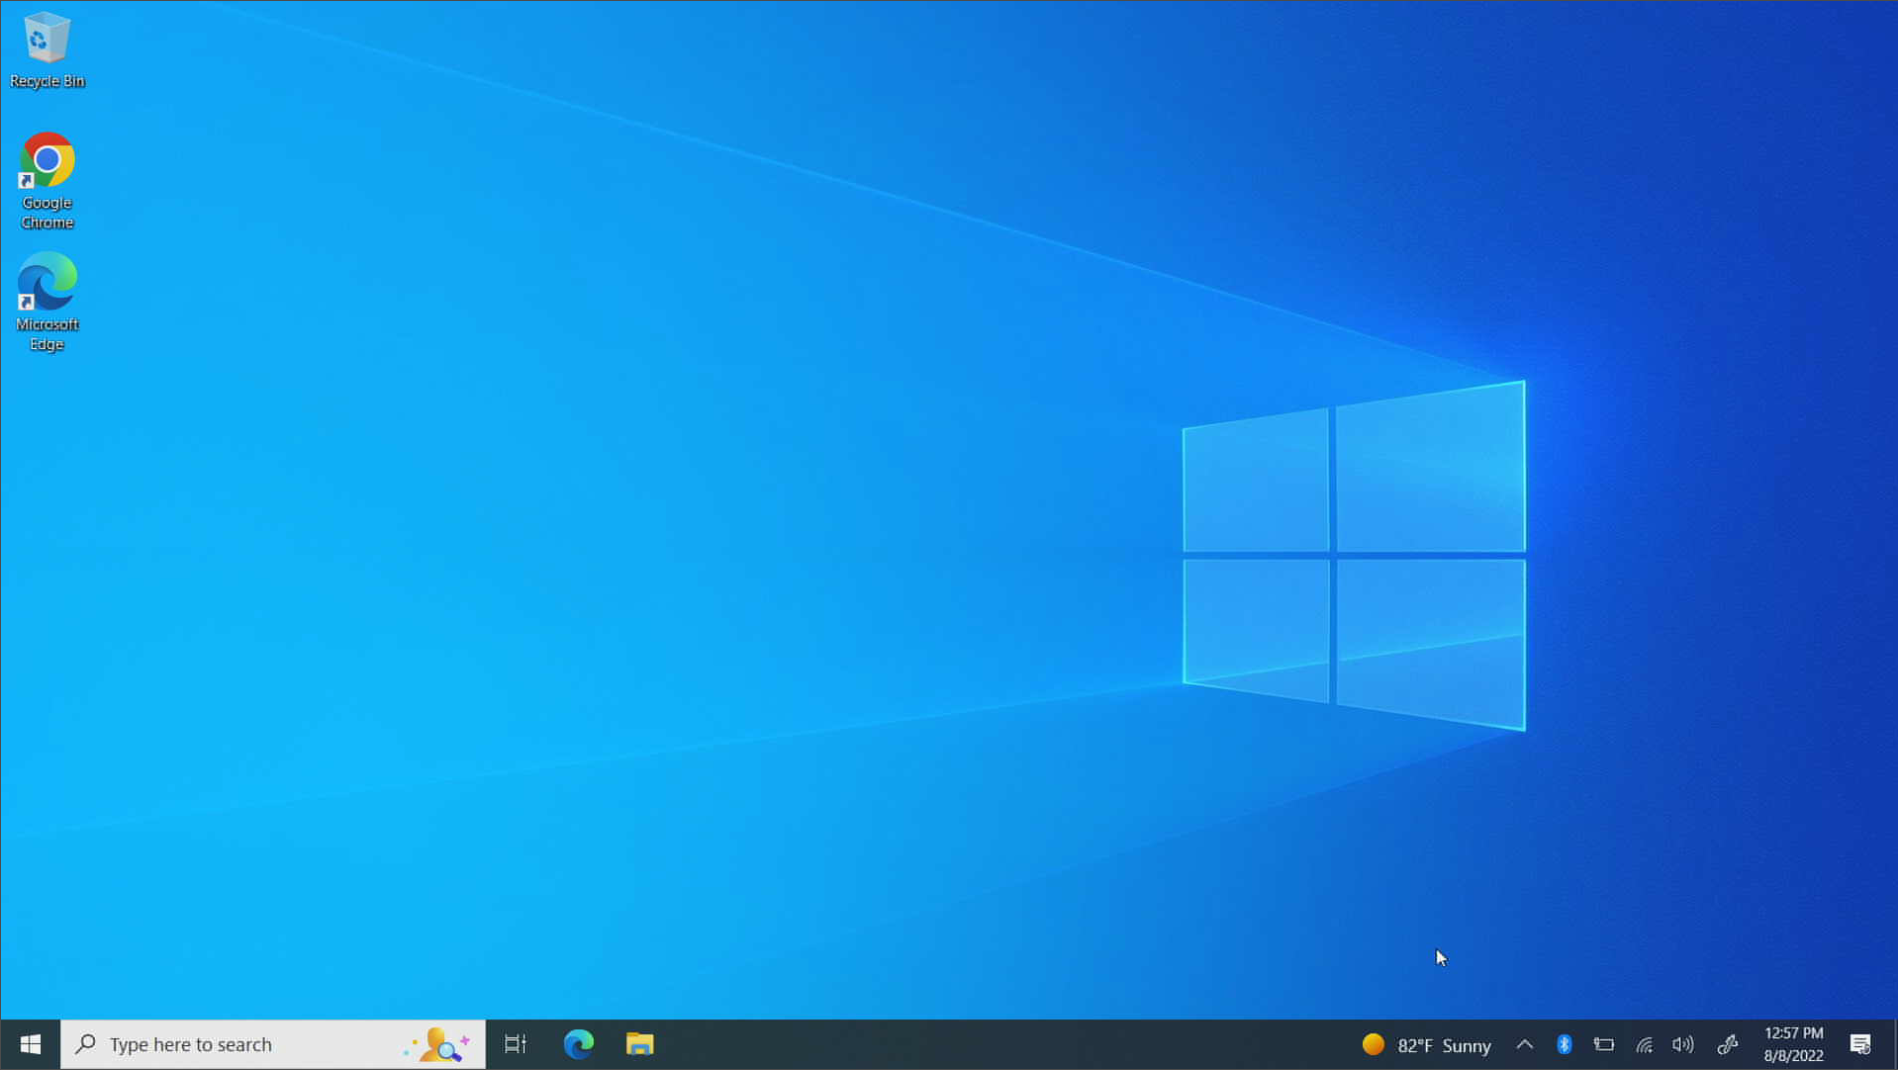
- After you have setup and verified your credentials, Windows will setup your user and show you a screen as shown below.
- Your computer will start installing software in the background such as Chrome, Slack, Zoom, and Company Portal. This process usually takes 5-10 minutes.
- Once Chrome is installed you can login to Chrome using your email address and Google password (generally the same as your Microsoft password unless you set something different).
- Once Company Portal is installed you can login and install additional software if needed.
- Please navigate to training.revverdocs.com to start the “New Hire Onboarding - IT Information” training course. Login using your Microsoft credentials
- Click on “Start course” to start the course
- This course is required and will help you setup software on your computer.
- If you have any questions or concerns, you can submit a ticket to IT by going to ithelp.revverdocs.com or sending an email to ithelp@revverdocs.com
Surplus Sale
General information
The standard life of a computer here at Revver is 3-4 years. Once a computer surpasses that age it is kept on as a team or testing computer or it is sold to employees as surplus.
Computers sold to employees are sold at a price generally quite lower than any online price listed for an equivalent used computer. These computers have been wiped and are ready for use.
The best way to get the most recent information on surplus sales is to join the #surplus_sale Slack channel and ask questions there. Very few announcements pertaining to the surplus sale will be made via email so if you think you are at all interested in participating in surplus sales please make sure to join the Slack channel.
How the surplus sale works
- Join the #surplus_sale Slack channel and wait for any announcements.
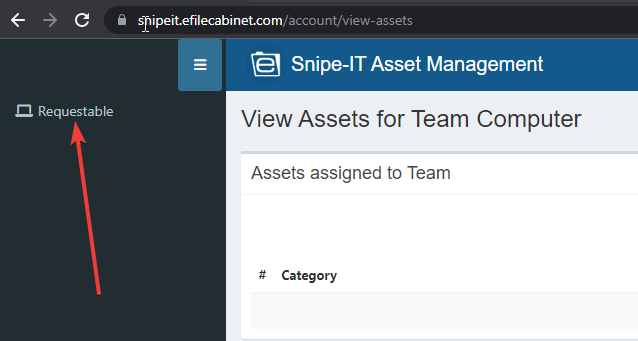
- Login to https://snipeit.revverdocs.com/account/requestable-assets to view what surplus is available (if after you login it does not take you to the previous link, you can click on the computer icon to the very left of the screen to view requestable items).

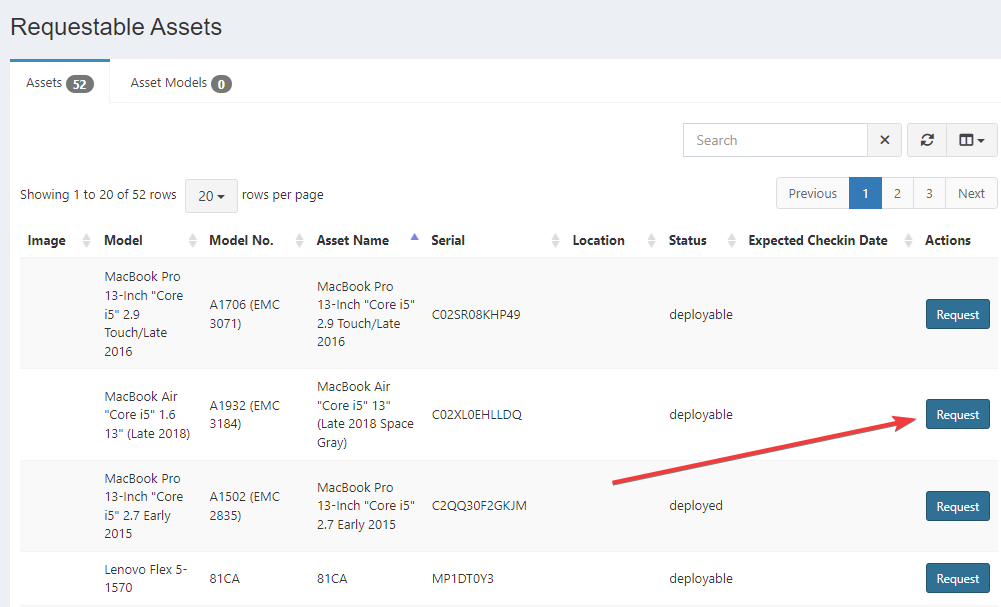
- The "Requestable" page will list each computer for sale with the specs, condition, and price.
- Once you have found the item you would like to request, you can click on the "Request" button.

- If you change your mind, you can cancel the request.

- Once you have made a request, a ticket is auto-generated and sent to IT. Once IT is ready to sell the item to you they will reach out and you can create an appointment to come into the office to purchase the item.
- We accept payments by check. Checks should be made out to "Revver."

Things to know before requesting an item for the surplus sale
- All items are sold "as is" and all sales are final. You can inspect the item before purchasing it. IT has done basic tests on each item being sold but they have not done extensive tests. It is up to you to determine if you are willing to accept the quality of the item being sold.
- Laptop batteries have not been tested. You should have the expectation that the battery capacity is not in peak condition.
- Laptop battery chargers will be given out with laptops as available. If a charger is no longer available with the purchase of a laptop, a link will be provided for you so you can purchase a third party charger and the overall price of the laptop will be reduced by $10.
- You are only allowed to purchase a single item at a time. Once you have completed the purchase of an item, you can make another request.
- Requests will be fulfilled in the order that they are made.
- We will not be shipping surplus sale items. All purchases must be picked up in the office.
All questions should be sent in the @surplus_sale Slack channel or you can email ithelp@revverdocs.com
How to join the Azure AD domain and delete the local user
Join Azure Active Directory
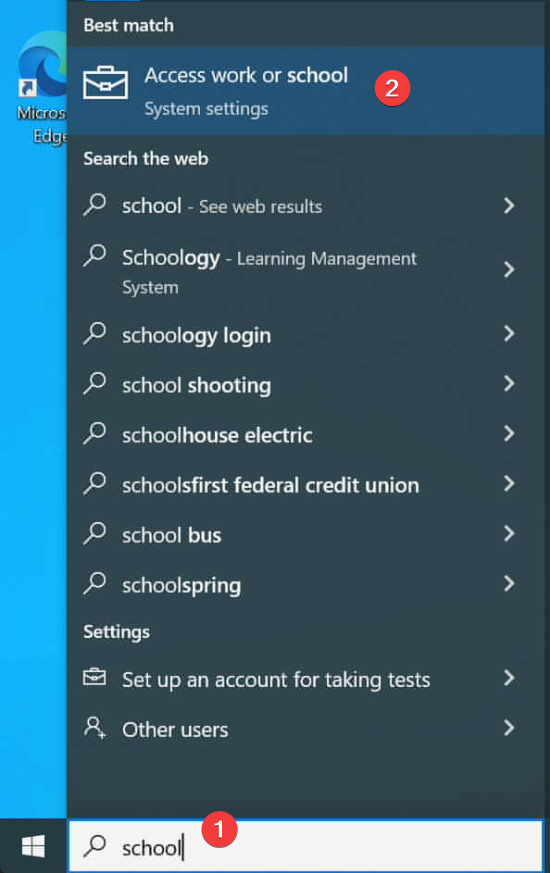
- In the Window search bar type in "school" then click on the option to "Access work or school"
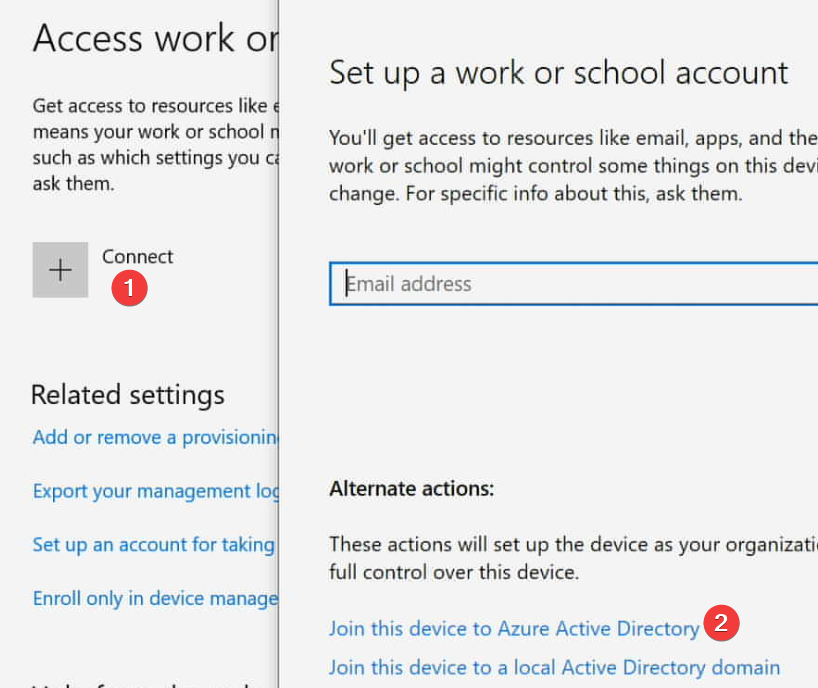
- Press the "Connect" link then click on the "Join this device to Azure Active Directory" link
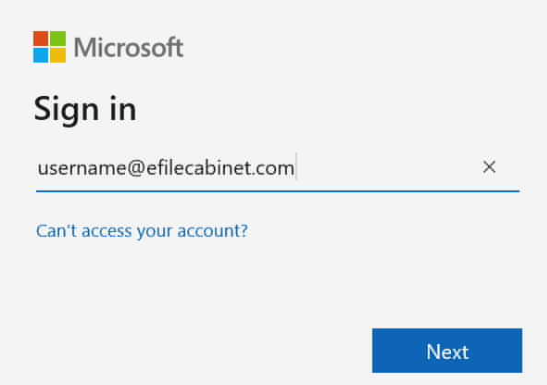
- Enter your Microsoft username and password
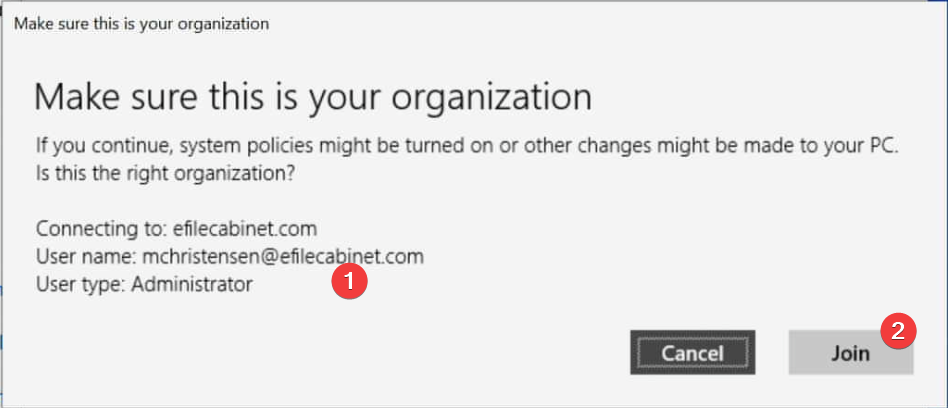
- A popup will show up. Verify your username is correct then click "Join"
- Click "Done" then restart your computer.
Delete the local user
- When you get to the login screen select "Other user"
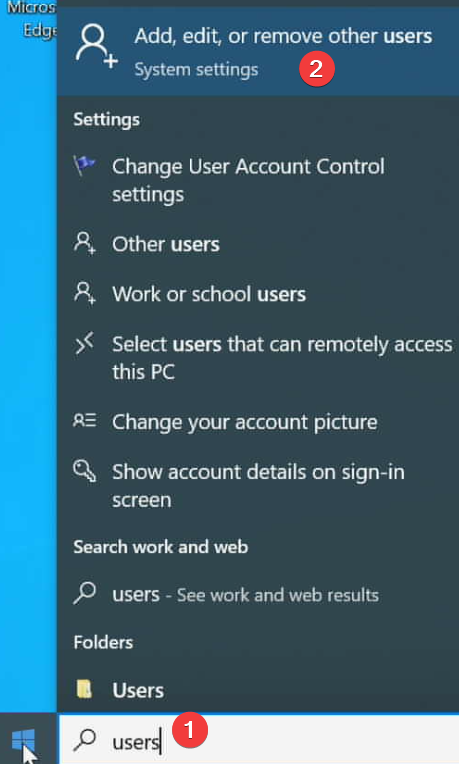
- In the Windows search bar type in "users" then click on "Add, edit, or remove other users"
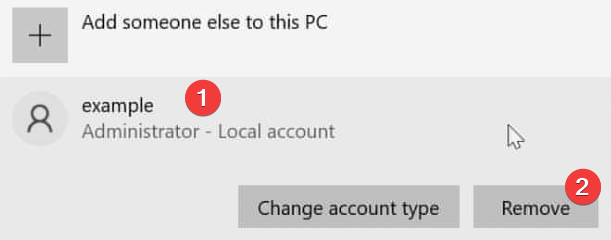
- Click on the username you wish to remove then click on the "Remove" button
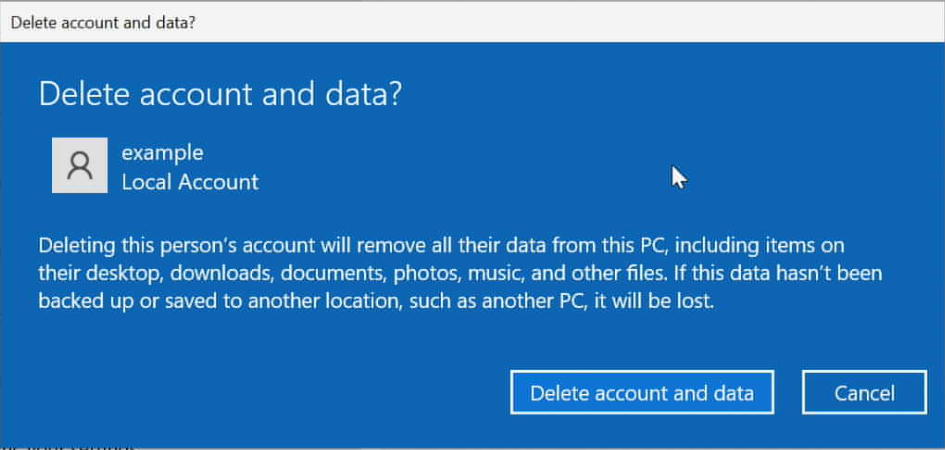
- Click on "Delete account and data"

How to setup a new Windows computer ("Autopilot Reset")
All Windows computers just need to be logged into with your email address and Microsoft password. Most computer setup will be done automatically.
Important note: You must be connected to the Internet for the computer to allow you to login to your account.
Instructions - Concise text version:
- Turn on your computer and enter your preferred language and keyboard settings.
- Login with your Microsoft username and password. You should have received this already. If not, do not proceed until you have this information.
- Continue with Windows setup by setting up your Windows Hello and PIN.
Instructions - Detailed version with screenshots:
- Boot the computer
- Select the region, language, and keyboard you wish to use. You can skip the second keyboard layout.
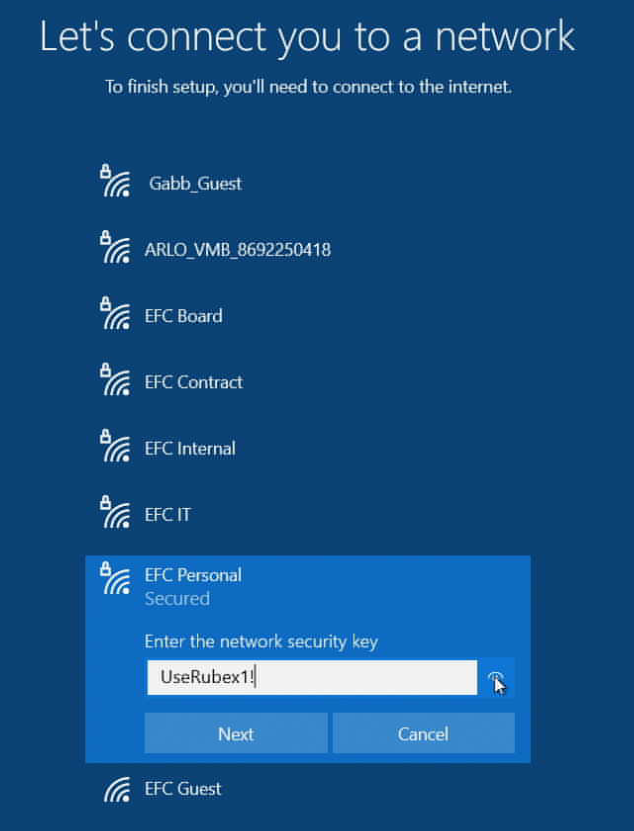
- If you are in the office, connect to the "EFC Personal" Wifi connection with the password "UseRubex1!". If you are at home, connect to your preferred Wifi connection.
- After you connect to Wifi you may be taken to an Internet agreement. Click on the "Continue to the Internet" button.

- Agree to the Windows License agreement
- Sign in with your email address and Microsoft password. If this is the first time using your password, it will have you create a new password. Make sure you set a password with 10 characters, an uppercase letter, a lowercase letter, and at least one number or symbol.
- When it asks you to choose your privacy settings you can customize the settings or keep the defaults.
- Setup your fingerprint if it gives you the option and create your Windows Hello PIN.
- After you have setup and verified your credentials, Windows will setup your user and show you a screen as shown below.
- Your computer will start installing software in the background such as Chrome, Slack, Zoom, and Company Portal. This process usually takes 5-10 minutes.
- Once Chrome is installed you can login to Chrome using your email address and Google password (generally the same as your Microsoft password unless you set something different).
- Once Company Portal is installed you can login and install additional software if needed.
- Please navigate to training.efilecabinet.com to start the “New Hire Onboarding - IT Information” training course. Login using your Microsoft credentials
- Click on “Start course” to start the course
- This course is required and will help you setup software on your computer.
- If you have any questions or concerns, you can submit a ticket to IT by going to ithelp.efilecabinet.com or sending an email to ithelp@efilecabinet.com
Shared Dev Mac for Remote Access
There is a Mac Mini setup in the IT area that can be accessed remotely.
If you are not in the office make sure you are connected to VPN before trying to access the Mac mini.
The login credentials for this computer are in LastPass. You can search for "Mac Mini for Remote Dev Access" to find it.
If that has not already been shared with you please submit a ticket requesting access at ithelp.efilecabinet.com
Phone System
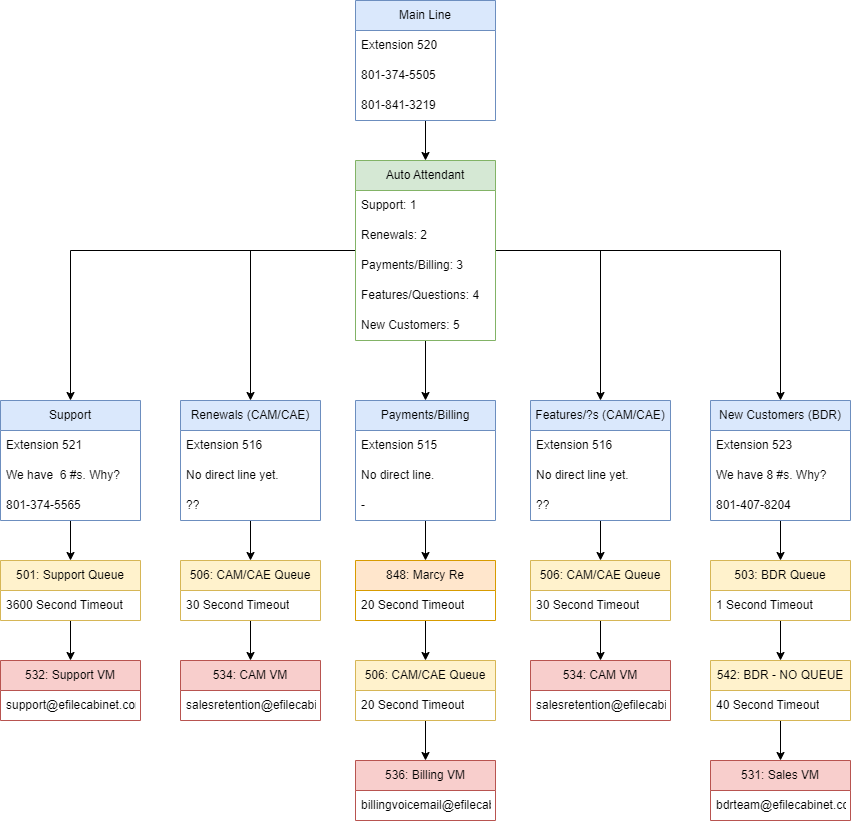
Our Current Phone System / Dial Plan
Main Dial Plan
Phone Hours
Working Hours:
Support: Monday - ??
Sales: Monday - ??
Listed Hours:
Support: Monday - Friday 7:00am - 6:00pm
Sales: Monday - Friday 7:00am - 6:00pm
Phone path during non-working but listed working hours: ??
Questions:
- What do we want our spoken times to be for departments?
- How do we want to list toll free phone numbers? Who else needs to be involved?
- What number do we want our auto attendant to start on?
AV (Audio / Video)
AV Setup for Company Meetings
Items Needed
- Item / Location
- Black IT cart with power outlets / Server closet
- White table / Town Hall area
- Meeting Audio Computer / Drawer in IT area
- Items for this: charger, HDMI cable, USB-C hub, dummy 3.5mm jack, headphones, clicker
- Items for this: charger, HDMI cable, USB-C hub, dummy 3.5mm jack, headphones, clicker
- Jabra Pancast camera and speaker bar / table in the town hall area || Alternatively McKay has a way better camera that he sometimes brings
- Maono Mixer / White cabinets in IT room
- Geardon handheld mics (optional) / White cabinets in IT room
- Lapel mics / Media room
Checklist
- Setup the cart and table in the back of the auditorium. Plug in the cart to the electrical outlet on the floor.
- Plug in the computer and Jabra to the outlets in the cart. Place them on the white table.
- Setup the Mixer on the white table and plug it in to the computer.
- Turn on the mixer by pressing and holding the power button
- Get the lapel mics out of the boxes. Put new batteries in them if they are low. Turn them on then plug in the XLR cable to the mixer and to the mic receivers.
- Computer setup
- Login to the computer as your user (do this beforehand if you have not already so that your user account is already created on the computer.
- Login to the auditorium Wifi and make sure that the option to auto-connect is ON (make sure all other networks have this option turned off)
- SSID: Auditorium Guest Wifi
- Password: GuestAccess2021
- NOTE* Being connected to non-auditorium Wifi is the cause of 95% of broadcasting issues. Do not neglect to connect to auditorium Wifi
- You may want to sign into calendar.google.com to make it easy to open your calendar event
- Join the Zoom meeting (or start a new one for testing)
- Zoom Setup (on computer)
- Camera - Set this to the Jabra or McKay's camera
- Speaker - If you need to hear people on the other end, set this to the Jabra. If you don't want to hear people on the other end, set this to the computer and plug in the dummy 3.5mm plug.
- Audio control (Maono mixer)
- Set the volume sliders to about 80% - Move it to 0% to mute the speaker (or press the mute button)
- Set the Main mix out to 12:00 - 4:00
- Video Control (on computer)
- Prop up the Jabra on boxes or something so you have a good view.
- Open the Jabra software and turn off auto tracking and zoom to the stage
- Zoom meeting monitoring (on separate computer)
- Record the Zoom meeting if you have not started already
- Connect to the Zoom meeting on your personal computer and wear headphones so you can listen to the audio and make sure it sounds good. Make sure that you are muted and your camera is off.
- Speaker/Presenter help
- Make sure that the speaker is aware that you will edit volume levels and that they do not need to mute themselves.
- Instruct the speaker how and where to wear the lapel mic if they don't already know.
- Make sure the speaker knows how to operate their computer and plug in their computer to the projector. You may have to supply a USB-C hub.
- Give the speaker a clicker if they need one.
Zoom Rooms
Company Meeting Area - Zoom Room
Company Meeting Area
The company meeting area (north end of the 2nd floor) has been turned into a Zoom room to simplify the process of holding video conferencing meetings in that area.
To use this room, please schedule the room in the calendar just like you would any other Zoom room and make sure that you add video conferencing. Use the remote controls to bring the projector screen down and turn the projector on.
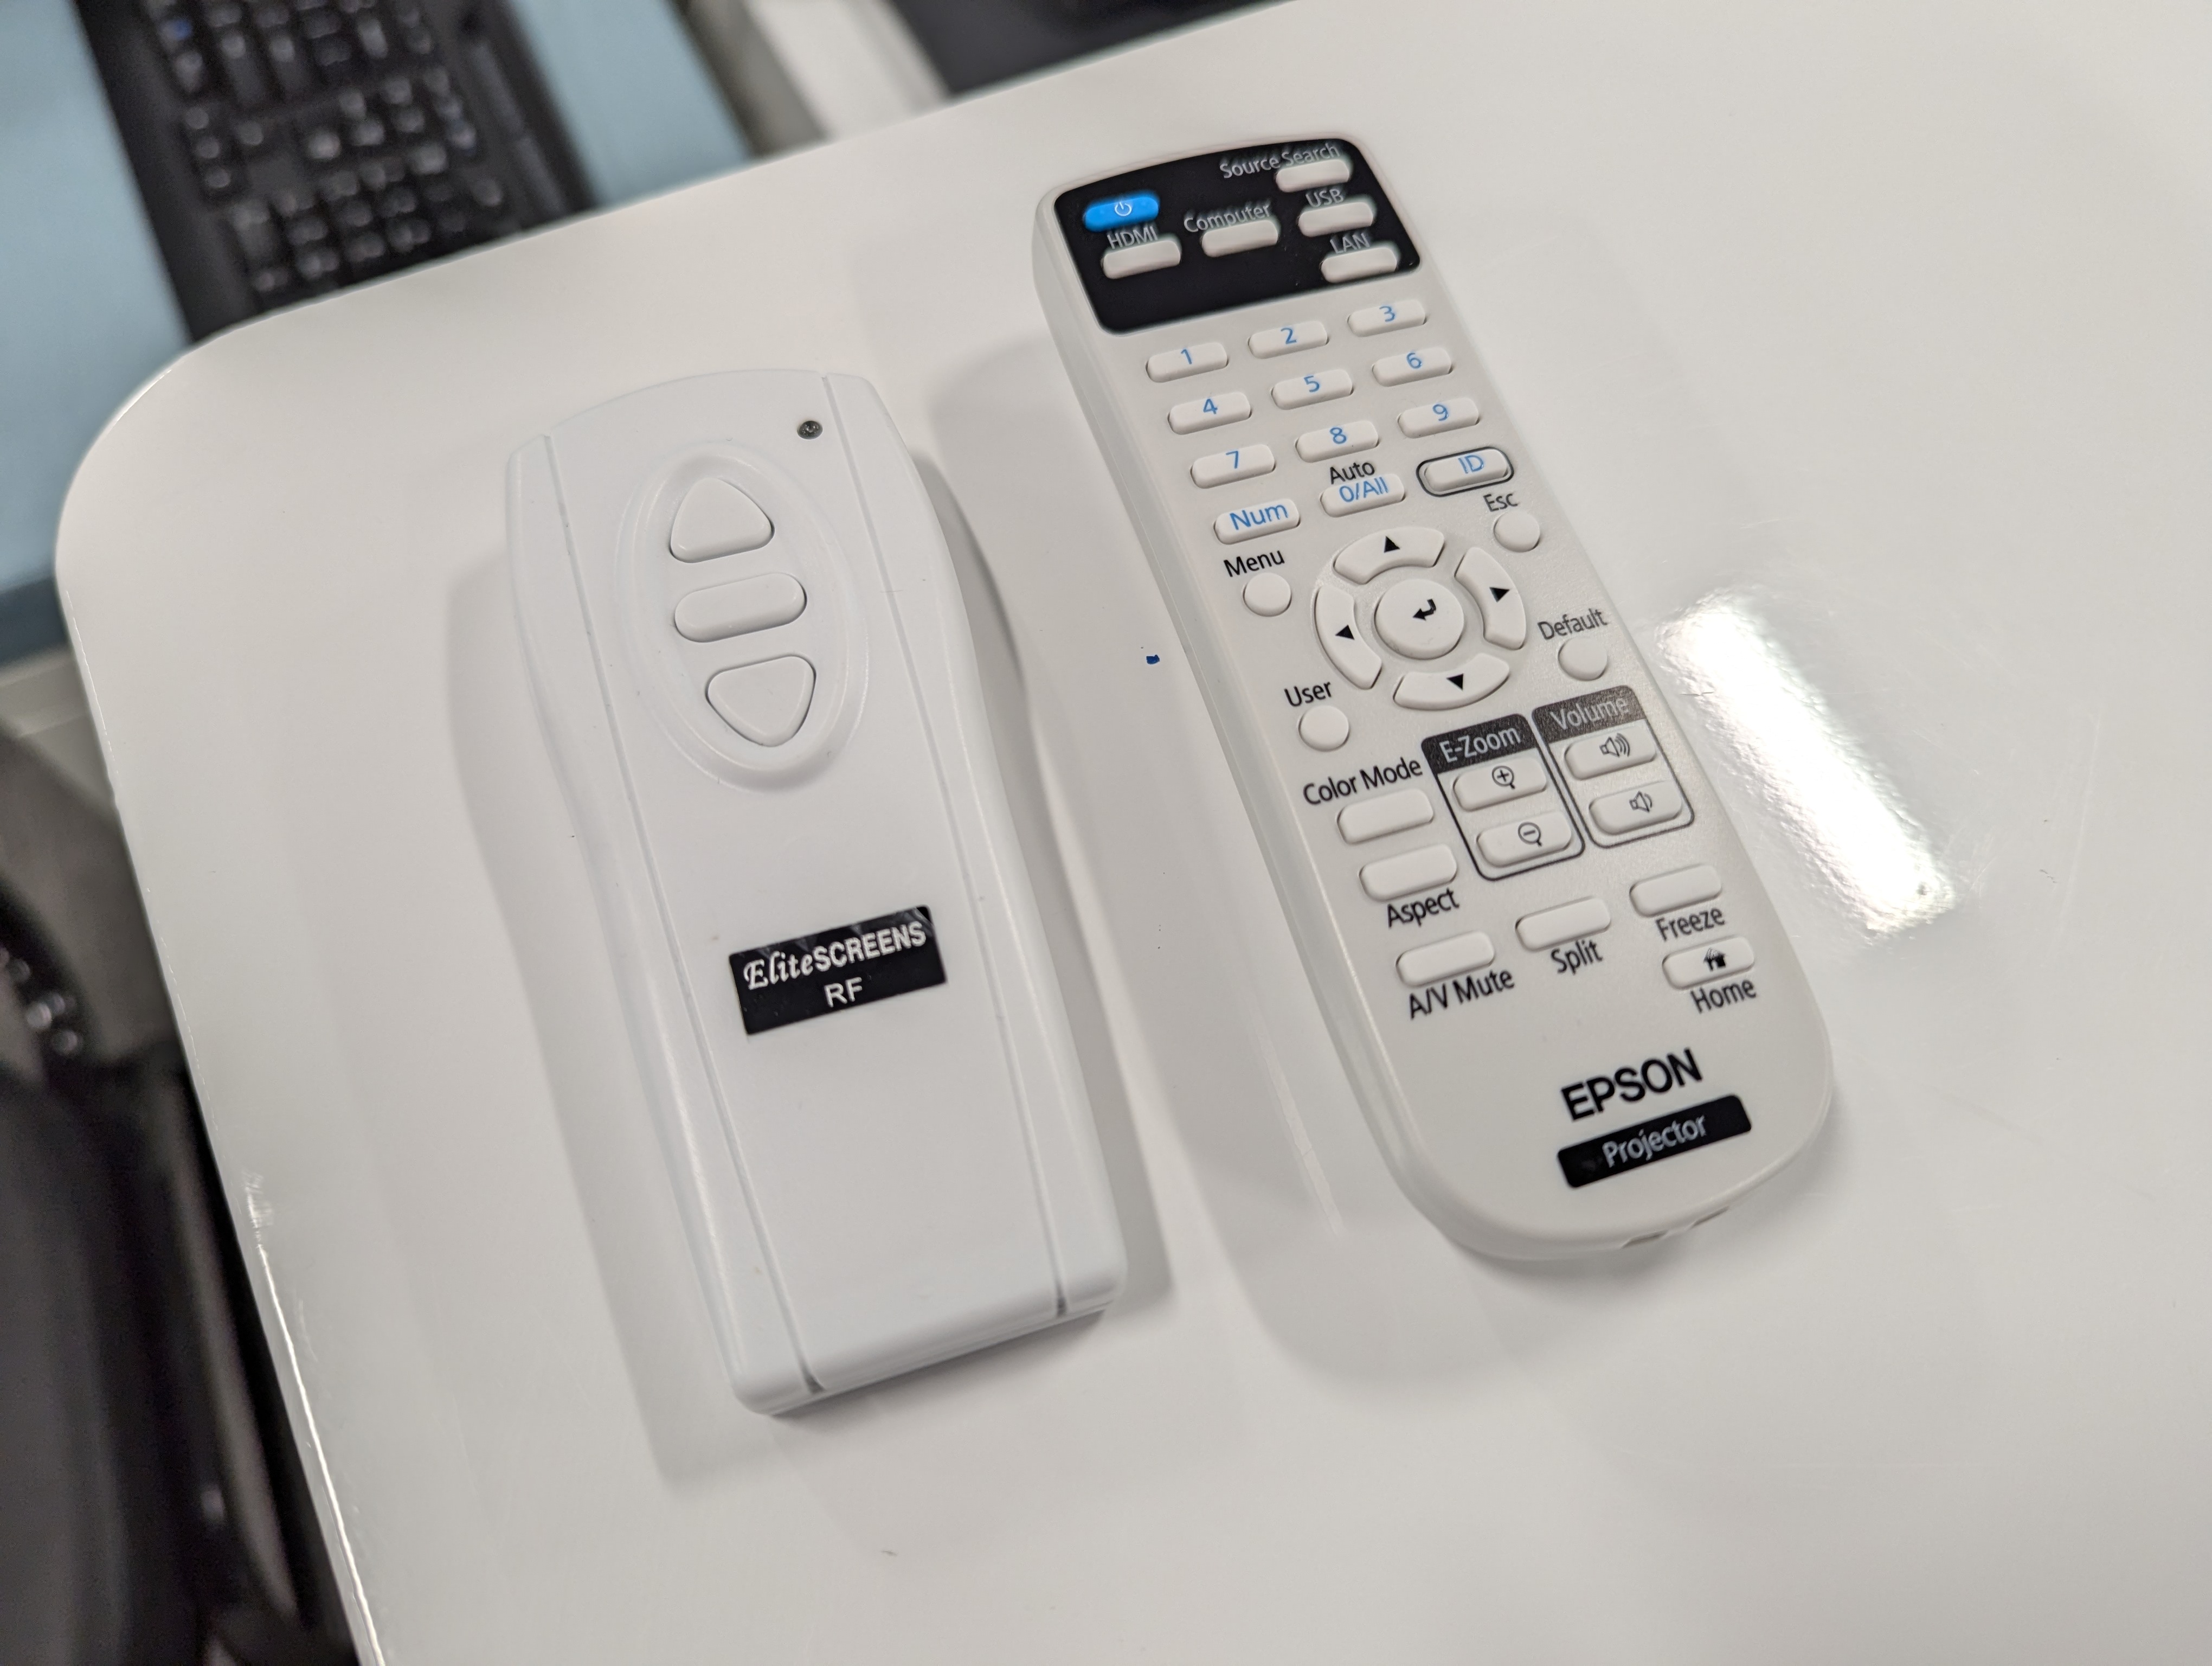
Use the tablet on top of the computer to start the meeting.

Things to be aware of
- You can schedule the Company Meeting Area by creating a calendar event and selecting "Calendar Meeting Area".
- By default, participants join muted and with the video off.
- You will need your own computer to share your screen. Do not unmute your computer's mic or you will get feedback.
- The camera can be controlled with the tablet. You can zoom in or out and adjust where the camera is pointing.
- Please remember to turn off the projector when you are finished (press the power button twice to turn it off).