General Info
- Who to contact for all the things!
- Wi-Fi Information (Revver and Auditorium Wifi)
- Welcome!
- IT Roadmap
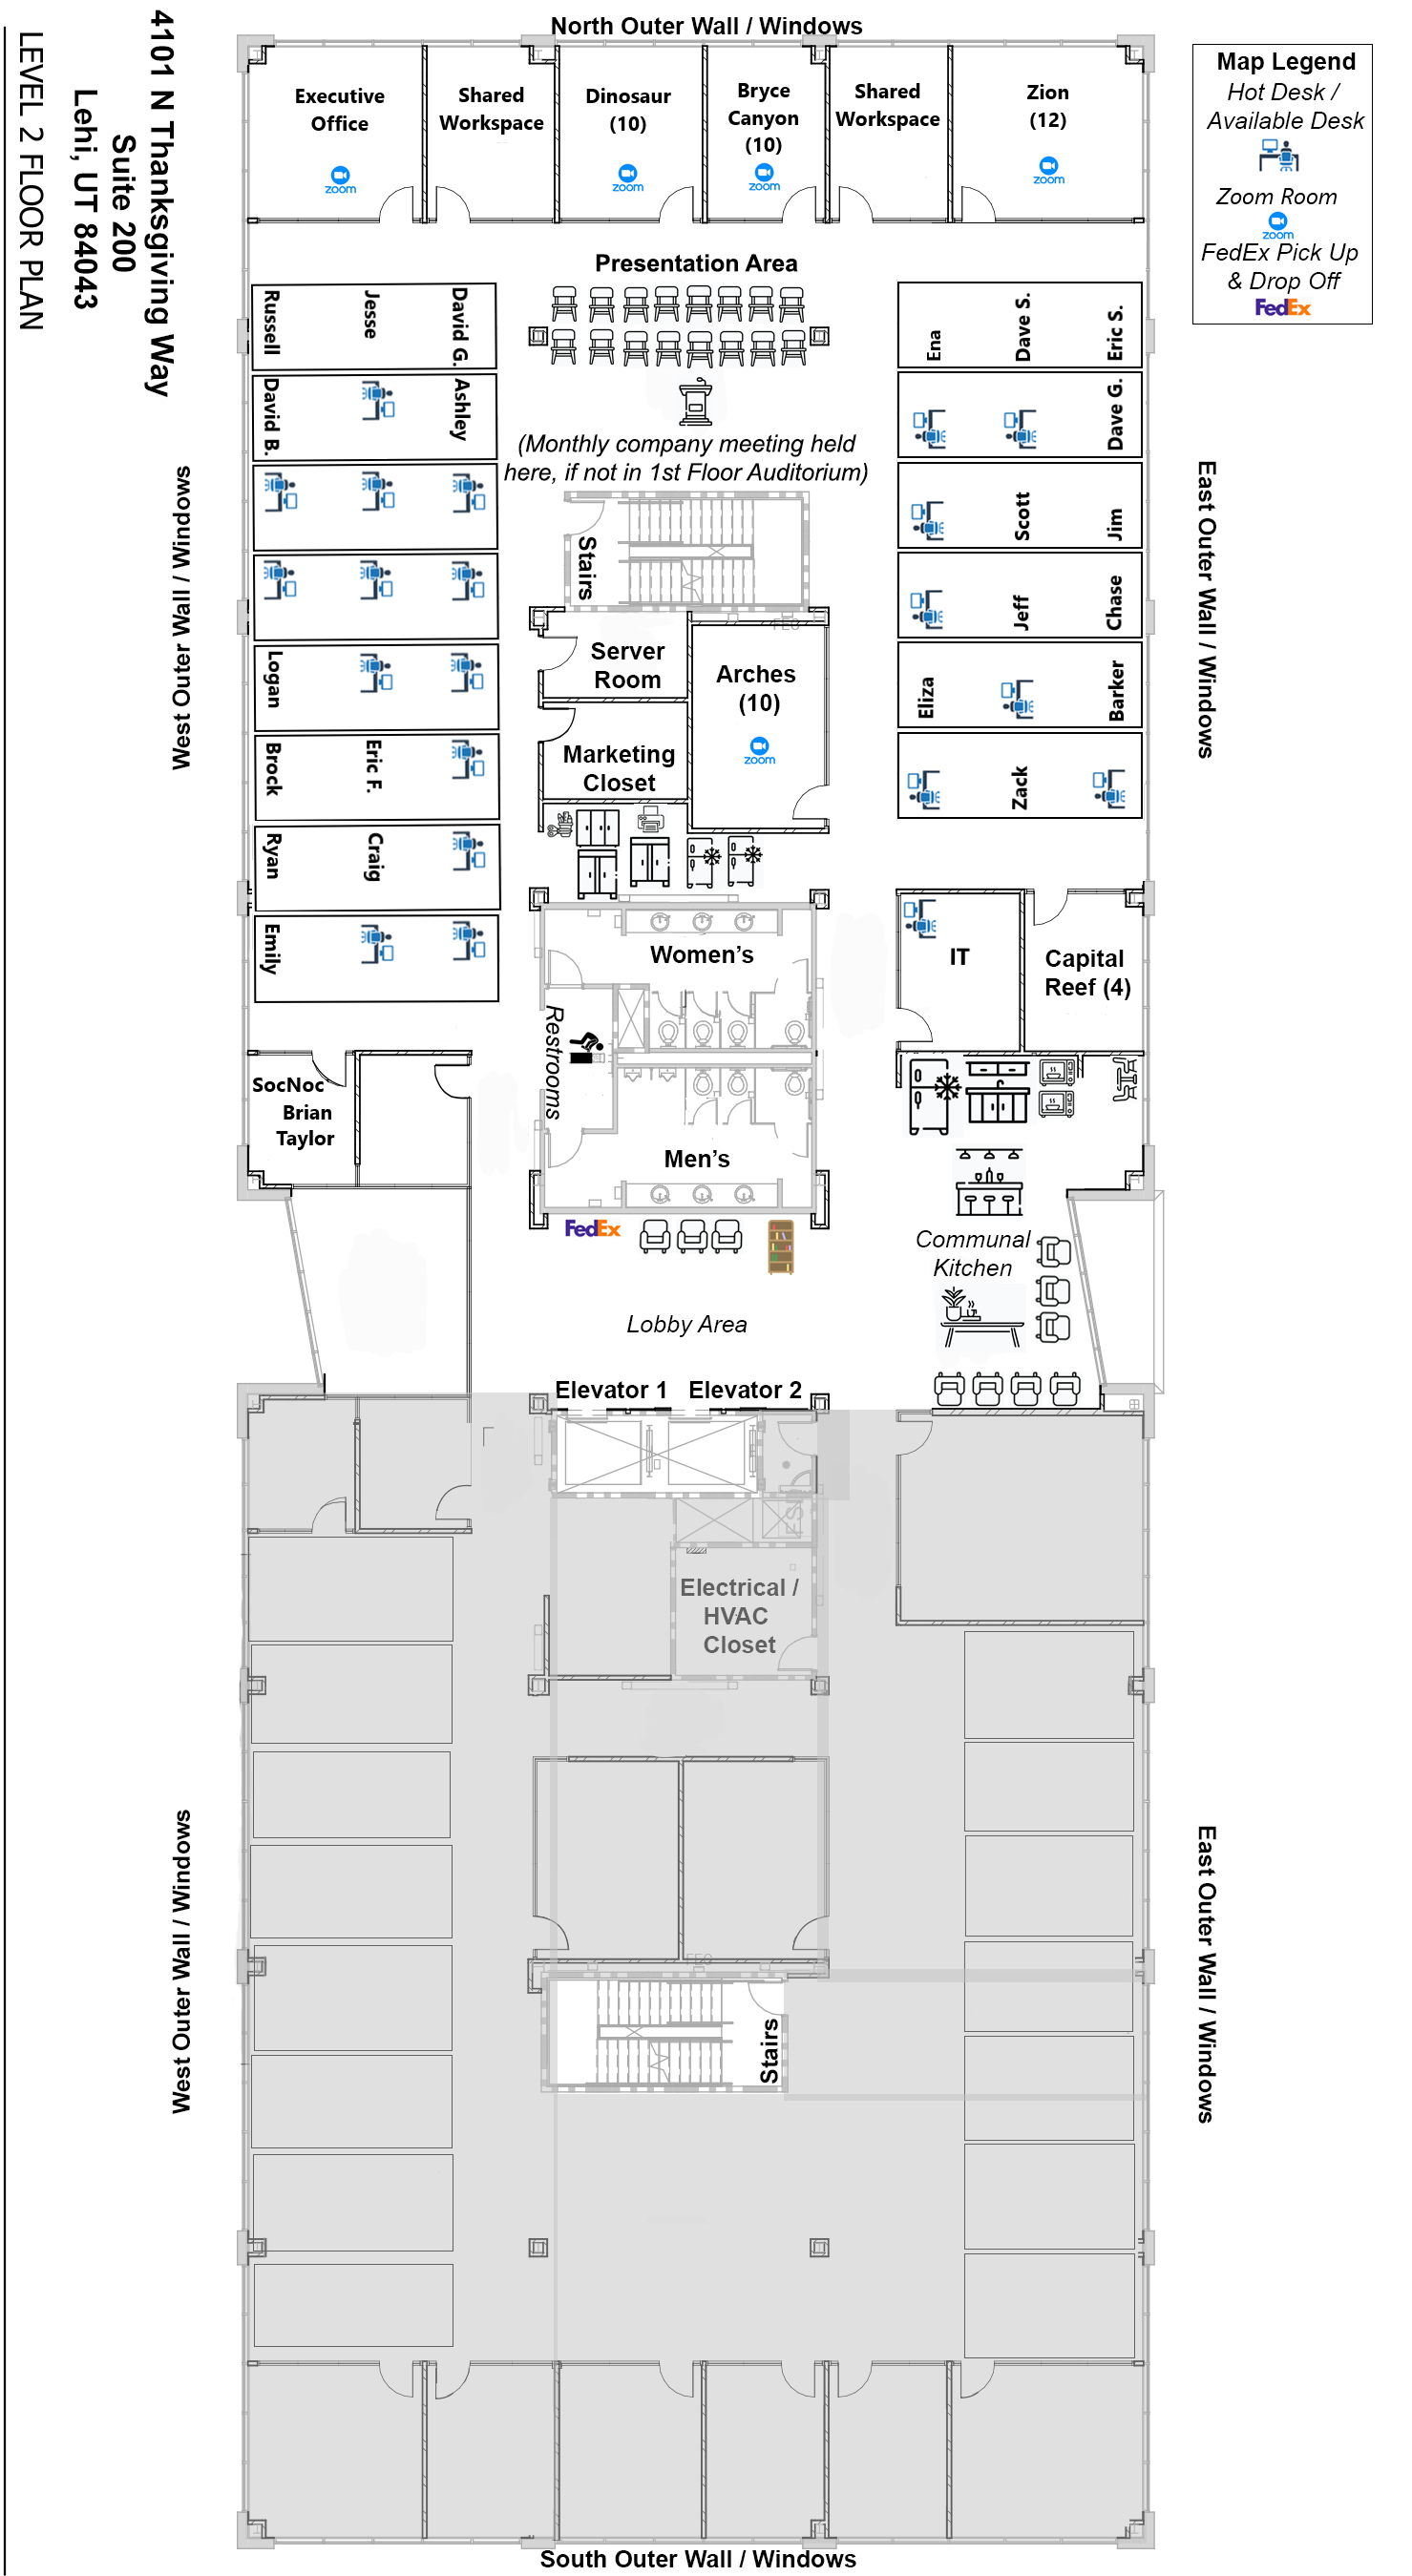
- Revver Floorplan / Map 10.1.2024
- Revver Internal Documentation
- IT Policies
- Hardware policy for new and current employees
- Hardware Policy for exiting employees
- USB Data Transfer Disablement Policy / Removeable Media Policies
- Exiting Employees
- Tips and Tricks
- New Hire and Exit Procedures and Training
- Building Information
Who to contact for all the things!
This is information for how to access certain services or software
6sense (ABM Platform)
mderossi@revverdocs.com is the admin for this.
Adobe
If you need access to an Adobe product you can submit a ticket by going to ithelp.efilecabinet.com or emailing ithelp@efilecabinet.com
Apollo
Please send a message in the #salesforce_support Slack channel for access or help with this.
AppInsights
If you need access to AppInsights, please submit a ticket by going to ithelp.efilecabinet.com or emailing ithelp@efilecabinet.com
Avalara
Please send a message in the #salesforce_support Slack channel for access or help with this.
Azure AD / Microsoft
We use Azure AD for our main directory. Every employee should have an account in Azure AD. These Microsoft credentials can be used to login to many services here at eFileCabinet.
If you need a password reset or anything changed with your account, please email ithelp@efilecabinet.com or submit a ticket at ithelp.efilecabinet.com
Azure DevOps
If you access to Azure DevOps, please email ithelp@efilecabinet.com or submit a ticket at ithelp.efilecabinet.com
Your ticket will be routed to our CloudOps team. In your ticket please specify what you need access to any why.
Billing / Credit Cards
For company credit cards and sending in expense reimbursement requests please email expenses@efilecabinet.com
Invoices or bills can go to accountspayable@efilecabinet.com
BookStack (internal.efilecabinet.com)
If you need to make changes to or need help with this site (BookStack) you can submit a ticket by going to ithelp.efilecabinet.com or emailing ithelp@efilecabinet.com
ChatBot
To make changes to ChatBot you will need to become an admin. To become an admin please submit a ticket to ithelp.efilecabinet.com and request admin access for ChatBot.
chatbotintegration@efilecabinet.com is the ChatBot owner and is managed by IT
Chili Piper
Please send a message in the #salesforce_support Slack channel for access or help with this.
Computer software or hardware
IT sets up the computer with basic software and controls the software available in "Company Portal."
For help with your computer or software you can submit a ticket by going to ithelp.efilecabinet.com or emailing ithelp@efilecabinet.com
Docusign
If you have a question about Docusign, please go to the Slack channel #salesforce_support. When you create a ticket select the "DS" option.
Please contact someone on the marketing team if you have questions about Facebook.
Gong
Send a message in the #salesforce_support Slack channel to let the team know you need access to Gong.
Google Analytics
97th Floor currently helps us manage this. You can reach out to mderossi@revverdocs.com if you have questions related to Google Analytics.
Google / Gmail
If you need to make changes to or need help with Google or Gmail you can submit a ticket by going to ithelp.efilecabinet.com or emailing ithelp@efilecabinet.com
Lastpass
If you need to make changes to or need help with Lastpass you can submit a ticket by going to ithelp.efilecabinet.com or emailing ithelp@efilecabinet.com
Please contact someone on the marketing team if you have questions about LinkedIn.
Marketo
Please contact Whitney.
For help with the Marketo integration please send a message in the #salesforce_support Slack channel.
Office 365 Desktop
Everyone here at eFileCabinet has access to Office 365 online. To access it, please sign on to https://www.office.com/
Once you are logged into office.com you can create new Word, Excel, or PowerPoint documents. Here are detailed instructions for doing this.
Once you have created your document, you can store it in Rubex and edit it using the Microsoft Office Addin for Rubex.
Requesting Microsoft Office Desktop Apps
If your position requires you to have Office Desktop Apps, you can request a license from IT by following this procedure:
- Submit a ticket at https://ithelp.efilecabinet.com
- In your ticket, please set the subject as “Request for Microsoft Office Desktop Apps”
- In the body of the ticket please explain the task that you need to perform in the desktop app that cannot be performed in the online version.
- Once we get manager approval, we will submit the request for approval.
- If your request is approved, we will activate your license and you can download the software by logging into office.com with your existing account.
Outreach
Please send a message in the #salesforce_support Slack channel for access or help with this.
OwnBackup
Please send a message in the #salesforce_support Slack channel for access or help with this.
Phone System / Jive
If you need to make changes to or need help with the phone system you can submit a ticket by going to ithelp.efilecabinet.com or emailing ithelp@efilecabinet.com
Rubex
If you need to make changes to or need help with your personal Rubex account you can submit a ticket by going to ithelp.efilecabinet.com or emailing ithelp@efilecabinet.com
If you need to make changes to or need help with corporate Rubex account, please contact People & Places by emailing humanresources@efilecabinet.com
Salesforce
Please note that Salesforce is logged in using your Azure AD (Microsoft) credentials. If you need help with that password you can contact IT to give you a temp password by submitting a ticket at ithelp.efilecabinet.com or emailing ithelp@efilecabinet.com.
For other issues with Salesforce including CPQ and billing, send a message to the #salesforce_support Slack channel to receive support.
Security
If you have a question in regards to security please email security@efilecabinet.com. If you are reporting a phishing email or smishing text, please include a screenshot.
Slack
IT admins Slack. If you need to make changes with Slack or need help with Slack you can submit a ticket by going to ithelp.efilecabinet.com or emailing ithelp@efilecabinet.com
If you would like to install a Slack app, please submit a ticket and state the reason for needing the Slack app.
Smartsheet
If you need access or information for Smartsheet, please contact Kelsee Beck (kbeck@revverdocs.com).
TalentLMS (training.efilecabinet.com)
Our internal training is done using TalentLMS.
If you need to make changes to or need help with TalentLMS you can submit a ticket by going to ithelp.efilecabinet.com or emailing ithelp@efilecabinet.com
Totango
Please contact Mike Edlefsen.
For help with the Marketo integration please send a message in the #salesforce_support Slack channel.
Visual Studio
If you need access to Visual Studio or need to edit your account in some way, please send an email to ithelp@revverdocs.com
(Note for IT: Management is found at https://manage.visualstudio.com/)
Wordpress
mgarn@revverdocs.com and brice@revverdocs.com are the admins for Wordpress.
Zoom
If you need to make changes to or need help with the Zoom you can submit a ticket by going to ithelp.efilecabinet.com or emailing ithelp@efilecabinet.com
ZoomInfo
Please send a message in the #salesforce_support Slack channel for access or help with this.
Wi-Fi Information (Revver and Auditorium Wifi)
Revver Internal Wi-Fi
Our main Wi-Fi SSID is "Revver"
This is our internal network and what every employee computer should be using (unless plugged into Ethernet). This SSID will be added to your computer automatically when you first set it up. The password for this is not shared. If your computer is not connected to this SSID you should contact IT.
Revver Personal Wi-Fi
The SSID for this is "Revver-Personal"
The password for this SSID is: revverbyod
This is the SSID you should use for personal devices such as a smartphone or personal computer. It can also be used for testing purposes if you need to test something off the main network. This SSID does not connect to our main network. The password for this SSID should NOT be given out to guests
Revver Guest
The SSID for this is "Revver-Guest"
There is no password for this SSID.
This SSID is for guests who come to Revver and temporarily need access. Once they connect to this SSID they will be prompted to enter the email of a Revver employee. That employee will then be responsible for approving the Internet activity for that guest.
Auditorium Wi-Fi
The auditorium can be connected via
Auditorium Guest WiFi1
Auditorium Guest WiFi2
Both of these SSIDs require no password to connect but you will need to verify with a valid phone number to connect. Also, the first time you connect, it may ask you to install software in order for you to connect.
(This is the old auditorium SSID and password
SSID: Auditorium Guest Wifi
Password: GuestAccess2021)
Welcome!
Welcome to our internal documentation platform. We use the service BookStack. You probably found this page because in the search bar you typed in the name of a pretty good band that has the name of a pretty good fruit in their band's name.
IT Roadmap
Here is the basic IT roadmap starting from 2021.

Revver Floorplan / Map 10.1.2024
Revver Internal Documentation
Some things you should know
- By default all accounts are created with view permissions. Viewers can make comments on all pages but cannot edit the content of the page. If you need edit access please submit a ticket to ithelp.efilecabinet.com (or email ithelp@efilecabinet.com) and specify what Shelf you need edit access to.
Basic Navigation
- The easiest way to find an article is to use the search bar at the top of your screen. If you prefer to browse to see what is available you can go to the "Shelves" or the "Books".
-

- In the top right of a page (article) you can view the details for the page. It shows when the page was created and updated. You can also see how many revisions it has has. An editor can restore previous revisions.
-

- Everyone can favorite or export a page.
- When you favorite an item it shows up in a custom page in your account that can be found by going to your profile name and clicking on "My Favorites"
- Exporting allows you to save a PDF of a page, chapter, or an entire book.


Terminology
-
Shelves / Shelf = Department
-
Book = Category or Topic
-
Chapter = Sub-Category or Topic
-
Page = Article
IT Policies
Hardware policy for new and current employees
eFileCabinet's IT department has collaborated with our executive team to determine the standard equipment needed for each employee's role. Below is a list of standard equipment we issue, note there are variations to the below based on role and business need. As a reminder, all such equipment is provided at the cost of the company and must be returned by the employee at the time employment is terminated.
Office Only or Hybrid Employees
Standard equipment provided in the office:
- Laptop computer
- Hub or dock
- External keyboard or mouse
- External monitors
- Headsets for those employees who are required to make phone calls in their position
- Desk phones as needed for employees who are required to make phone calls in their position
Equipment available upon request for an employee's home office:
- External monitor
- Additional power supply for computer
Equipment available upon request for an out-of-state employee's home office:
- Laptop computer
- Hub or dock
- An external keyboard and mouse
- An external monitor
- A headset if the job position requires them to make phone calls
Computer Life Cycle
- Each employee computer has a life cycle of three years. The start date of the life cycle is the day it was purchased and not the day it was given to an employee. When a computer reaches the end of three years, the IT team will reach out to the employee with instructions for moving to a new computer.
- There is some flexibility to this policy based on employee preference and current budget.
Hardware Policy for exiting employees
Current policy is that when an employee leaves they are required to return all Company property. Anything they fail to return is deducted from their last paycheck.
USB Data Transfer Disablement Policy / Removeable Media Policies
Policy Statement:
This policy outlines the guidelines and restrictions regarding the use of USB ports for data transfer on all corporate computers within Revver. The purpose of this policy is to enhance data security, prevent unauthorized access, and mitigate the risk of data breaches.
Scope:
This policy applies to all employees, contractors, and third-party individuals who have access to corporate computers owned or managed by Revver.
Policy Guidelines:
-
USB Port Disablement:
-
All USB ports on corporate computers will be disabled to prevent data transfer via USB devices.
-
-
Exceptions:
-
Exceptions to this policy may be granted on a case-by-case basis and must be approved by the Revver IT Team.
-
USB ports on specific computers may be enabled for legitimate business reasons, subject to approval and monitoring.
-
-
Approval Process for Exceptions:
-
Employees requesting an exception must submit a written request to their respective department head or supervisor.
-
The department head or supervisor will review the request and, if deemed necessary, escalate it to the IT Team for final approval.
-
Approved exceptions will be documented, and USB ports will be enabled for the specified duration or purpose.
-
-
Monitoring and Compliance:
-
IT personnel will regularly monitor and audit computers to ensure compliance with this policy.
-
Non-compliance may result in disciplinary action, including but not limited to warnings, suspension of computer privileges, or termination of employment.
-
-
Data Transfer Alternatives:
-
Employees are encouraged to use approved and secure methods for data transfer, such as company-provided cloud storage, network drives, or email systems.
-
Responsibilities:
-
IT Department:
-
The IT department is responsible for implementing and enforcing this policy.
-
IT personnel will conduct periodic audits to ensure compliance.
-
-
Employees:
-
Employees are responsible for adhering to this policy and seeking approval for any exceptions.
-
Any unauthorized attempt to enable USB ports or transfer data using USB devices may result in disciplinary action.
-
Please note that depending on your operating system, you may or may not see a warning message when you plug in a USB device; it may simply not function. USB mice, keyboards, headsets, docks etc. will continue to work as they always have.
If you have a specific need for using a USB storage drive, please submit a ticket to ithelp@revverdocs.com or ithelp.revverdocs.com. In your ticket please include the following:
- Reason for needing to use a USB storage device.
- Duration you will need to use USB storage.
- Manager's name.
Your request will be reviewed and if approved USB storage will be temporarily unblocked for your account. IT will ask you to fill out this form before making an exemption for your account. You can either fill the form out now or when it is requested. The form has basic questions and a short training video for you to watch.
Review and Revision:
This policy will be reviewed annually or as needed. Any revisions will be communicated to all relevant stakeholders.
Enforcement:
Violation of this policy may result in disciplinary action, up to and including termination of employment.
Approval:
This policy has been approved by Jesse Wood, CEO, on January 4, 2024.
Exiting Employees
Accessing Email from a former employee
Important Note:
Generally, when an employee leaves the company, their Google account is deleted and all of their email is removed with that. We have a 20 day window to restore the account. If you know you will need to access email from a former employee, you must inform IT BEFORE that employee leaves. If you are able, you should work with the employee while they are still employed so they can forward the necessary emails to your account. After that, email forwarding should be all that is necessary going forward.
Options for accessing a former employee's email
For each option, please realize that this should be communicated to IT via ticket before the employee leaves.
Option 1 - A downloadable archive of all email - Recommended for long term archival needs
We can download all of the employee's email from Google and upload it to a portable instance of the Thunderbird email client. To view the email you would need to download this file and open it. Downloading email from Google can take several days.
In most cases this should be the preferred option as it allows us to delete the employee's account while retaining the email.
Option 2 - Receive delegate access for the account - Recommended for short term access
This can either be setup by the employee before they leave, or IT can set this up after the employee leaves. When this is setup you will receive an email from Google asking you to accept delegate access. Once you do, you will be able to switch from your account to the delegate account within Gmail. This will allow you to send and receive email as the former employee.
This is a temporary solution only as this requires us to pay for an active Google account for the former employee. If you prefer to do this method, you must submit a ticket to IT and include the date that access can be removed.
Option 3 - Receive login credentials for the account - Not recommended
With approval, you can request login credentials and login as the former employee. This is not recommended and should only be used for very short term emergencies.
This is a temporary solution only as this requires us to pay for an active Google account for the former employee. If you prefer to do this method, you must submit a ticket to IT and include the date that access can be removed.
How to setup and use an email alias
A note about email aliases and email addresses
When you are assigned an email address, that will become your username for almost all services you use here. In some instances (for example a name change), rather than assigning a completely new account, an alias can be provided. This alias can be used to send and receive email but will not be used for any logins.
- To request an email alias, please submit a ticket to ithelp.efilecabinet.com or send an email to ithelp@efilecabinet.com. Specify what you would like the alias to be and why you need it.
- An alias will be created for you. When someone sends an email to your alias, your email will go to your main email account. An alias forwards email only and is not an account that can be used to login to anything.
- After IT has notified you that your alias has been created, please send an email to that account to verify that it is working. I recommend a personal account to do this (if you send it from your main work account it may arrive to your inbox as being read and you might miss it). Please note that it can take a few hours for the alias to sync and be active. Please do not continue to the next steps until you have verified that your alias is receiving email.
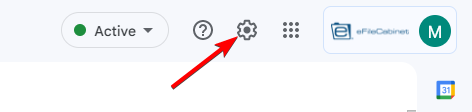
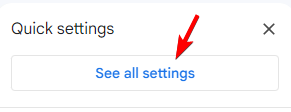
- If you would like to send emails using the alias email address, you will need to click on the settings (gear icon) in the upper right corner of Gmail.
-
- Press the "See all settings" button.
-
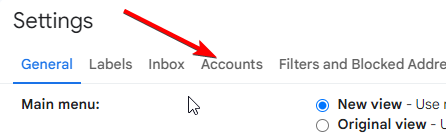
- Go to the Accounts tab.
-
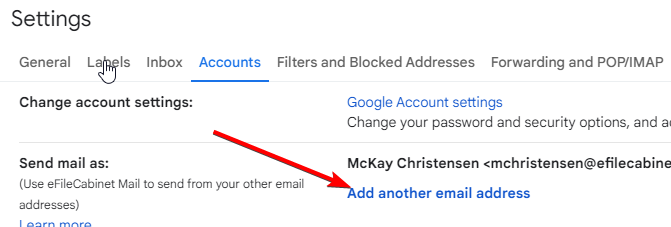
- Click on the link to "Add another email address"
-
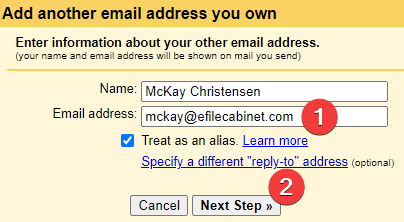
- Enter your alias email address then click on "Next Step"
-
- If you want to make your alias your default email address you can click the "make default" link
-
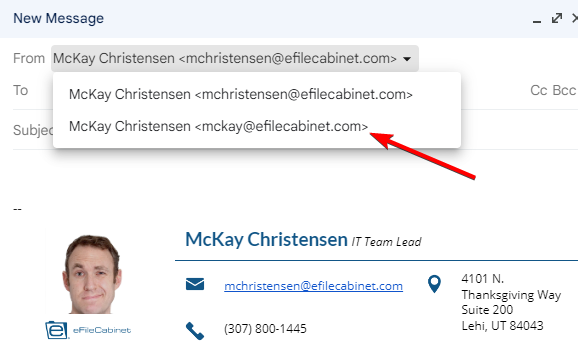
- When you compose a new email, you will now have a dropdown in the "From" field and you can choose the email address you would like to send the email as.
-

Tips and Tricks
General tips and tricks to make your life easier.
Revver IT Tips and Tricks
Muting and Sending Mass emails in Gmail.
Mute Email Threads
Have you ever received an informative email that is not really meant to be replied to but people reply anyhow AND they "reply all" so everyone gets their response?
If you don't want to be a part of that conversation, you can simply click on the triple dot icon at the top of the email (next to the label icon in Gmail) then select "Mute." Now all replies will be marked as read. You will still have the email in your inbox and all the replies but you won't have to worry about it showing up in your inbox or getting notifications for new replies.
(Note; from the tests I ran it appears that you cannot mute an email from someone if they only send the email to you. If they send an email to you and at least one other person, then muting the email will result in all follow up emails in that thread skipping the "inbox" and going directly to "all mail." The email shows up as unread in the "all mail" folder but you do not get a notification for it.)
Send a mass email that does not allow "reply all"
Sometimes it is useful to send out a newsletter type email that people can unsubscribe to in case they are not interested in receiving follow-up emails (just like this one!). Google has higher tier subscriptions that have built-in "multi-send mode" to send emails and there are also third party services that offer mail merge integration, but most employees here don't have access to that, so the best workaround is:
- Instead of entering emails in the "To" or "Cc" fields, only enter emails in the "Bcc" field. This way it will only show the recipient and the sender so the recipient does not have an option to reply all.
- (If you want the recipient to be able to "unsubscribe" from future replies in that thread, you could insert a blurb at the bottom that says something like "To unsubscribe from future replies, please "mute" this thread by pressing the Mute option next to the label icon in Gmail.")
Lock your computer before leaving your desk
This is something you should do EVERY time you leave your computer (this is good practice even at home; especially if you have kids or pets).
- Windows: Windows Key + L
- macOS: Control + ⌘ + Q
Advanced Copying and Pasting
Paste from your clipboard history
Remember a few copies ago when you copied someone's name and you want to paste it again but you already copied something else that is in the clipboard? No worries, paste from the clipboard history.
- Windows: Windows Key + V
- macOS: You will have to use a third party like Clipy to get this functionality.
Paste without formatting
Most of the time when we copy text, we want to paste it without pasting the formatting. Unfortunately, pressing ctrl + v to paste defaults to pasting with formatting. To paste without formatting, you can press ctrl + shift + V
- Windows: Ctrl + shift + V
- Mac: Shift + Option + Command + V (Note; on a Mac you can actually paste without formatting as the default by changing your Keyboard Shortcut in Apple menu > System Preferences > Keyboard > App Shortcuts)
-
Get maximum productivity from Slack
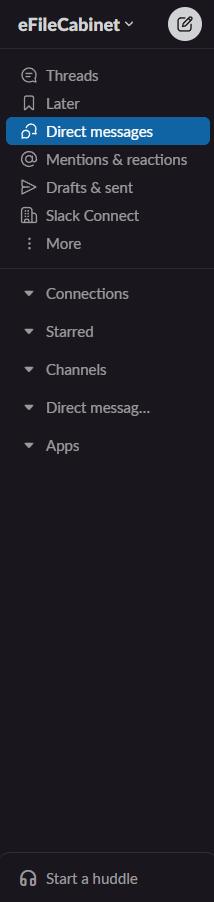
Only show unread messages
- Showing only your unread messages makes it much easier to find and prioritize your messages. As soon as someone messages you it will be the only thing in Slack to show up. When you read or reply to the message it goes away keeping all your conversations clean. If you need to get back to the message you can either search for the person who sent you the message or you can click on your direct messages to find it there.
- Go to your profile icon (bottom left) > Preferences > Home> Show... Unreads only
- Note; you can also do this for just individual sections by right clicking on the section and selecting "Show and Sort" and selecting "Unreads only" or "Mentions only"
-
- Here is what unread messages looks like vs all messages:
-

Quickly Compose a new message
- The fastest way to send a message to someone is to use the shortcut ⌘ + K (Mac) or Ctrl + K (Windows and Linux) then type in the name of who you wish to send a message to.
Send a reminder to yourself
- Use the /remind command in any chat window to remind yourself to do something at a later time. For example, you could write "/remind me to drink water in 1 hour" and in 1 hour Slack will send you a notification to drink water.
-

Take a screenshot of a section of your screen and save to the clipboard
- Windows: Windows Key + Shift + S
- macOS: Shift + ⌘ + 4 (Note: this saves the screenshot to the desktop)
Take advanced screenshots (gif, screencasts, annotations, arrows, etc)
Create a new Google Docs file without opening Google Docs
- Document: https://document.new
- Spreadsheet: https://spreadsheet.new
- Presentation: https://presentation.new
Desktop window snapping
- Windows: Windows Key + Right/Left arrow - Snaps the window to the right or left of screen. Can move window across multiple monitors. Windows Key + Up/Down arrow - Maximize or minimize windows. (Note; Windows 11 handles this much better than Windows 10 and is one reason you may want to consider upgrading.
- macOS: In the top left of the window you want to snap, hover over the green icon and select one of the snapping options.
Safely check links for phishing attempts
There are many services that will allow you to paste a link and they will check the link for malicious content so you don't have to click on it. Here are a handful of services:
- https://easydmarc.com/tools/phishing-url
- https://www.emailveritas.com/url-checker
- https://checkphish.ai/
- https://www.psafe.com/dfndr-lab/
Useful Google Sheet shortcuts
- Windows
- Ctrl + Shift + Alt + : - Inserts the current date and time
- Ctrl + Shift + : - Inserts the current time
- Ctrl + Shift + V - Paste values only
- macOS
- ⌘ + ; - Insert date
- ⌘ + Option + Shift + ; - Insert Date and time

Improve how you highlight words for copying and pasting
- Windows:
- Use Ctrl + arrow keys to navigate to the end of the word.
- Use Shift + arrow keys to highlight where the cursor moves.
- Use Ctrl + Shift keys and arrows to navigate to the end of the word while highlighting.
- Use the home and end keys to move the cursor to the beginning or end of the sentence.
- Use the home and end keys with shift to highlight the entire sentence.
- Ctrl + Backspace to delete a word at a time
- Bonus: Ctrl + Insert copies and Shift + Insert pastes (this can be done with your right hand)
- Use Ctrl + arrow keys to navigate to the end of the word.
- macOS:
- Basically the same as Windows but replace Ctrl with ⌘
- Basically the same as Windows but replace Ctrl with ⌘

Gmail Tricks
- Periods / Dots don't matter
- Gmail does not count periods in email addresses. For example, Gmail treats johndoe@gmail.com, john.doe@gmail.com, and jo.hn.do.e@gmail.com all as the same email address.
- How can I use this? - If you have a user name, that might be a bit ambiguous, you could use periods to make it more clear. For example, if you had a scrap metal company and your email address was bobscrap@gmail.com, you could write it like bob.scrap@gmail.com to avoid possible confusion.
- You can setup "Undo" send
- If you go to Settings > General you can turn on an option to undo send. You can specify up to 30 seconds how long Gmail should wait allowing you to unsend. Obviously this postpones emails from going out immediately but it can save you from sending an email that you realize at the last second you probably should not send.
- How can I use this? - Sometimes we accidentally send an email before we really want to. Examples; You send an email then immediately read it and realize we have a typo. You press send when you mean to save as a draft. After you send you realize there is something else that you needed to say.
- You can use the "+" sign to create a pseudo alias
- If you add a "+" sign to your email address, then you can write anything you want after that and emails to this address will still go to your email inbox. Example myemailaddress+icanwriteanythingiwanthere@email.com
- How can I use this?
- You can use this to sign up for a test or trial service. Example: myemail+trial1@email.com, myemail+trial2@email.com, myemail+trial3@email.com
- You can use this for signing up for random services. This can help you track down spam as well to enable you to filter easily. Example: myemail+randomnewsletter@email.com
- You can use this to sign up for something you know is a one time thing and you won't want any follow-up emails. For example, you could create a filter that looks for "junkmail@email.com" and automatically deletes or marks those emails as read. Then when you sign up with a service using "myemail+junkmail@email.com" you will never see any follow-up emails from that service (but if your filter only marks as read you can still search for those emails in case you need to click on a confirmation link).
Browser Navigation
- Reopen recently closed tab
- Ctrl + Shift + T will open the most recently closed tab. You can press ⌘ + Shift + T if you’re on Mac
Reduce Startup Apps (Windows)
Over time a computer's performance and especially startup time may become impacted as software is installed and there are more startup apps. Chances are there are many apps that are starting up automatically that you never use. Fortunately, it is really easy to set these apps to not startup after boot.
- Press Ctrl+Shift+Esc to open Task Manager. Click on the Startup tab. Select any program in the list you don't want to auto-start and click the Disable button.
Quick and simple text editor built into browser (Note; this will work on most browsers)
- If you place the following in a new tab it will open a text editor:
-
data:text/html, <title>Text Editor</title><body contenteditable style="font-size:2rem;font-family:georgia;line-height:1.4;max-width:60rem;margin:0 auto;padding:4rem;"> - Save this as a bookmark on your bookmarks bar to open it easily on a new tab.
- Once you have opened it a few times you should be able to just type "text editor" in a new tab and it will show up as part of your history.
- You can customize the code before you paste is for more customizations (like a smaller font).
-
Segment Work (and personal) Profiles
Chrome, Windows and Mac all have options to allow you to use separate profiles or desktops. This will allow you to segment your work. There are many advantages to doing this. For example, in Chrome, you can have multiple different profiles that will allow you to be logged into the same service but as different users. In Windows and Mac you can have separate desktops to allow you to isolate workflows or tasks. This can also be used to help you separate work tasks from personal tasks.
Chrome - Multiple Profiles:
Why you should set this up: This will allow you to easily keep work items and personal items completely separate. This is also useful for testing various things; for example, you could log into a service as a user and log into the same service in a different profile as an admin. This is very useful for front-end and UI development as well as dev and QA testing.
- Click on your profile icon in the upper right corner of the browser.
- Click the option to add a new profile. You can also navigate to other created profiles.
- You can have multiple profiles at once.
-
- Notes: While it is possible to be logged into work and personal Gmail at the same time in the same Chrome profile it is much better to use separate profiles for this. This way you will not accidentally create a Google doc in the wrong account.
Windows - Multiple Desktops:
Why you should use this: This again can be useful for segmenting work and personal data as well as keeping projects separate.
- Click on the "Desktop" icon in the taskbar, or press Windows Key + Tab, or press Ctrl + Windows Key + right/left arrow.
-
macOS- Multiple Desktops/Spaces:
Temporarily Silence Notifications
- Windows:
- Click on the date and time on the bottom right of the screen
- Press the "Focus" button or icon (note these are slightly different in Windows 10 and Windows 11) click on the date and time again to end the session.
-
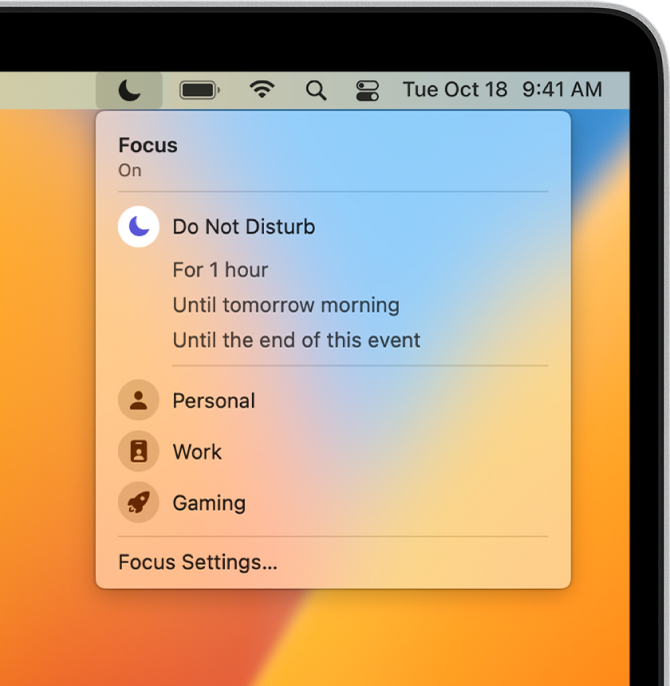
- macOS:
- Open Control Center, then click anywhere in the Focus section
-
- Open Control Center, then click anywhere in the Focus section
Use built-in Windows Sandbox environment for quick testing
Windows has a built in sandbox environment that you can use for testing. It is a lightweight desktop environment that allows you to run software in isolation. You can find more information about this here.
- To enable Sandboxing, open "Windows Features" and enable Windows Sandbox (you will need to restart your computer).
-
- To open a new Sandbox, type in "Sandbox" in the Windows search bar
-
Why would you want to use this feature?
One of the best use cases for this sandbox environment would be to quickly install and test software that you do not want to be permanently installed on your computer. This might be so you can test the functionality of the software or so you can check new software for bugs. This is also useful for testing browser extensions that you are unfamiliar with.
Can you use this for malware?
While this does run in an isolated environment, the sandbox still has network access. The only way to be 100% safe from malware is to not open it. This can however be used to check links that you think are safe but want to cautiously open. If you choose to use it for this you should still not open any files that might be downloaded from a suspected link.
Ditch your file manager for something more powerful
You don't have to use your built-in file manager. There are many file managers that give you additional options like split panes to make dragging and dropping files much easier.
- Windows - Q-Dir - This is my personal favorite. I like Q-Dir because it opens up the same file addresses I had open when I closed it. I also like how I have have many different views and panes. This works well if you have a certain workflow for moving and dragging and dropping files.
- Mac - muCommander - Not quite as powerful as Q-Dir but when you use a Mac you have far fewer options for cool nerdy things like extra file managers.
Focus Assist or Do Not Disturb modes
These are modes that turn off notifications. Very helpful if you are in a call or meeting (especially if you are sharing your screen) so you don't get notifications.
Focus Assist is a feature in Windows designed to help you minimize distractions by filtering notifications. It allows you to selectively block notifications, sounds, and alerts to create uninterrupted periods for work or focus.
You can customize Focus Assist to:
- Block all notifications: No interruptions at all.
- Allow priority notifications: Only allow notifications from specific people or apps.
- Allow alarms only: Only allow alarms to sound.
Do Not Disturb is the macOS equivalent of Focus Assist. It serves the same purpose of reducing interruptions. However, it offers slightly different features and customization options.
Similar to Focus Assist, Do Not Disturb allows you to:
- Silence all notifications: No alerts or sounds.
- Allow calls from favorites: Only allow calls from specified contacts.
Additionally, Do Not Disturb on Mac often includes options for:
- Scheduling: Setting specific times for Do Not Disturb to automatically activate.
- Repeating: Setting recurring Do Not Disturb periods.
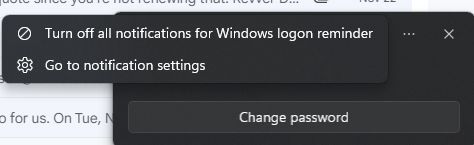
Windows login reminder bug
Several employees are seeing a bug where a "Windows logon reminder" notification will say that "Your password has expired."
This notification will come up daily even after changing your password.
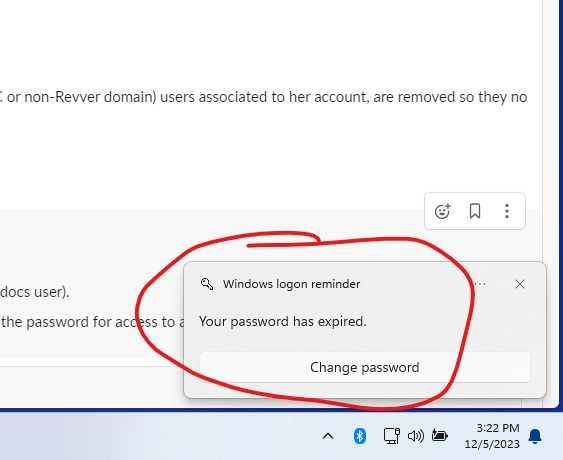
Until this bug is fixed by Windows, the simplest solution is to simply to turn off the notification for this. To do that, click on the "..." in the upper right hand corner of the notification and select the option to "Turn off all notifications for Windows logon reminder"
New Hire and Exit Procedures and Training
New Hire Onboarding - IT Information
Revver IT Information
Welcome to Revver! If there is ever an issue with your hardware or software please don't hesitate to contact the IT team. This page is designed specifically for new hires to become acquainted with things related to IT while working here at Revver. Please read through this entire article.
A note about phishing / smishing
Bad actors are always on the lookout for people updating their LinkedIn profile or moving to a new company. As a new employee your are a special target for email and text message attacks. If you receive an email that seems suspicious, please double check the email address that it is coming from. If someone sends you a text message claiming to be an executive or colleague, please know that unless you have explicitly given out your phone number, you should not expect a text message from a colleague. If ever you are in doubt, please use Slack as a way to confirm an email or text message.
You will be required to complete security training after completing this IT onboarding training.
USB Storage Devices are Disabled
As a policy we have disabled the ability to use USB storage devices to transfer data. USB storage devices an introduce several security issues; as a company we use cloud storage such as Revver or Google Drive for backing up or transferring files.
Note about eFileCabinet
Revver was previously known as eFileCabinet. You may see some documentation or screenshots that still refer to eFileCabinet. Please note that while we are continually changing old documentation and images you are still likely to read or see something that references our old name.
Hardware
Each employee is provided a laptop and up to two external monitors if they work in the office and a single monitor if they work remote. Employees can also be given a USB-C hub, and external mouse and keyboard upon request. If you need additional hardware for your role, you can make a request via an IT ticket.
Please take your computer home daily.
You are expected to take good care of your computer. If your computer incurs hardware damage, it should be reported to IT immediately so it can be repaired or replaced.
Computer Life Cycle
Each computer has a three to four year life cycle. This is determined by the purchase date of the computer and not the date you received it. Once the computer has reached the end of its life cycle, IT will reach out to the employee using it and offer an upgraded computer. The old computer will be repurposed as a test or team machine or sold as surplus.
Software Installation
Your computer will come with the OS default software installed. If you need to install additional software, the best method for doing this is by opening "Company Portal" and browsing the approved software available there (you can do this by searching for "company portal" in the Windows search bar or Mac spotlight search).

While you can install software outside of the software in Company Portal, we ask that you submit a ticket to IT before installing any software that you have any concerns with. IT can then either add the software to the Company Portal or give you approval to manually install it on your computer.
Please note that the software available in the company portal in Mac and Windows are different. The options for Mac are much more limited. If you need to install software not available in the company portal, you can install software via the Apple store.
Computer updates
Each computer is setup with automatic updates. Major updates are only applied during a reboot. It is recommended that you often reboot your computer at the end of the work day to avoid forced reboots during a more inconvenient time. If you ever experience issues with your computer one of the first things you should check is whether or not your computer has installed all of the updates (including the optional driver updates).
Device Management
Revver uses Intune for our device management. The main benefit of Intune is that it allows us to take inventory of our computer hardware and evaluate the compliance of each device. If devices are reported to not be in compliance (for example, the hard drive is not encrypted) then Intune can help us to remotely encrypt the device. Intune can also help us to update and install software.
Endpoint Security
Microsoft Defender for Endpoint is what we use here at Revver for our advanced threat detection. While we have this as a tool to help us mitigate potential security issues, the best security practice is for you to use safe browsing habits. Do not connect to unknown or unprotected Wi-Fi networks. Don't download software you are not familiar with. Be careful with the websites you visit. If you have any questions or think your computer might be compromised, please go to ithelp.revverdocs.com and submit a ticket.
Software you will need to login to regularly
As I guide you through the different services we have and how to login, please follow along and login to each service rather than reading.
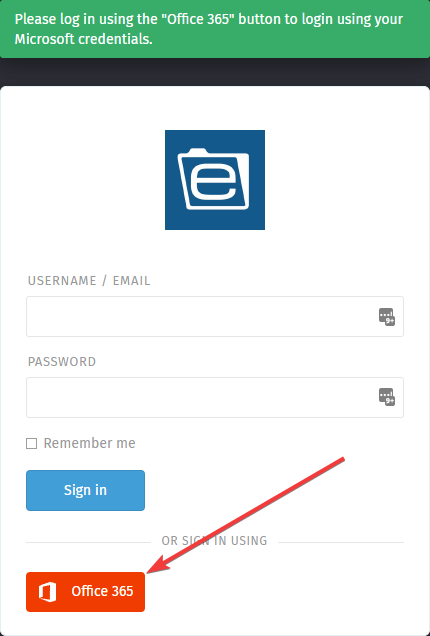
IT ticketing system (Zammad)
If you need any IT help, you can submit a ticket at ithelp.revverdocs.com.
To sign in, you will need to use the "Office 365" button. Please login now to verify you are able to login.
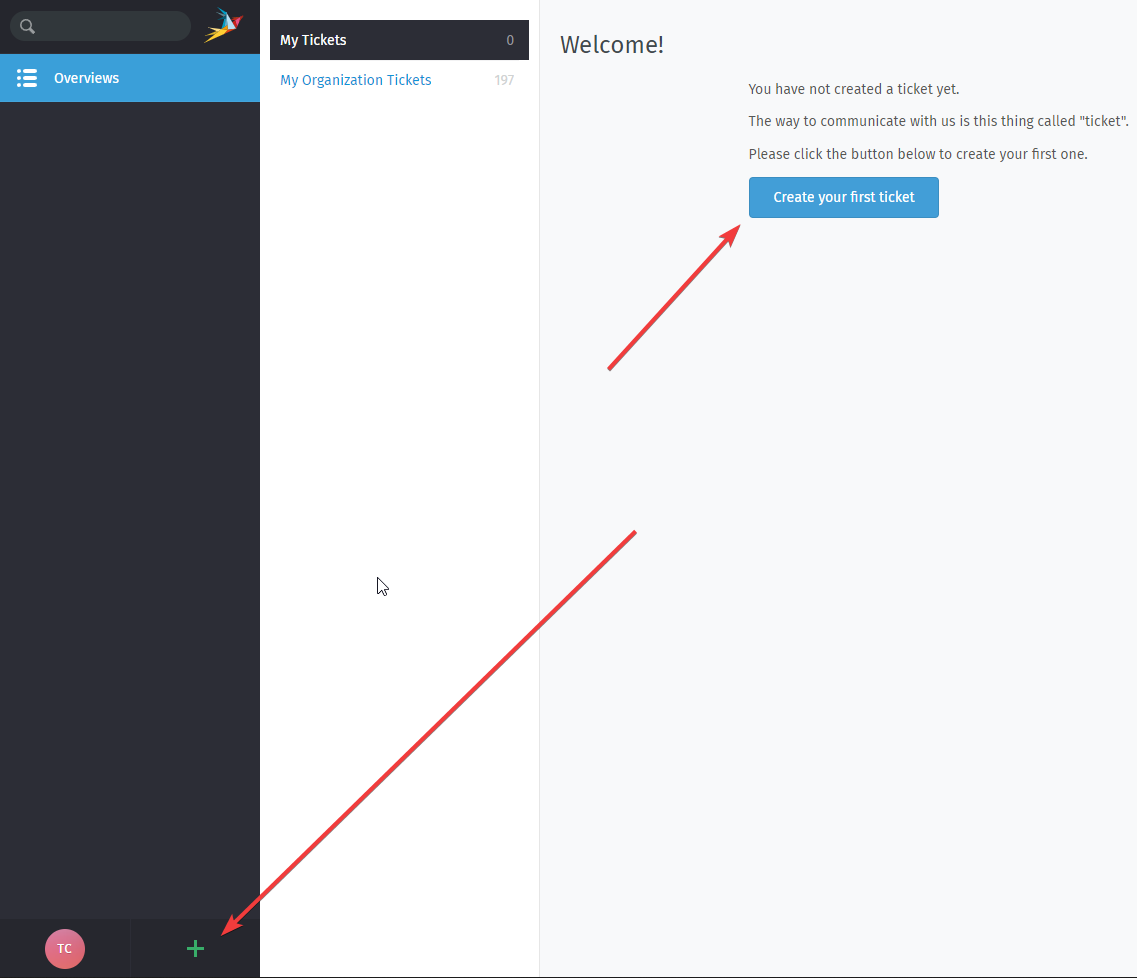
Once you are logged in, you can submit a ticket by pressing the green "+" button in the bottom left or use the "Create your first ticket" link if you have not previously created a ticket.
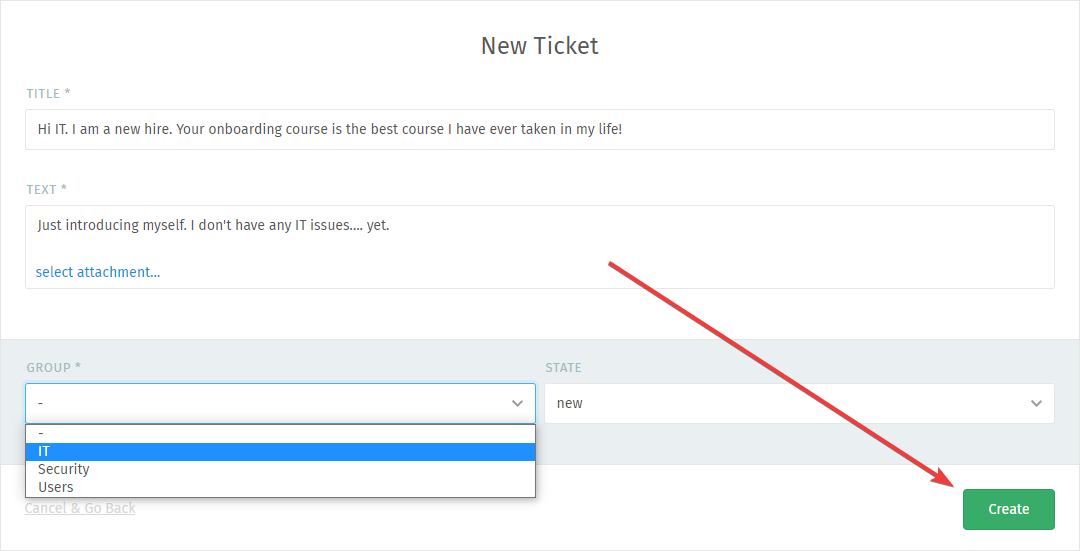
To create a new ticket, you will add a subject or title, then you will add your message. You are welcome to submit a ticket now just to say "hi" if you would like. In the dropdown, select if it is a Security or IT issue, then press "Create".
Once you have a ticket created you can view all your tickets on the Overview page. With your ticket open you can add information and change the state of the ticket.

When IT responds to your ticket, you will get an email of the ticket contents. You can reply directly to the email or log in to the ticketing system. Additionally, if you wish to create a ticket by email, you can send an email to ithelp@revverdocs.com
Contacting IT
The best way to contact IT is by submitting a ticket at https://ithelp.revverdocs.com. You will need to login using your Microsoft credentials. Tickets submitted within working business hours will be read and responded to generally within 30 minutes.
You can also find a link to submit a ticket in your "Revver" bookmarks folder

If you have an emergency situation that requires a response in less than 30 minutes, you can Slack McKay Christensen.
Logging into your Google Chrome browser
Please login to Google Chrome with your Revver email address (it should be in the email sent to you previously by IT). If Chrome is not already installed on your computer, please go to Chrome's website to manually download and install it.

You can use whatever browser you prefer here at Revver but you will need to use Chrome for the duration of this onboarding as there are several bookmarks built-in that you will need to use later.
After your account has synced fully, you should see a bookmark folder called "Revver" in the top left corner of the screen (note; you may need to open a new tab to see it). You can press Ctrl+Shift+B to toggle the bookmarks bar on or off; if it is off it will still show up when you open a new tab.

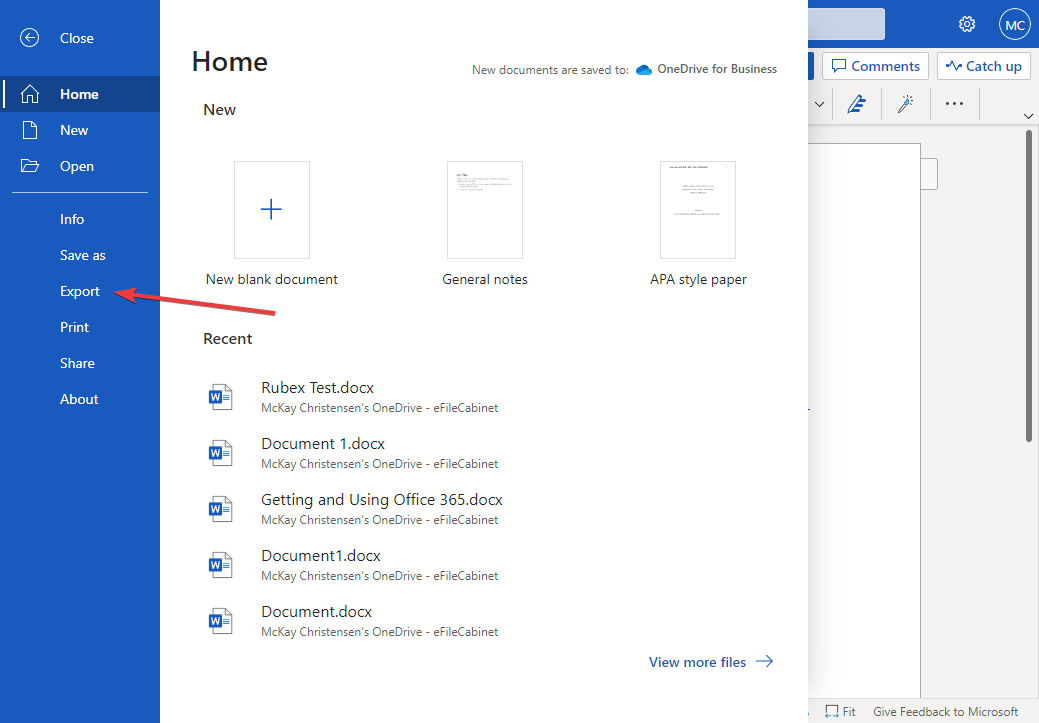
Logging into Office 356
Everyone at Revver has a license to the online version of Microsoft Office.

If you need the file on your computer sent to someone else, you will need to export the file.
If your role requires you to have the desktop version of Office, please follow this process.
Logging into Slack
Please go to https://revverdocs.slack.com or open the Slack app on your computer (if it is not already installed you can download and install it using the Apple or Microsoft store). Click on the "Sign in with Google" icon and sign in with your Google credentials.
.

Logging into LastPass
You should have received an email from LastPass inviting you to use LastPass. In Gmail, search for "LastPass" until you find the invitation email. It should look similar to the screenshot below. If you have not received an email from LastPass, please submit a ticket at https://ithelp.revverdocs.com and request that IT resends your LastPass invite.
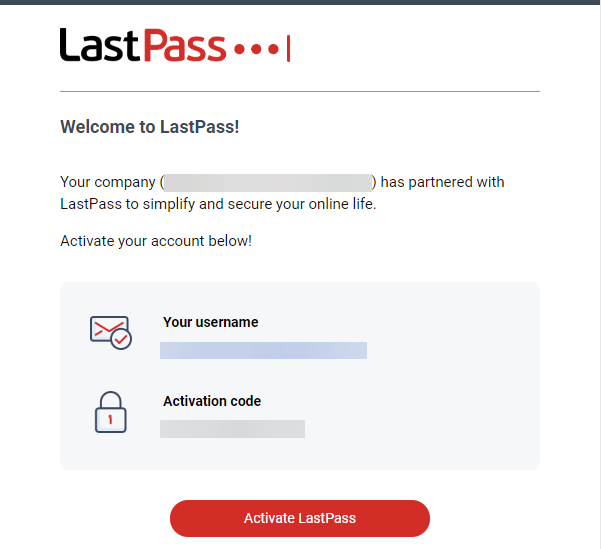
Press the "Activate LastPass" link and follow any instructions it gives.
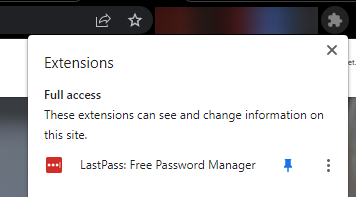
You will not need to create a Master password for LastPass; it will use your Microsoft credentials. The LastPass Chrome extension should be automatically installed on Chrome if you are signed in. If you don't see the LastPass extension you should login to Chrome and make sure Bookmarks and Apps are synced. Once the extension is installed you should be able to find it in the upper right corner of your screen.
If you have not used LastPass before or are not very familiar with it, please view a basic guide for LastPass here.
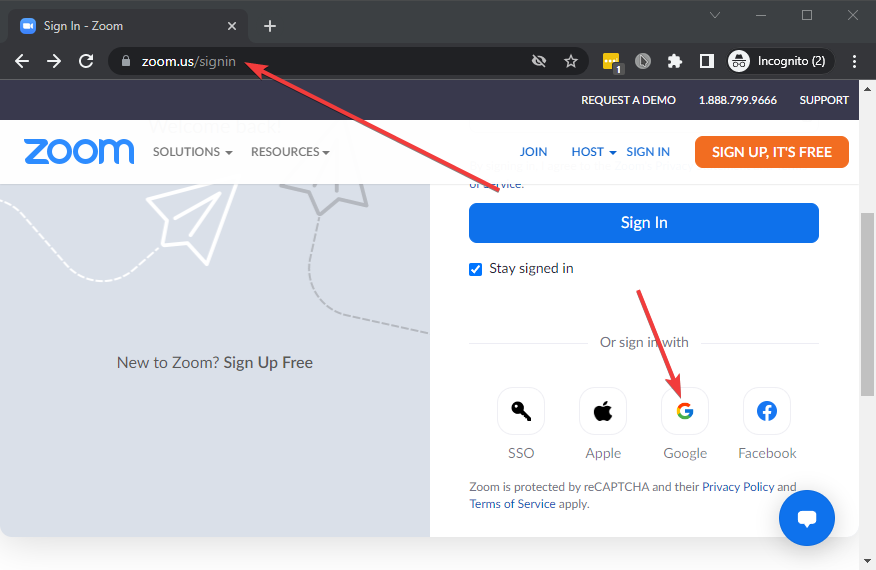
Logging into Zoom
Zoom is what we use for video calls. Most employees are provisioned the basic license Please navigate to https://zoom.us/signin and press the Google icon to login
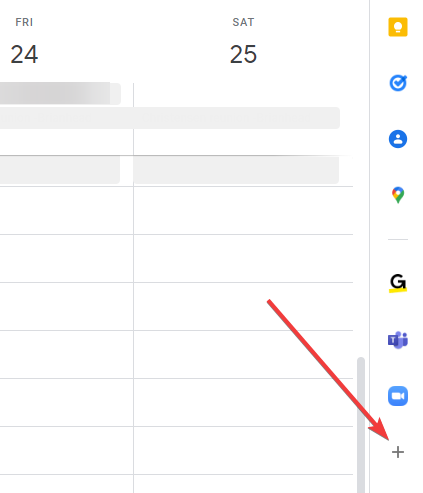
You should also install the Google Calendar Add-on for Zoom. Please navigate to https://calendar.google.com/ and press the "+" icon on the far right side of the screen. Click on the Zoom Add-on to install it and follow the instructions it provides.
Logging into Revver
Click on your Revver bookmarks folder then go to "Revver - Revver Login". (Note; you may need to open a new tab or window to see the bookmark folder)

Your username is your email address but you do not yet have a password. To create a password, click on the "Forgot password" link then go to Gmail and check for the new email sent to you. Follow the instructions in the email.

How to gain access to the Revver community
The eFC Community contains company information, including the Org Chart, Phone List, eFC Community Department Directories, Office Map / Floorplan, Benefits (Guides and Info), Company Handbook, How To Guides, etc.
To access the Revver Community in Rubex, please log into it using the instructions below:
- Go to https://myapps.microsoft.com/signin/2ddac645-0a28-4f68-b647-b349dbec2806?tenantId=571003ed-707e-4f16-af3e-e786fc9e146c
- Use your corporate email address to login
- Go to https://account.revverdocs.net/#/auth/login
- Enter your email address then click "Next"
- Select "Sign In using Revver Corporate"
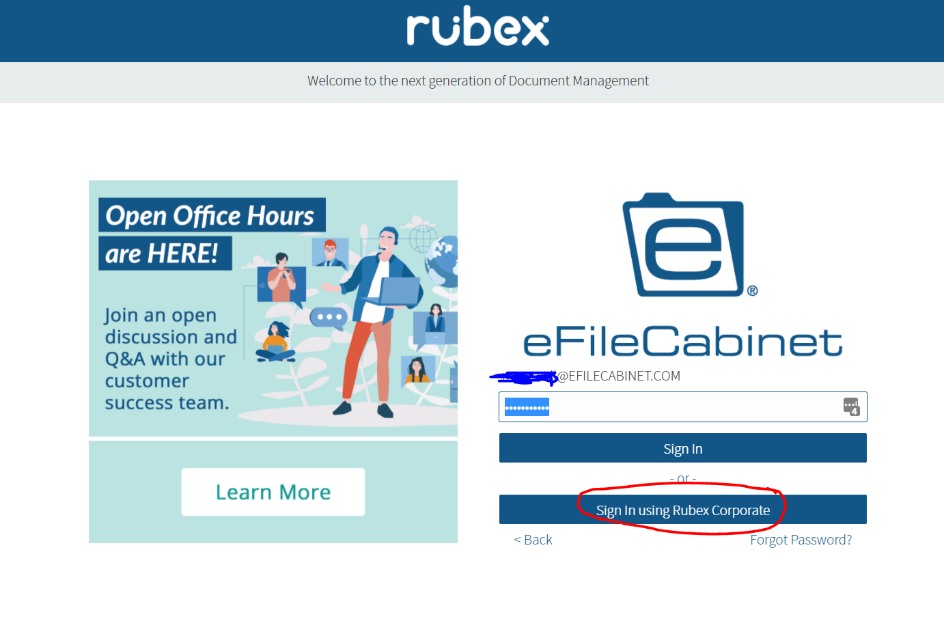
You should now be able to login with your new password.
Once you are in Revver, navigate to the most recent year for benefits. Revver Corporate>Revver Community>Revver Info>Benefits Information. You will use this folder later in onboarding. Please note that Revver will automatically log you out after an extended time of inactivity.
Logging into SplashTrack
Please open the bookmark for SplashTrack.

Click on the login button and use your username and password to sign in. Note; you should have already logged into SplashTrack several times by now and have already set your username and password. If your username and password is saved to a personal account, I would recommend setting up a separate Google profile rather than logging into your personal account in the same browser window as your work account. Please view this article for help with using multiple Google profiles. Your username is your personal email address. If you wish to change this, you can go to "Employee info" then click the pen icon under "General Info". You are not required to change this.
Once you are logged into SplashTrack, please navigate to the benefits portal by clicking on the person icon in the top right corner of the screen and clicking on the "Benefits Portal" link.

At this time you will not do anything with the benefits portal but you will need this for onboarding later on.
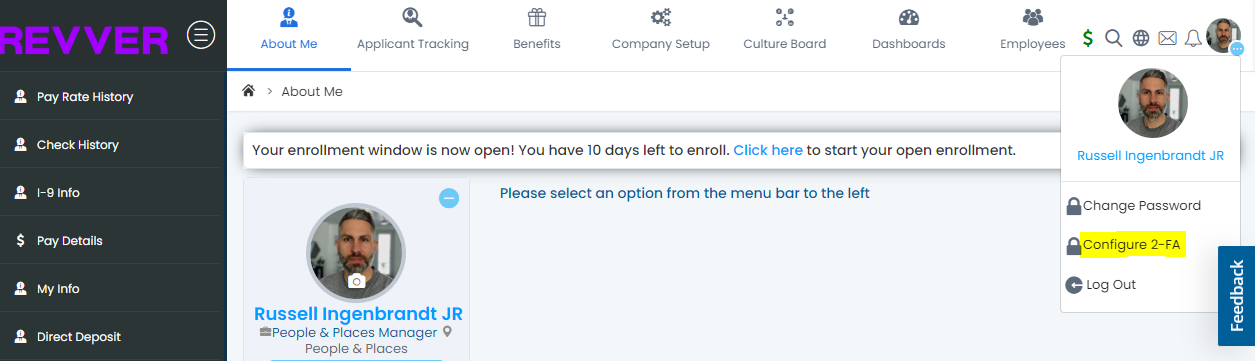
Setup Two Factor Authentication in SplashTrack and Replicon
Go to https://revver.splashtrack.com/ then click on your profile in the upper right hand corner of the screen. Click on the "Configure 2-FA" link and setup your multi-factor authentication. This is required for all employees.
Go to http://login.replicon.com/ then follow the instructions to setup multi-factor authentication. (Note, to login use "StratusHR352" for the Company).
Finish New Hire Training
Please return to training.revverdocs.com to take a short quiz. After you complete the quiz you will be assigned 4 security training modules. These training modules are mandatory and should be completed during your first week of employment.