Creating VMs in Azure
Creating/configuring the VM
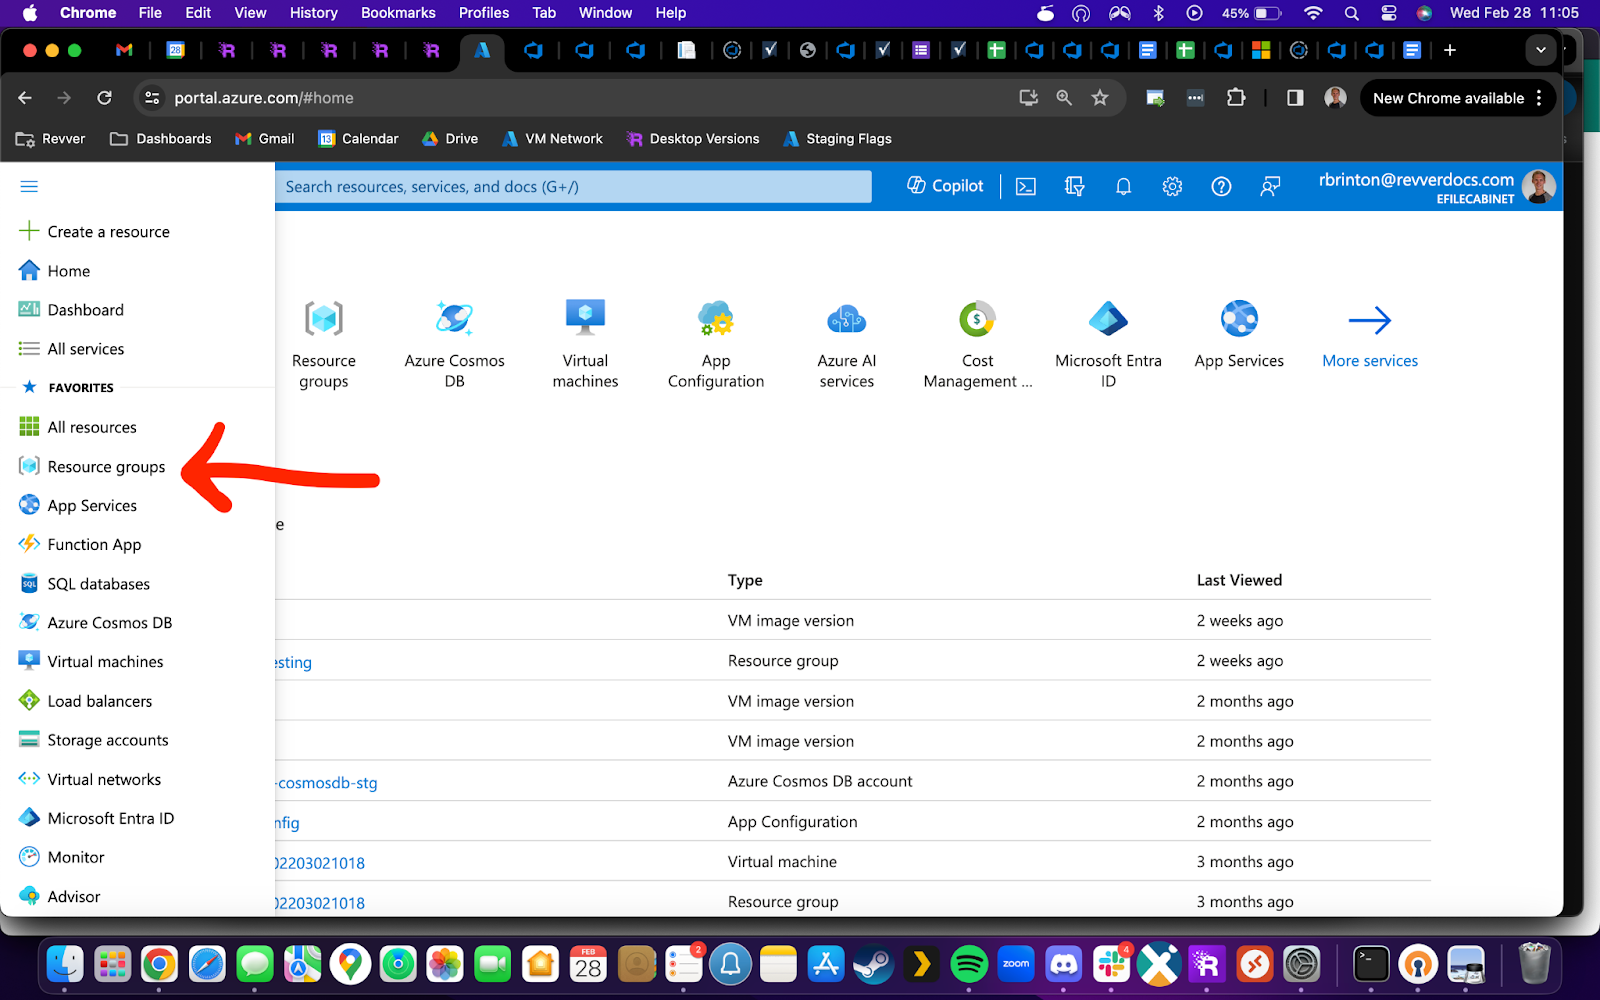
- Navigate to portal.azure.com and sign in. Once logged in, open the hamburger menu, and select Resource Groups (if it isn’t already in your “recents” bar on the home page)
- In the list of resource groups, look for PrivateCloudTesting. Open it
- This group is where all of our standard images live.
-
If you need a basic VM (as in, one that is just running a clean version of Windows 10), look for 2.0.0 (PrivateCloudTestingImages/Windows10-Clean/2.0.0). Make sure you select the item labeled VM Image Version, not VM Image Definition
-
There are plenty of other images in there for various uses. We tried to make the names self-descriptive, but feel free to reach out if you have any questions
-
-
Click Create VM
-
-
You’ll need to change several things on the next page. Here is the order that I find most helpful:
-
Virtual machine name
-
This needs to be unique. My default is <name of person using it><timestamp>, so ryan202402281110 or rachel202402281110. Copy this name to your clipboard
-
-
Resource group (back at the top)
-
Click “Create new”, and paste the VM name here
-
-
Size
-
This is just asking how “beefy” of a machine you need. The beefier the machine, the more expensive it is to run
-
-
That should be it on this tab! Even though there are other empty fields with red *’s indicating the fields are required, just leave those blank - they will auto-fill with the correct default values during the VM deployment.
-
-
Click the blue “Review + create” button at the bottom
-
Assuming you see “Validation passed”, you can now click the blue “Create” button at the bottom
-
If you get “Validation failed”, 9 times out of 10 this is solved by simply clicking back to the “Basics” tab and clicking “Review + create” a second time. Not sure why it passes the second time haha
-
-
It will take a few minutes to create the VM. All the next steps need to be done on the VM item itself, so you’ll need to wait for the deployment to complete before continuing onward
-
Once you see “Deployment is complete”, click the blue “Go to resource” button
-
VM post-deployment configuration
-
First, scroll down in the left menu until you see “Auto-shutdown” (in the Operations section). Turn it on, and set the time to be 6:00:00 PM. This helps us avoid getting charged as much if you forget to manually turn off the VM. Make sure to save your changes
-
Next, scroll up to “Network settings” (in the Networking section)
-
First, delete inbound port rule 300 (it should be named RDP)
-
Next, create the following new inbound port rules, with the designated priorities:
-
299
- Source: Service Tag
- Source service tag: Internet
- Source port ranges: *
- Destination: IP Addresses
- Destination IP addresses: 10.3.0.4
- Service: RDP
- Designation port ranges: 3389
- Protocol: TCP
- Action: Deny
- Priority: 299
- Name: SecurityCenter-DENY
- Description: N/A
- 298
- Source: IP Addresses
- Source IP addresses: 73.127.31.114
- Source port ranges: *
- Destination: IP Addresses
- Destination IP addresses: 10.3.0.4
- Service: RDP
- Designation port ranges: 3389
- Protocol: TCP
- Action: Allow
- Priority: 298
- Name: SecurityCenter-ALLOW
- Description: N/A
- 297
- Source: IP Addresses
- Source IP addresses: 50.230.88.131/32
- Source port ranges: *
- Destination: Any
- Service: RDP
- Destination port ranges: 3389
- Protocol: TCP
- Action: Allow
- Priority: 297
- Name: RevverOfficeWhitelist
- Description: Allows users connected to the Revver network (or Revver VPN) to connect to this Virtual Machine.
-
- If you are working remotely and do not want to connect to the VPN to access this VM, go to “whatismyip.com” and take note of the IPv4. Then, add 296 below:
- 296:
- Source: IP Addresses
- Source IP addresses: <the IPv4 address from above>/32
- Source port ranges: *
- Destination: Any
- Service: RDP
- Destination port ranges: 3389
- Protocol: TCP
- Action: Allow
- Priority: 296
- Name: <YourName>RemoteWhitelist
- Description: Allows <YourName> to connect with this Virtual Machine without first connecting to the Revver office VPN.
- 296:
-
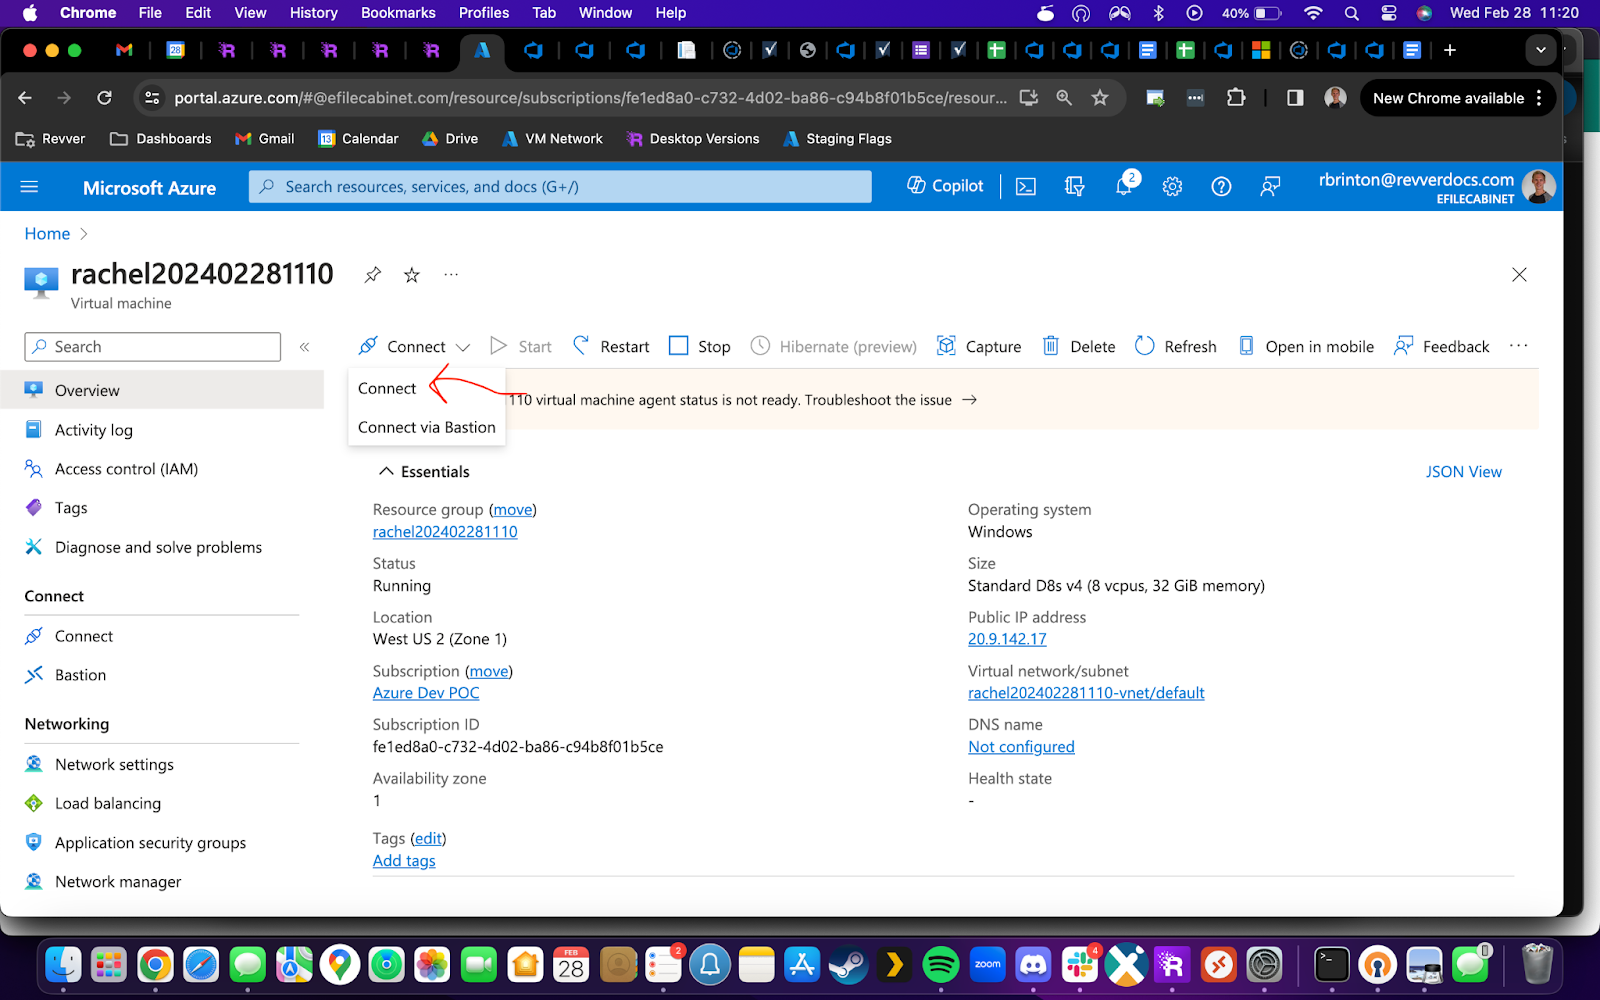
- You’re all set! Now, just scroll up to “Overview” at the top
-
- Click the Connect button at the top, and click Connect in the drop-down menu. Choose RDP, and open the file it'll have you download. That should auto-open in Windows Remote Desktop Connection, which will auto-fill the VM connection details for you. The default credentials are username admintest, password asdfASDF1234!@#$

 asdf
asdfDeleting the VM
- Our account has a limited number of VMs that can exist at a time, so it’s important that everyone deletes their VM as soon as they’re finished with it. The good news is, this is super easy, thanks to some of the setup choices we made above. All you need to do is:
- Navigate to portal.azure.com and sign in. Once logged in, open the hamburger menu, and select Resource Groups (if it isn’t already in your “recents” bar on the home page)
- In the list of resource groups, look for the resource group you created earlier. Open it
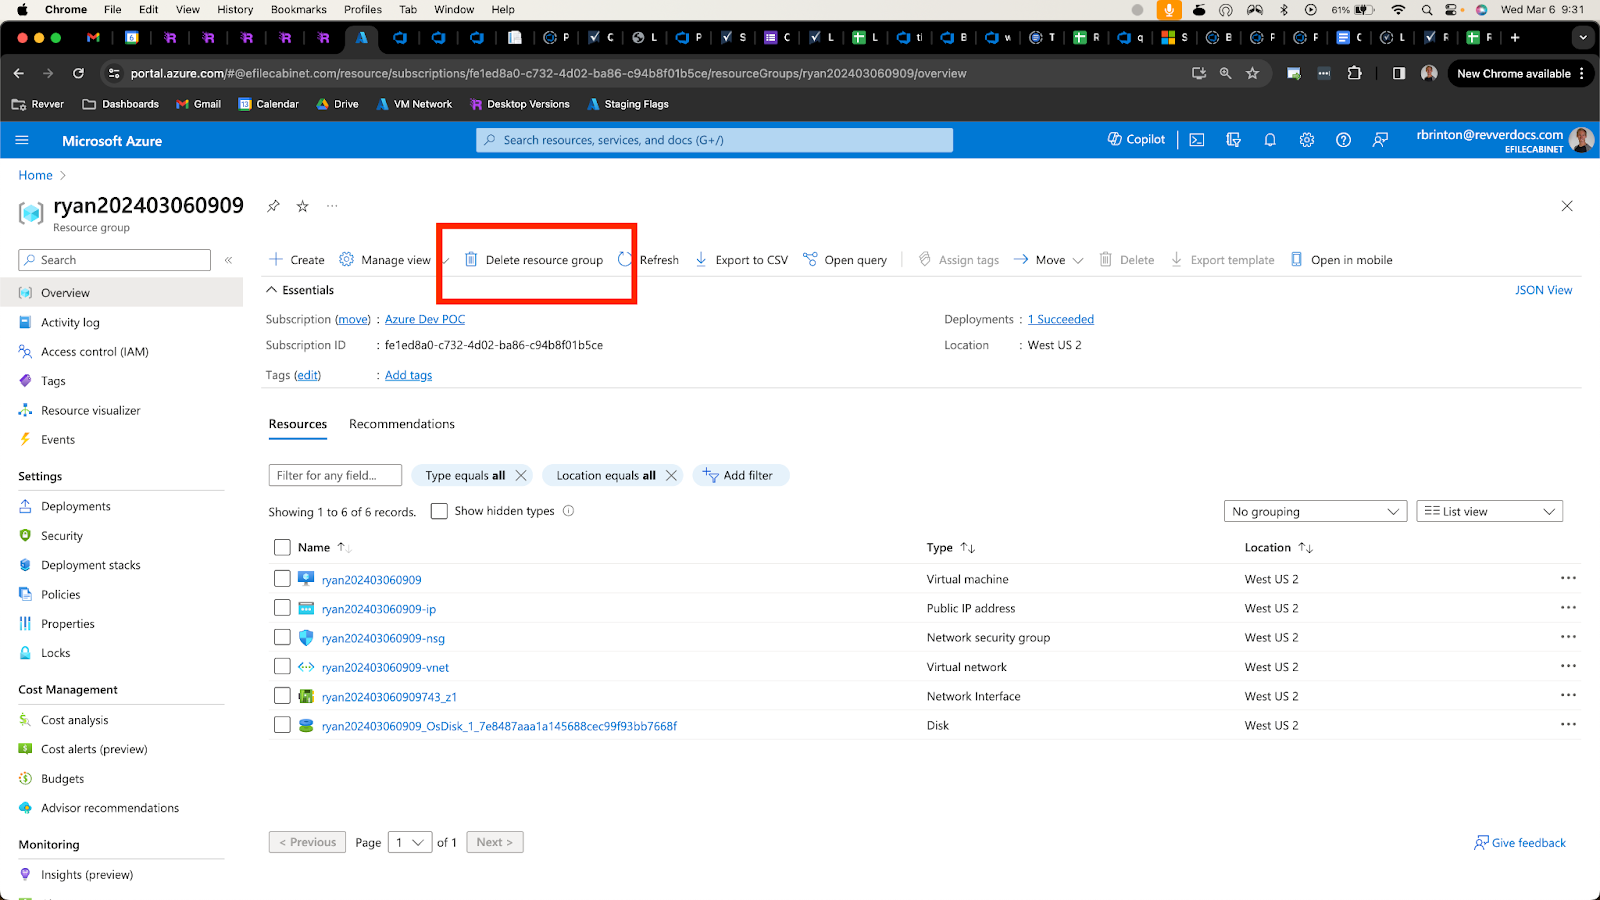
- Look along the top ribbon for an option called “Delete resource group” and click it
- Verify that every item in the “Dependent resources to be deleted” list has the name of your VM in it
- Assuming that is correct, enter the resource group name at the bottom (there is a handy “Copy to clipboard” button by the resource group name at the top of the delete panel), and click the red Delete button.
- As soon as you see the “Deleting resource group <your resource group name>” toast, you are safe to close your tab. All finished!